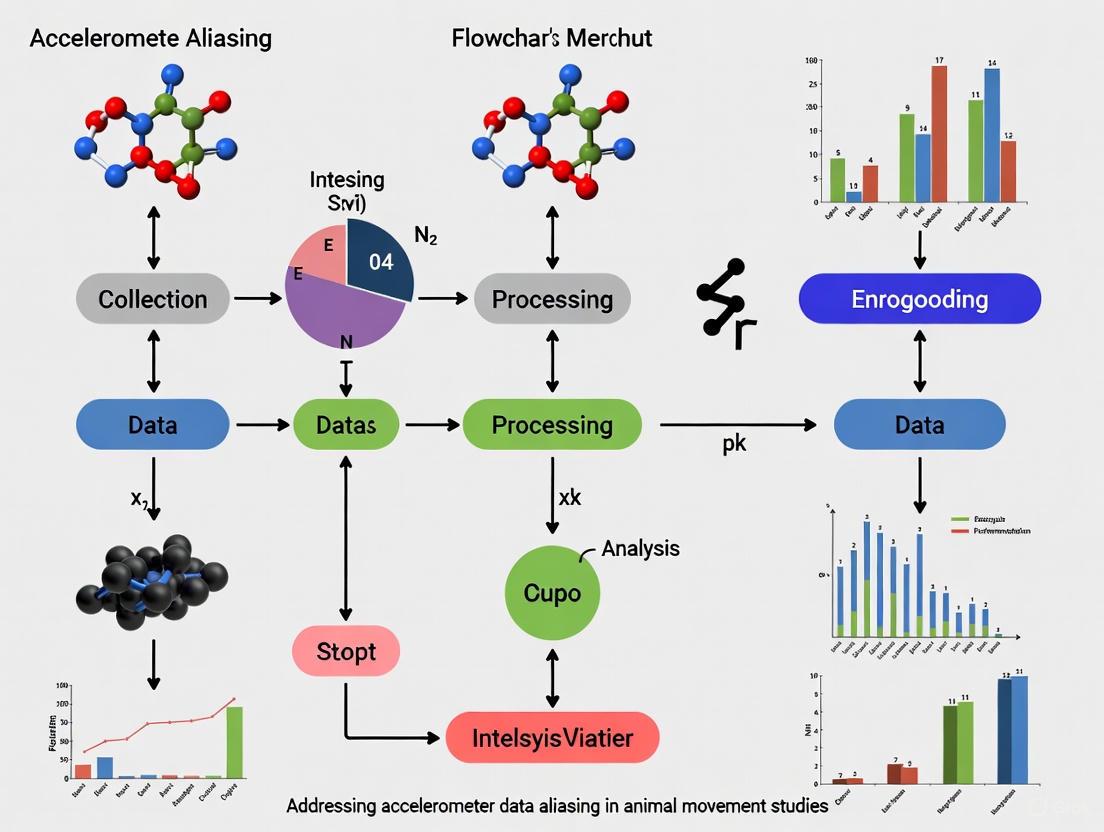
Preventing Data Aliasing in Animal Studies: A Researcher's Guide to Accurate Accelerometer Use in Preclinical and Drug Development
This article provides a comprehensive guide for researchers and drug development professionals on addressing the critical challenge of accelerometer data aliasing in animal studies.
Preventing Data Aliasing in Animal Studies: A Researcher's Guide to Accurate Accelerometer Use in Preclinical and Drug Development
Abstract
This article provides a comprehensive guide for researchers and drug development professionals on addressing the critical challenge of accelerometer data aliasing in animal studies. Data aliasing, a distortion that occurs when the sampling rate is too low to accurately capture high-frequency movements, can compromise the validity of behavioral data used to assess drug efficacy and animal welfare. We explore the technical foundations of aliasing, present methodologies for its prevention across various study designs, offer troubleshooting and optimization strategies for existing data, and review validation frameworks to ensure data integrity. By synthesizing current best practices and emerging analytical techniques, this resource aims to enhance the reliability of accelerometer-derived endpoints in preclinical research, thereby strengthening the pipeline for therapeutic development.
Understanding Accelerometer Data Aliasing: Foundational Concepts and Impact on Preclinical Data Integrity
Frequently Asked Questions (FAQs)
Q1: What is data aliasing and why is it a problem in animal movement studies? Data aliasing is a distortion that occurs when a signal is sampled at a rate that is too low to accurately capture its highest frequency components. Instead of disappearing, these high frequencies "fold back" and appear as lower, misleading frequencies in the recorded data [1]. In animal movement studies, this can cause rapid, fine-scale movements to be misrepresented as slower, non-existent behaviors, severely compromising the validity of your data and leading to incorrect biological interpretations [2] [1].
Q2: How can I identify aliasing in my collected accelerometer data? Aliasing can be tricky to spot, but some common signs include [1]:
- Unexplained Low-Frequency Patterns: Observing rhythmic movements or patterns in your data that do not align with any observed animal behavior.
- Inconsistencies with Video Evidence: When your accelerometer data shows a particular movement trend, but simultaneous video recording reveals completely different animal activities.
- Signal Clipping in Time-Domain Data: Visual inspection of the raw signal might show a "clipped" waveform where the peaks are flattened because the signal exceeded the sensor's measurement range, which can be associated with aliasing-related distortions [1].
Q3: My sampling rate should be sufficient based on the animal's expected movement. Why am I still seeing aliasing? The sampling rate must be high enough to capture not just the gross body movement, but also the high-frequency vibrations and shocks. For instance, in a study quantifying activity counts, the ActiGraph processing pipeline requires raw data to be sampled at rates between 30 Hz and 256 Hz before being down-sampled [3]. Furthermore, mechanical impacts (e.g., a foot striking the ground, a bird's wingbeat) can generate very high-frequency vibrations that will alias if not properly filtered before sampling [1].
Q4: What is the Nyquist-Shannon Sampling Theorem and how does it relate to my study design? The Nyquist-Shannon Sampling Theorem is a fundamental principle that states a signal must be sampled at a rate at least twice as high as its highest frequency component to be accurately represented [1] [3]. If your study animal exhibits rapid movements with a maximum frequency component of 10 Hz, your accelerometer must sample at a minimum of 20 Hz. However, in practice, researchers typically sample at 5 to 10 times the highest frequency of interest to ensure data quality [3].
Troubleshooting Guide: Preventing and Resolving Data Aliasing
Problem: Suspected Aliasing in Existing Data
| Symptom | Possible Cause | Diagnostic Check | Corrective Action |
|---|---|---|---|
| Appearance of slow, undulating patterns in data [1] | High-frequency movements undersampled | Compare data with video recordings or higher-frequency data logs. | Solution: Re-collect data with a higher sampling rate. The data cannot be reliably "fixed" after collection. |
| Inconsistent results between different sensor models [3] | Different devices use different internal sampling rates & processing | Review device specifications for sampling rate and built-in anti-aliasing filters. | Solution: Standardize equipment across studies or fully characterize differences using the published algorithms for each device [3]. |
| Signal distortion/clipping in time-domain data [1] | Sensor range exceeded during high-impact movements | Plot raw signal and check for flattened peaks. | Solution: Use an accelerometer with a higher measurement range (e.g., 500 g-pk instead of 50 g-pk) [1]. |
Problem: Designing a New Study to Avoid Aliasing
| Design Phase | Common Pitfall | Best Practice |
|---|---|---|
| Sensor Selection | Choosing a sensor with a fixed, low sampling rate. | Select a sensor whose sampling rate can be configured and exceeds your Nyquist requirement. |
| Parameter Configuration | Setting a sampling rate based only on obvious, slow behaviors. | Sample at a high rate (e.g., ≥ 30 Hz for general movement, up to 256 Hz for fine details or impacts) [3]. |
| Data Acquisition | Failing to use an anti-aliasing filter before sampling. | Ensure your data acquisition system applies a proper anti-aliasing low-pass filter to remove high-frequency noise above the Nyquist frequency [3]. |
Experimental Protocol: A Framework for Anti-Aliasing Data Collection
This protocol provides a methodology for setting up an accelerometer study on animal movement that minimizes the risk of data aliasing, based on established practices in the field [2] [3].
1. Pre-Study Calibration and Setup
- Objective: Determine the appropriate sampling rate and filter settings.
- Procedure:
- Estimate Maximum Frequency: Based on the literature or pilot observations, estimate the maximum possible frequency (f_max) of the animal's movement of interest (e.g., wingbeat, footfall).
- Apply Nyquist Criterion: Calculate the minimum sampling rate:
f_s_min = 2 * f_max. For safety, set your final sampling ratef_sto5 * f_maxor higher [3]. - Configure Anti-Aliasing Filter: Set a low-pass filter on your data acquisition system with a cutoff frequency
f_cat or below the Nyquist frequency (f_s / 2). For example, ActiGraph devices apply adjustable low-pass filters with cutoff frequencies matched to their output data rates (e.g., 16 Hz cutoff for a 32 Hz output data rate) [3]. - Verify Sensor Range: Conduct a pilot test to ensure the accelerometer's measurement range (in g's) is not exceeded during high-intensity activities [1].
2. Data Collection Workflow The following diagram illustrates the critical steps for preventing aliasing during data collection.
3. Post-Collection Data Processing and Validation
- Objective: Confirm data quality and process data for analysis.
- Procedure:
- Visual Inspection: Plot the raw data to check for any obvious signs of clipping or unnatural periodicities [1].
- Down-sampling (if needed): If storage or analysis requires a lower frequency, properly apply a digital low-pass filter to the raw data before down-sampling to prevent introducing aliasing artifacts [3]. For example, the ActiGraph algorithm resamples raw data to 30 Hz after appropriate filtering [3].
- Generate Activity Metrics: Convert the processed raw data into relevant movement metrics, such as statistical movement elements (StaMEs) for path segmentation or traditional activity counts [2] [3].
The Scientist's Toolkit: Essential Research Reagents & Materials
The following table details key materials and their functions for ensuring high-quality accelerometer data in animal movement studies.
| Item / Reagent | Function / Application in Research |
|---|---|
| Programmable Accelerometer (e.g., ActiGraph models) | Core sensor for capturing raw acceleration data. Programmability allows researchers to set a sufficiently high sampling rate and access raw data for transparent processing [3]. |
| Anti-Aliasing Low-Pass Filter | A hardware or software filter that removes frequency components above the Nyquist frequency before the signal is sampled. Critical for preventing aliasing at the data acquisition stage [3]. |
| Data Acquisition System with High Sampling Rate | System (e.g., Biopac MP150) capable of sampling at high frequencies (e.g., 2 kHz) to capture transient, high-impact movements without distortion, providing a clean raw signal for later analysis [4]. |
| Signal Processing Software (e.g., MATLAB, Python) | Used to implement custom processing pipelines, including proper filtering, down-sampling, and extraction of derived metrics like activity counts or StaMEs [2] [3]. |
| Published Counts Algorithm (e.g., ActiLife Python package) | An open-source algorithm that provides transparency into how raw acceleration data is converted into activity counts, enabling reproducibility and comparison across studies [3]. |
The table below consolidates critical numerical guidelines from the search results to inform your experimental design.
| Parameter | Guideline / Example | Research Context |
|---|---|---|
| Sampling Rate (General) | At least 2× the highest frequency of interest (Nyquist rate); 5-10× is recommended [1] [3]. | Fundamental signal processing rule. |
| Sampling Rate (Specific) | 30 Hz to 256 Hz [3]. | Processing pipeline for generating activity counts in ActiGraph devices. |
| Sampling Rate (High-Fidelity) | 2 kHz [4]. | Capturing sternum accelerometry for quantifying restlessness in opioid withdrawal studies. |
| Anti-Aliasing Filter Cutoff | Should be set at or below half the sampling rate (Nyquist frequency) [3]. | Prevents high-frequency noise from aliasing into the signal band. |
| Analog Band-Pass Filter Range | Max gain at ~0.76 Hz, -6 dB at 0.21-2.15 Hz [3]. | Used in ActiGraph devices to filter signals to the frequency range of human activity. |
Troubleshooting Guides
FAQ 1: What is the minimum sampling rate I should use for my animal-borne accelerometers?
The minimum sampling rate is determined by the Nyquist-Shannon sampling theorem. This theorem states that to accurately capture a signal without distortion (aliasing), the sampling frequency must be at least twice the highest frequency component present in the animal's behavior you wish to record [5]. For example, if the fastest behavior of interest has a frequency of 30 Hz, your minimum sampling rate should be 60 Hz [6] [5].
However, in practice, sampling at exactly the Nyquist frequency is often insufficient for detailed analysis. Research on European pied flycatchers showed that for short-burst behaviors like swallowing food (mean frequency of 28 Hz), a sampling frequency higher than 100 Hz was needed for accurate classification. For longer-duration, rhythmic behaviors like flight, a lower sampling frequency of 12.5 Hz was adequate [6]. To accurately estimate signal amplitude, especially for short data segments, a sampling frequency of four times the signal frequency (twice the Nyquist frequency) is recommended [6].
FAQ 2: Why does my accelerometer data show low-frequency patterns that don't match the animal's observed behavior? (Aliasing)
This is a classic sign of aliasing [7]. Aliasing occurs when a signal is sampled at a rate that is too low, causing high-frequency components in the signal to be misrepresented as lower frequencies in the recorded data [5] [8]. It can create the illusion of slow-motion behavior that doesn't actually exist.
- How it happens: If the sampling rate is
fs, then any signal frequency abovefs/2(the Nyquist frequency) will be "folded back" into the lower frequency spectrum [9]. For instance, with a 50 Hz sampling rate (Nyquist frequency = 25 Hz), a true 40 Hz vibration would appear in your data as a 10 Hz signal [10] [7]. - How to prevent it:
- Increase Sampling Rate: The most direct method is to sample at a high enough rate to capture all relevant frequencies [7].
- Use an Anti-Aliasing Filter: Before the signal is digitized, it should pass through an analog low-pass filter. This filter removes frequency components above the Nyquist frequency, preventing them from being misrepresented [10] [9]. Many digital MEMS accelerometers have built-in filters, but their effectiveness varies [9].
FAQ 3: I am sampling above the Nyquist rate, but my behavior classification is still inaccurate. What could be wrong?
Sampling rate is only one factor. Other critical considerations include:
- Behavioral Characteristics: The required sampling rate depends heavily on the nature of the behavior. Short-burst behaviors (e.g., prey capture, swallowing) that last only a few movement cycles require much higher sampling rates than sustained, rhythmic behaviors (e.g., flight, walking) [6].
- Sampling Duration: The length of your data recording windows also impacts accuracy. For short sampling durations, the combination of duration and sampling frequency significantly affects the estimation of signal frequency and amplitude. Accuracy, especially for amplitude, declines with shorter durations [6].
- Sensor Placement and Calibration: Inconsistent sensor attachment or lack of calibration before deployment can degrade data quality and lead to misclassification, regardless of sampling rate [6].
Quantitative Sampling Guidelines from Animal Research
The table below summarizes findings from an accelerometer study on European pied flycatchers, providing a concrete example of how sampling requirements differ by behavior [6].
| Behavior Type | Example Behavior | Mean Frequency | Recommended Minimum Sampling Rate | Key Consideration |
|---|---|---|---|---|
| Short-Burst | Swallowing food | 28 Hz | 100 Hz (>> 2×Nyquist) | Captures rapid, transient movements accurately [6]. |
| Sustained Rhythmic | Flight | Lower than swallowing | 12.5 Hz (~Nyquist) | Adequate for characterizing longer-duration, rhythmic patterns [6]. |
| Mixed (with rapid maneuvers) | Flight with prey capture | N/A | 100 Hz | The sustained flight can be sampled at a lower rate, but to identify rapid maneuvers within the bout, a high rate is essential [6]. |
Experimental Protocol: Determining Sampling Rate for a New Species or Behavior
This methodology, adapted from a study on pied flycatchers, provides a systematic approach to establish sampling parameters for your specific research context [6].
Objective: To empirically determine the minimum accelerometer sampling frequency required for accurate classification of key behaviors and estimation of energy expenditure.
Materials:
- Miniaturized accelerometer loggers.
- Synchronized high-speed video camera system (e.g., >90 fps).
- Calibration equipment.
- Appropriate animal housing/aviaries.
Procedure:
- Logger Attachment: Calibrate accelerometers. Attach loggers securely to the animal (e.g., over the synsacrum in birds using a leg-loop harness) to minimize movement artifacts [6].
- High-Frequency Data Collection: Record tri-axial acceleration data from the freely moving animal at the highest feasible sampling rate (e.g., 100 Hz or more) concurrently with high-speed video [6].
- Behavioral Annotation: Use the synchronized video to identify and label the precise start and end times of specific behaviors of interest (e.g., flight, foraging, swallowing) in the high-frequency accelerometer data [6].
- Data Down-Sampling: Digitally down-sample the original high-frequency accelerometer data to progressively lower sampling rates (e.g., from 100 Hz down to 10 Hz).
- Performance Analysis: At each down-sampled rate:
- For Behavior Classification: Train a classification model and test its accuracy in identifying the annotated behaviors.
- For Energy Expenditure: Calculate proxies like ODBA (Overall Dynamic Body Acceleration) and compare their values to those from the original high-rate data.
- Determine Critical Frequency: Identify the sampling rate at which performance (classification accuracy or agreement in energy expenditure metrics) begins to significantly degrade. This is your empirically derived minimum sampling rate for your study system.
The Scientist's Toolkit: Essential Research Reagents and Materials
| Item | Function in Experiment |
|---|---|
| Multi-sensor Biologger | A miniaturized device, often containing an accelerometer, to be attached to the animal for data collection in the field or lab [6]. |
| High-Speed Video Camera | Provides ground-truth data for behavioral annotation; crucial for validating accelerometer data and identifying behavioral signatures [6]. |
| Leg-Loop Harness | A common method for secure and safe attachment of loggers to birds and other animals [6]. |
| Anti-Aliasing Filter | An analog or digital filter used to remove high-frequency noise above the Nyquist frequency before sampling to prevent aliasing [10] [9]. |
| Signal Processing Software | Software (e.g., MATLAB, Python with SciPy) used for data analysis, including down-sampling, frequency analysis, and behavior classification [6]. |
Workflow Diagram: From Signal to Analysis
Aliasing Visualization Diagram
FAQs: Understanding and Troubleshooting Aliasing in Animal Behavior Research
Q1: What is aliasing in the context of accelerometer data, and how can it lead to misclassified animal behaviors? Aliasing is a data distortion phenomenon that occurs when an accelerometer is sampled at a frequency that is too slow to accurately capture rapid movements. High-frequency motions are misrepresented as lower-frequency signals [11]. In behavior classification, this means a rapid action (e.g., a quick head shake or a paw movement) might be misidentified as a slower, entirely different behavior (e.g., steady walking or grazing), compromising the validity of your results [12] [13].
Q2: I am setting up a study on grazing behavior in goats. What is the minimum sampling frequency I should use to avoid aliasing? While the optimal rate can depend on the specific behavior, a general guideline is to use a sampling frequency of 20–30 Hz as a baseline [14]. However, for finer-grained behaviors, studies have successfully used higher rates, such as 100 Hz for human ankle movements during agility tests [15] and 24 Hz for sheep activity monitoring [16]. Always err on the side of a higher sampling rate if your equipment and data storage allow.
Q3: My model, trained in a controlled setting, performs poorly when deployed on animals in a free-living environment. Could aliasing be a factor? Yes. This is a common challenge. Laboratory-calibrated models often fail to generalize to free-living settings because they encounter a wider variety of "transitive and unseen activities" and differences in acceleration signals that were not present in the training data [14]. This can include novel, high-frequency movements that, if undersampled, cause aliasing and misclassification.
Q4: Beyond sampling frequency, what is the most critical hardware setting to prevent aliasing? The most critical step is to enable an anti-aliasing filter. This is an analog low-pass filter applied to the data before it is digitized, designed to remove high-frequency components that the sampling rate cannot accurately capture. Without this filter, high-frequency energy will "fold" down into lower frequencies, irrevocably distorting your data [11].
Q5: Our classifiers struggle to distinguish between "eating" and "ruminating" in cattle. Are these behaviors particularly susceptible to misclassification? Yes. Studies show that while major behaviors like lying and standing are reliably predicted, other behaviors are more challenging. "Eating" often exhibits high variability in sensor signals, and "transitional behaviors" (like moving from lying to standing) are frequently misclassified [12] [13]. Ensuring proper data collection and processing is essential for these complex activities.
Troubleshooting Guide: Aliasing and Behavior Misclassification
| Problem | Possible Causes | Recommended Solutions |
|---|---|---|
| Poor model generalization from lab to field | Model trained on low-variability data; unseen high-frequency behaviors cause aliasing [12] [14]. | Maximize variability in training data; use large datasets with a wide range of animals and conditions [12]. |
| Low accuracy for specific behaviors (e.g., eating, walking) | Inadequate sampling rate for high-motion behaviors; incorrect pre-processing for target behavior [12] [13]. | Increase sampling frequency; tailor pre-processing methods (e.g., window size, feature selection) to the specific behavior [12] [17]. |
| Consistent misclassification of rapid, transitional movements | Transitional behaviors are inherently brief and complex; sampling rate may be too low to capture their dynamics [12]. | Focus pre-processing on capturing short-duration events; validate models specifically on transition data [12]. |
| Unexpected low-frequency signals in data | Aliasing is occurring due to a lack of an anti-aliasing filter or an incorrectly set one [11]. | Apply an analog anti-aliasing filter with a cut-off frequency set below the Nyquist frequency (e.g., ( fc < 0.6 fN )) [11]. |
Quantitative Evidence: Impact of Model Generalization on Behavior Classification
The following table summarizes documented performance drops in behavior classification models when applied to new individuals, a problem exacerbated by data issues like aliasing.
Table 1: Performance Decrease in Models Applied to Unseen Animals
| Species | Behavior | Performance (AUC) on Known Animals | Performance (AUC) on New Animals | Source |
|---|---|---|---|---|
| Dairy Goats | Rumination | 0.800 | 0.644 | [17] |
| Dairy Goats | Head in Feeder | 0.819 | 0.733 | [17] |
| Dairy Goats | Lying | 0.829 | 0.741 | [17] |
| Dairy Goats | Standing | 0.823 | 0.749 | [17] |
Experimental Protocol: Validating an Accelerometer Setup to Minimize Aliasing
This protocol, adapted from validation studies on children and livestock, provides a methodology to ensure your accelerometer system is correctly configured before a full-scale experiment [18].
Objective: To confirm that the chosen sampling frequency and anti-aliasing filter settings accurately capture a range of species-specific behaviors without distortion.
Materials:
- Accelerometer sensors
- Video recording system (as gold standard for validation)
- Secure mounting equipment (collars, ear tags, etc.)
- Data processing software (e.g., Python, R, MATLAB)
Procedure:
- Sensor Configuration: Initialize the accelerometers with a target sampling frequency (e.g., ≥ 20 Hz [14]) and ensure any built-in anti-aliasing filters are enabled.
- Standardized Activity Protocol: Fit the sensors on the animal and guide it through a structured protocol of target behaviors. Example activities include:
- Lying down (stationary)
- Standing quietly (stationary)
- Walking at a normal pace
- Eating/foraging
- Any other high-frequency behavior of interest (e.g., head shaking, scratching)
- Video Recording: Simultaneously record all activities with a high-frame-rate video camera. Precisely synchronize the video timestamps with the accelerometer data.
- Data Analysis:
- Comparison: Extract the total time spent in each behavior from both the accelerometer data (processed by its algorithm) and the video observations (manual coding).
- Agreement Analysis: Use statistical tests like paired t-tests, Bland-Altman plots, and Intraclass Correlation Coefficient (ICC) to assess the agreement between the two methods [18].
- Interpretation: Strong agreement and high ICC values across all behaviors indicate a robust setup. If specific behaviors (especially rapid ones) show poor agreement, consider increasing the sampling rate or adjusting the filter settings and re-test.
The Researcher's Toolkit: Essential Reagents and Materials
Table 2: Key Materials for Accelerometer-Based Behavior Studies
| Item | Function / Explanation | Example from Literature |
|---|---|---|
| Tri-axial Accelerometer | Measures acceleration in three perpendicular dimensions (X, Y, Z), providing a detailed picture of movement and posture. | Actigraph GT3X+ used on ankles in human agility tests [15]. |
| Integrated Sensor (Accelerometer + Gyroscope) | The gyroscope measures angular velocity, complementing the accelerometer's linear motion data. This fusion significantly improves classification of complex behaviors like eating and walking [13]. | MPU-6050 sensor used on dairy cow necks [13]. |
| Anti-aliasing Filter | An analog filter that removes high-frequency signal components before digitization to prevent aliasing. A critical, often overlooked, component [11]. | Recommended as a mandatory hardware feature for accurate data collection [11]. |
| Customizable Data Pipeline | Software that allows for tailored pre-processing (e.g., noise filtering, feature extraction, window segmentation) to optimize models for specific behaviors [17]. | ACT4Behav pipeline for dairy goats [17]. |
| Axivity AX3 Accelerometer | A specific model of research-grade accelerometer commonly used in long-term livestock studies due to its small size and configurable sampling. | Used on ear tags in a sheep health monitoring study [16]. |
Workflow Diagram: A Robust Framework for Behavior Classification
The diagram below outlines a recommended experimental workflow that incorporates checks against aliasing and poor generalization, synthesizing best practices from the literature.
Troubleshooting Guides and FAQs
This technical support center provides targeted guidance for researchers addressing the critical issue of accelerometer data aliasing in animal studies. Proper data acquisition is fundamental to ensuring the validity of behavioral findings in drug development and welfare assessment.
Frequently Asked Questions
Q1: What is accelerometer data aliasing and why is it a problem in animal behavior studies?
Aliasing is a distortion effect that occurs when an accelerometer is sampled at a rate too slow to accurately capture the true frequency of an animal's movement [19]. When the sampling rate is insufficient, high-frequency movements are misrepresented as lower-frequency, slower signals that are not actually occurring [20]. In animal studies, this means a rapid behavior like a head shake or a swallow could be misclassified as a slower, different behavior. This corrupts your dataset, leading to inaccurate activity budgets, misrepresentation of drug-induced behavioral changes, and ultimately, flawed conclusions about drug efficacy or animal welfare [6].
Q2: How can I determine the minimum sampling rate needed for my specific animal model and behaviors of interest?
The foundational rule is the Nyquist-Shannon theorem, which states that your sampling frequency (ODR) must be at least twice the highest frequency component of the behavior you wish to measure [19] [6]. However, recent research suggests this is a theoretical minimum and higher rates are often needed for real-world accuracy.
For classification of short-burst behaviors (e.g., food swallowing in birds, escape responses in fish), studies recommend a sampling frequency of at least 1.4 times the Nyquist frequency of the behavior for reliable classification [6]. For accurate estimation of movement amplitude (important for energy expenditure studies), a sampling frequency of four times the signal frequency (twice the Nyquist frequency) is necessary, especially when sampling durations are short [6].
Q3: My accelerometer data shows clear behavior patterns, but my machine learning model performs poorly when applied to new subjects. Could aliasing be a factor?
While poor model generalization can stem from several issues, aliasing is a potential contributor. If your training data contains aliased signals, the model learns to recognize these distorted patterns. When applied to new data—even if collected with the same hardware—slight variations in how individuals perform behaviors can interact with the sampling rate to produce differently aliased signals, which the model fails to recognize correctly [17]. This underscores the importance of ensuring clean, non-aliased data from the start of your project.
Troubleshooting Guide: Identifying and Resolving Aliasing
| Symptom | Possible Cause | Solution | Verification Method |
|---|---|---|---|
| Implausible low-frequency signals in the data when animals are known to be moving rapidly. | Sampling rate far below the Nyquist limit for the behavior. | Increase the sensor's Output Data Rate (ODR). | Compare data collected at a very high rate (e.g., 100+ Hz) with down-sampled data. |
| Machine learning models that perform well on training data but poorly on validation data or new subjects. | Model trained on aliased signals that are not consistent. | Implement an analog anti-aliasing filter before the ADC and retrain the model [19]. | Validate model predictions against video recordings of behavior. |
| Inconsistent amplitude measurements for rhythmic, high-frequency behaviors. | Sampling duration too short and/or sampling frequency too low [6]. | Increase sampling duration or increase sampling frequency to at least 4x the behavior's frequency. | Use simulated signals of known frequency and amplitude to test the sampling setup. |
| Inability to distinguish short-burst, high-intensity behaviors (e.g., sneezing, startle responses). | Sampling frequency is too low to capture the transient signal's detail [21] [6]. | Significantly increase the sampling frequency (e.g., 100 Hz+) and use a high-pass filter to isolate the burst. | Annotate high-speed video recordings and synchronize with accelerometer data. |
Experimental Protocol: Establishing a Validated Accelerometry Pipeline
This protocol provides a step-by-step methodology to prevent aliasing from the outset of your experiment, based on best practices from recent literature [17] [6].
Step 1: Pre-Study Sampling Frequency Determination
- Pilot Study: Conduct a pilot study using a subset of animals.
- High-Rate Recording: Record accelerometer data at the highest feasible sampling rate (e.g., 100-200 Hz) to capture the full range of behavioral signals without distortion.
- Frequency Analysis: Using synchronized video, identify epochs of the fastest behaviors of interest (e.g., wingbeats in birds, head shakes in ruminants). Perform a Fourier analysis (FFT) to determine the highest fundamental frequency present in these behaviors.
- Set Sampling Rate: Calculate the Nyquist frequency (2 × highest observed frequency). Set your final sampling rate to at least 2.5 to 4 times this observed frequency to ensure a safety margin and accurate amplitude recording [6].
Step 2: Data Collection with Anti-Aliasing Safeguards
- Sensor Selection: Where possible, select digital accelerometers with embedded analog anti-aliasing filters (AAF) in their signal chain, such as the LIS2DU12 family [19]. These filters remove high-frequency noise before it can be aliased.
- Configuration: If using a sensor with a configurable AAF, set its cutoff frequency slightly above your maximum analysis frequency but below the Nyquist frequency of your chosen ODR [19] [20].
Step 3: Model Training and Validation with Processing Tuning
- Feature Selection: When training machine learning models for behavior classification, explore features derived from a mixture of time window sizes, as this has been shown to improve classification accuracy for diverse behaviors [17] [21].
- Behavioral Balance: Ensure your training dataset has a standardized duration for each behavior to prevent the model from being biased toward more common behaviors and against rare but important ones [21].
- Cross-Validation: Always test your final model on data from animals that were not included in the training set to truly assess its generalizability and check for hidden issues like aliasing [17] [22].
The Scientist's Toolkit: Essential Research Reagents and Solutions
| Item | Function in Research | Key Consideration |
|---|---|---|
| Digital MEMS Accelerometer with Embedded AAF (e.g., LIS2DU12) [19] | Measures acceleration; built-in analog filter prevents aliasing by removing high-frequency noise before digitization. | Preferable for most studies as it mitigates aliasing at the hardware level, conserving battery and storage. |
| High-Speed Video Camera | Provides ground-truth behavioral labels for accelerometer data validation; essential for identifying behavioral frequencies in a pilot study. | Frame rate should be significantly higher than the accelerometer's sampling rate to accurately observe fast movements. |
| Machine Learning Core (MLC) Embedded Sensors (e.g., LIS2DUX12) [19] | Allows on-device behavior classification, reducing data transmission and storage needs. | Ideal for long-term deployments, but models must be trained on non-aliased data. |
| Tri-axial Accelerometer Loggers | Capture movement and static acceleration (for posture) in three dimensions, providing a rich dataset for behavior classification [6] [23]. | Ensure sufficient bit-resolution (e.g., 8-bit or higher) and configurable sampling rates to fit study needs. |
| Leg-Loop or Collar Harness | Securely attaches the accelerometer to the animal in a consistent orientation [6]. | Attachment method and placement on the body significantly influence the signal and must be standardized. |
Sampling Requirements for Common Behavioral Objectives
The table below summarizes evidence-based sampling recommendations for different common research goals in animal studies.
| Research Objective | Behavioral Example | Recommended Minimum Sampling Frequency | Key Reference |
|---|---|---|---|
| Classification of short-burst behaviors | Swallowing in birds, escape responses in fish | 1.4 × Nyquist Frequency (e.g., ~80 Hz for a 28 Hz behavior) [6] | [6] |
| Estimation of energy expenditure (ODBA/VeDBA) | Sustained walking, swimming | Can be low (1-10 Hz), but amplitude accuracy requires 4× signal frequency for short windows [6] | [6] |
| Classification of long-endurance, rhythmic behaviors | Flight in birds, grazing in ruminants | Can be lower (e.g., 12.5 Hz for flight) [6] | [6] |
| General multiclass behavior identification | Lying, feeding, standing, walking in deer | 4 Hz (when using low-resolution, averaged data) [22] | [22] |
| High-accuracy classification of captive animal behaviors | Rumination, head-in-feeder in goats | Tuned per behavior; achieved AUC scores >0.8 [17] | [17] |
Data Acquisition Workflow for Alias-Free Research
The diagram below outlines the logical workflow for designing an accelerometer study that prevents data aliasing.
Methodological Frameworks: Designing Aliasing-Resistant Accelerometer Studies in Animal Models
Establishing Minimum Sampling Rates for Common Preclinical Behaviors (Grazing, Running, Grooming)
Troubleshooting Guide: Common Data Aliasing Issues
Q1: My accelerometer data shows animals engaging in "impossible" or jittery behaviors. What is happening and how can I fix it?
This is a classic sign of aliasing, which occurs when your sampling rate is too low to accurately capture the true frequency of the animal's movements [24]. The device misinterprets high-frequency movements as slower, unnatural ones.
- Solution: Increase your sampling rate. As a rule of thumb, the sampling rate should be at least twice the frequency of the fastest behavior you wish to capture [24]. For high-frequency behaviors like running or head movements during grazing, this often requires rates of 20 Hz or higher.
- Verification: Conduct a pilot study. Use a high sampling rate (e.g., 50-100 Hz) to record a range of behaviors. Visually inspect the raw acceleration signals to confirm they are smooth and not jagged, which indicates sufficient sampling.
Q2: My machine learning model confuses grazing and grooming behaviors. How can I improve classification accuracy?
This error often stems from inadequate feature selection due to low-resolution data or poorly chosen data processing parameters [17].
- Solution: Optimize your data processing pipeline for each specific behavior [17].
- Re-evaluate your epoch or window size. Shorter windows (e.g., 1-3 seconds) may better capture brief, distinct movements in grooming, while longer windows (e.g., 5-10 seconds) might be better for sustained grazing.
- Apply behavior-specific filtering techniques and feature selections during data pre-processing [17].
- Verification: Perform a sensitivity analysis on your pilot data to identify the optimal window segmentation and feature set for discriminating between grooming and grazing.
Q3: My dataset is dominated by resting behavior, and my classifier performs poorly on rarer, active behaviors. What should I do?
This is a class imbalance problem, which is common in free-living animal studies [25].
- Solution: Implement data resampling strategies. A combination of Synthetic Minority Over-sampling Technique (SMOTE) and Edited Nearest Neighbours (ENN) has been shown to effectively balance datasets and improve the prediction of minority behaviors like running or grooming [25].
- Verification: Compare the F1-scores of your model before and after applying resampling. A robust model should have high and balanced accuracy across all behavior classes.
Frequently Asked Questions (FAQs)
Q: What is the minimum sampling rate required to distinguish between walking and running in rodents?
While the exact rate can depend on the species and sensor placement, a sampling rate of 20 Hz is generally considered a reasonable minimum for distinguishing locomotor behaviors. However, to capture finer kinematic details or for very small, fast-moving animals, rates of 50 Hz or higher are recommended to prevent aliasing.
Q: How long should my data epoch be for analyzing grazing behavior?
Epoch length should be chosen based on the behavioral bout length you want to detect. For cattle, studies have successfully used 15-second epochs to characterize grazing patterns [25]. We recommend testing multiple epoch lengths (e.g., 1s, 5s, 15s) during pilot studies to determine which best captures the natural structure of the behavior without oversmoothing key elements.
Q: Can I use the same sampling rate for all species and all behaviors?
No. The optimal sampling rate is dependent on the kinematic properties of the specific behavior and the species' anatomy. The high-frequency head movements of a goat during rumination require a higher sampling rate than the slower, ambulatory movements of a grazing cow [17]. Always base your rate on the fastest, most dynamic component of the behavior you are studying.
Q: What is the relationship between sampling rate and battery life?
It is a direct trade-off. Higher sampling rates consume significantly more power and will deplete the battery faster, limiting study duration. To optimize, use the lowest sampling rate that still faithfully captures your behaviors of interest, as determined by pilot work.
Minimum Sampling Rate Recommendations for Common Preclinical Behaviors
The following table summarizes evidence-based minimum sampling rates to prevent aliasing for core preclinical behaviors. These rates are derived from validated studies using accelerometers and machine learning classification.
| Behavior | Species | Recommended Minimum Sampling Rate | Key Rationale & Frequency Characteristics |
|---|---|---|---|
| Grazing | Cattle, Goats | 15 Hz [25] | Captures the characteristic slow, forward movement and head-down position. Lower frequency dominance. |
| Running | Cattle, Sheep | 20 Hz [25] | Necessary to capture the high-impact, high-frequency foot strikes and full gait cycle without aliasing. |
| Grooming | Cattle, Goats | 25 Hz [17] | Requires higher rates to accurately distinguish small, repetitive head, neck, and limb movements from grazing. |
Experimental Protocol: Validating Behavior Classification and Sampling Rates
This protocol outlines how to empirically determine the minimum sampling rate required to classify a specific behavior without aliasing.
1. Pilot Data Collection with High-Frequency Reference
- Fit animals with a validated accelerometer (e.g., tri-axial capacitive MEMS sensor) [24].
- Record synchronized video footage as your ground truth.
- Set the accelerometer to its maximum sampling rate (e.g., 50-100 Hz) to ensure all behavioral frequencies are captured [24].
2. Data Processing and Epoch Selection
- Manually annotate the video to create a ground truth dataset, labeling the start and end times of target behaviors.
- Synchronize the video labels with the high-frequency accelerometer data.
- Segment the accelerometer data into epochs of varying lengths (e.g., 1s, 5s, 10s) for analysis [17].
3. Machine Learning Model Training and Testing
- Extract features (e.g., mean, variance, FFT components) from the epoch-level accelerometer data.
- Train a machine learning classifier (e.g., K-Nearest Neighbours, Random Forest) using the features and video-based labels [25].
- To address class imbalance, apply resampling techniques like SMOTE-ENN [25].
4. Down-Sampling Analysis to Find Minimum Rate
- Down-sample your original high-frequency dataset to progressively lower rates (e.g., from 50 Hz to 40 Hz, 30 Hz, 20 Hz, 10 Hz).
- Re-run the classification model at each new, lower sampling rate.
- Plot the model's performance (e.g., F1-score) against the sampling rate. The minimum acceptable rate is the point just before a significant drop in classification accuracy occurs.
Workflow Diagram: Establishing Minimum Sampling Rates
The following diagram illustrates the logical workflow for establishing a minimum sampling rate, from data collection to validation.
The Scientist's Toolkit: Research Reagent Solutions
| Item | Function & Specification in Behavioral Research |
|---|---|
| Tri-axial Accelerometer | The core sensor for capturing movement in three planes (X, Y, Z). Capacitive MEMS type is suitable for low-frequency animal movement [24]. |
| GPS Collar | Provides spatiotemporal location data, essential for correlating accelerometer-derived behaviors like grazing with specific environmental contexts [25]. |
| K-Nearest Neighbours (KNN) Classifier | A machine learning algorithm effective for behavior classification, especially when combined with resampling techniques to handle imbalanced data [25]. |
| SMOTE-ENN Resampling | A combined data pre-processing technique that synthesizes new minority class instances (SMOTE) and cleans overlapping data (ENN) to improve model performance on rare behaviors [25]. |
| ACT4Behav Pipeline | A general-purpose accelerometer data processing pipeline that allows for behavior-specific optimization of filtering, window segmentation, and feature selection [17]. |
Foundational Concepts: Understanding Signal Fidelity and Aliasing
What is accelerometer signal aliasing and why is it a critical concern in animal studies?
Accelerometer signal aliasing is a distortion that occurs when a signal is sampled at an insufficient rate, causing high-frequency movements to be misrepresented as lower-frequency patterns in the data [24]. This is a fundamental concern in animal studies because it can lead to the misclassification of behaviors; for instance, a rapid head movement in a cow might be misinterpreted as a slower, ambling gait. This error compromises the validity of activity budgets and behavioral analyses, potentially leading to incorrect scientific conclusions and ineffective therapeutic interventions [24] [26]. Ensuring high signal fidelity is therefore paramount for producing reliable, interpretable data.
What technical specifications of a sensor most directly impact its susceptibility to aliasing?
The sampling rate, or sampling frequency (measured in Hertz, Hz), is the most direct technical specification affecting aliasing. It defines the number of data points collected per second [24]. According to the Nyquist theorem, to accurately represent a signal, the sampling rate must be at least twice the highest frequency component of the movement being measured. For very rapid animal movements (e.g., a mouse's whisker twitch or a bird's wingbeat), a higher sampling rate is required to avoid aliasing. Furthermore, the type of accelerometer technology—whether piezoelectric (AC-coupled, detecting only dynamic acceleration) or capacitive MEMS (DC-coupled, detecting both static and dynamic acceleration)—can influence the device's ability to capture certain movement qualities and postures, which indirectly relates to overall signal integrity [24].
Sensor Placement and Selection Guide
How does sensor placement on an animal's body influence the fidelity of the signal for different research applications?
The optimal sensor placement is entirely dependent on the specific behaviors of interest. A device mounted on a collar will capture gross head and neck movements, which is ideal for monitoring feeding or drinking behaviors in cattle via ear tags [27]. A harness-mounted sensor on the torso (back or chest) is better suited for assessing overall gait, posture, and general locomotion [24]. Implantable sensors provide data on core physiological processes and are less susceptible to motion artifacts from the external environment but require surgical intervention [28]. The following table summarizes the primary considerations for different placement locations.
Table 1: Comparison of Animal Sensor Placement Locations
| Placement Location | Ideal Research Applications | Key Considerations |
|---|---|---|
| Collar | Monitoring feeding, rumination, and head movement patterns; long-term ecological studies [27]. | Signal can be influenced by collar rotation; may not accurately represent full-body movement. |
| Harness (Back/Chest) | Assessing overall activity levels, gait analysis, posture, and general locomotion patterns [24] [29]. | Provides a good representation of the body's center of mass; harness fit is critical to prevent chafing and signal noise. |
| Head-Mounted | Fine-scale behavioral classification, spatial tracking (when combined with GPS), and specific head movement analysis [30]. | Device miniaturization is critical to avoid impeding natural behavior; can be highly intrusive. |
| Ear Tag | Large-scale livestock monitoring for behaviors like rumination and estrus detection [27]. | Practical for farm use; signal is specific to head movement. |
| Implantable | Monitoring core body temperature, deep physiological processes, and in scenarios where external devices are not feasible [28]. | Provides the highest protection from environmental damage; requires surgery, raising ethical and welfare considerations. |
What are the key characteristics of different accelerometer technologies that researchers should consider?
The core technology inside an accelerometer dictates its performance characteristics. The two most common types used in biologging are piezoelectric and capacitive MEMS accelerometers [24]. Piezoelectric sensors are AC-coupled, meaning they are excellent at capturing dynamic, high-frequency motions but cannot measure static forces like gravity, making them less ideal for determining body orientation. Capacitive MEMS accelerometers are DC-coupled, allowing them to measure both dynamic movement and static gravitational force, which enables the distinction between different postures (e.g., sitting vs. standing) [24]. The number of measurement axes (uni-axial, bi-axial, or tri-axial) is also crucial, with tri-axial sensors providing the most comprehensive data on movement in three-dimensional space [24].
Table 2: Key Accelerometer Technologies for Animal-Borne Sensors
| Technology Type | Key Operating Principle | Strengths | Weaknesses |
|---|---|---|---|
| Piezoelectric | AC-coupled; measures dynamic acceleration via voltage generated from deformation of a crystal [24]. | Well-suited for capturing high-frequency, high-magnitude vibrations and movements. | Cannot measure static acceleration (gravity), thus cannot determine body orientation or posture. |
| Capacitive MEMS | DC-coupled; measures capacitance changes from the displacement of a seismic mass between plates [24]. | Measures both dynamic movement and static gravitational pull, enabling posture detection; widely used in consumer electronics. | May be less suited for extremely high-frequency vibrations compared to specialized piezoelectric sensors. |
Troubleshooting Common Data Fidelity Issues
We are observing unexpected, high-frequency noise in our data. What are the primary sources of such artifacts and how can they be mitigated?
High-frequency noise can originate from multiple sources. Technically, it can result from electromagnetic interference from other electronic equipment or poor connection integrity. Biologically, it can be caused by the sensor not being firmly attached to the animal, leading to independent movement of the device (e.g., a loose collar or harness) [24]. To mitigate this, ensure sensors are securely fitted according to the animal's size and morphology, use devices with protective casing to minimize external interference, and apply low-pass digital filters during data processing to remove frequencies above those biologically plausible for the study species [24].
Our machine learning model performs well on training data but fails to generalize to new individuals. What validation error might this indicate?
This is a classic sign of overfitting, a prevalent challenge in machine learning where a model memorizes the training data, including its noise and specific individual characteristics, rather than learning the underlying generalizable patterns of the behavior [26]. A review found that 79% of animal accelerometer studies did not adequately validate their models to robustly identify this issue [26]. This can be caused by a lack of independence between training and test sets, often due to data leakage, where information from the test data inadvertently influences the training process [26]. To prevent this, it is essential to use rigorous validation techniques, such as training on data from one set of individuals and testing on a completely separate, unseen set of individuals (leave-one-subject-out cross-validation) [26] [29].
Experimental Protocols for Signal Validation
What is a robust protocol for validating a sensor placement and classification model for a new species or behavior?
A robust validation protocol ensures that your model can accurately identify behaviors in new, unseen individuals. The following workflow, utilized by benchmarks like the Bio-logger Ethogram Benchmark (BEBE), outlines a rigorous methodology [29].
- Data Collection & Annotation: Collect accelerometer data from multiple individuals simultaneously with video recordings. Annotate the video to create a ground-truthed dataset linking accelerometer signals to specific behaviors [29].
- Independent Data Partitioning: Split the data into three independent sets: a Training Set (e.g., 70%) for model learning, a Validation Set (e.g., 15%) for tuning model hyperparameters, and a Test Set (e.g., 15%) for the final, unbiased evaluation. The split should be performed by individual animal to prevent data leakage and ensure the model is tested on completely novel subjects [26] [29].
- Model Training & Tuning: Train your machine learning model (e.g., a Random Forest or Deep Neural Network) on the Training Set. Use the Validation Set to adjust model settings (hyperparameters) to optimize performance without overfitting [26] [29].
- Final Model Evaluation: Use the held-out Test Set, which has never been used during training or tuning, to obtain a final performance metric (e.g., accuracy, F1-score). This score reflects how well your model will generalize to new data [26] [29].
How can researchers control for variation between individual sensors and animals?
A study found that differences between individual accelerometer devices can be a significant source of error, with variations detected in 80% of calculated metrics [31]. Furthermore, individual animal variation and temporal effects (e.g., week of study) also introduce variability [31]. To control for this:
- Sensor Calibration: Calibrate all sensors before deployment according to manufacturer specifications.
- Randomized Rotation: In controlled studies, use a Latin-square design where sensors are systematically rotated among animals across different time periods. This helps to disentangle the variance caused by the animal from the variance inherent to the specific sensor [31].
- Statistical Control: Account for "individual" and "sensor" as random effects in statistical models to partition the variance appropriately [31].
The Scientist's Toolkit: Essential Research Reagents and Materials
Table 3: Essential Research Toolkit for Sensor-Based Animal Behavior Studies
| Tool / Reagent | Function & Purpose |
|---|---|
| Tri-axial Accelerometer | The core sensor that measures acceleration in three spatial planes (X, Y, Z), providing detailed movement data for behavior classification [24] [29]. |
| Bio-logger Ethogram Benchmark (BEBE) | A public benchmark comprising diverse, annotated datasets used to validate and compare the performance of different machine learning models for behavior classification [29]. |
| Random Forest / Deep Neural Networks | Machine learning algorithms used to classify raw or processed accelerometer data into specific behavioral states. Evidence suggests deep neural networks may outperform classical methods, especially with large datasets [29]. |
| Cross-Validation Framework | A statistical technique, particularly "leave-one-subject-out" cross-validation, used to assess how a model will generalize to an independent dataset and to guard against overfitting [26]. |
| Isolated & Non-isolated DC-DC Converters | Critical power management components in sensor design. Isolated converters protect sensitive sensor electronics from power surges, while non-isolated versions are more compact and efficient for space-constrained wearable devices [28]. |
Advanced Topics and Future Directions
What emerging technologies are shaping the future of sensor-based animal monitoring?
The field is rapidly evolving with several key trends:
- Miniaturization and Integration: Devices are becoming smaller, lighter, and capable of integrating multiple sensors (e.g., GPS, accelerometer, gyroscope, physiological sensors) into a single "multi-modal" platform, providing a more holistic view of an animal's state and environment [30].
- Artificial Intelligence and Self-Supervised Learning: AI is moving beyond simple classification. Self-supervised learning techniques, where models are pre-trained on vast amounts of unlabeled data (e.g., human accelerometer data), show promise for improving classification accuracy in new species, especially when labeled training data is scarce [29].
- Advanced Power Management: Research into AI-driven power management strategies is optimizing energy consumption in wearable and implantable sensors, which is critical for enabling long-term, remote monitoring studies [28].
How can I systematically diagnose a persistent signal fidelity problem?
A structured troubleshooting tree is the most effective way to isolate the root cause of a persistent problem, systematically checking from data collection through to analysis.
Frequently Asked Questions (FAQs)
Q1: What is the primary risk of using a low sampling rate for my accelerometer study? The primary risk is aliasing, a signal distortion that occurs when high-frequency movements are sampled at an insufficient rate, making them appear as lower-frequency movements that never actually occurred [32]. This can severely misrepresent rapid animal behaviors. Additionally, sampling below the required rate can cause a loss of critical information on signal amplitude, which is a key proxy for energy expenditure [6].
Q2: How do I determine the minimum sampling frequency needed for my research? The minimum sampling frequency is governed by the Nyquist-Shannon sampling theorem. It states that to accurately record a behavior, your sampling rate must be at least twice the frequency of the fastest movement you need to characterize [6]. For short-burst behaviors, an even higher rate may be necessary.
Table 1: Recommended Sampling Guidelines for Different Research Objectives
| Research Objective | Behavior Type | Recommended Minimum Sampling Frequency | Key Consideration |
|---|---|---|---|
| Behavior Classification | Short-burst (e.g., swallowing, prey capture) | 2x Nyquist Frequency (e.g., 100 Hz for a 28 Hz behavior) [6] | Essential for capturing brief, rapid events. |
| Behavior Classification | Rhythmic, long-duration (e.g., flight, walking) | Nyquist Frequency (e.g., 12.5 Hz for a 6 Hz wingbeat) [6] | Lower frequencies can suffice for sustained, periodic movements. |
| Energy Expenditure (Amplitude/ODBA) | General activity | 10-100 Hz [33] [6] | Accuracy depends on both sampling frequency and the duration of the analysis window. |
Q3: What are the practical trade-offs between raw high-resolution and processed low-resolution data? The choice involves a direct trade-off between data fidelity and operational constraints.
Table 2: Raw High-Resolution vs. Processed Low-Resolution Data Trade-Offs
| Factor | Raw High-Resolution Data | Processed Low-Resolution Data |
|---|---|---|
| File Size & Storage | Very large files (e.g., 18+ MB for an 18-megapixel raw file) [34]. | Significantly smaller files (half to one-fifth the size) [34]. |
| Battery Life & Memory | Faster battery drain and memory fill, limiting deployment duration [6]. | Longer battery life and deployment periods; more data can be stored [6]. |
| Data Flexibility | High flexibility for post-processing; allows for correction of exposure and recovery of detail [34]. | Limited post-processing flexibility; information is permanently lost during compression/processing [34]. |
| Information Content | Records all sensor data, enabling discovery of unforeseen patterns [35]. | Contains only a pre-determined subset of information, which may omit biologically relevant signals [35]. |
| Usability | Requires significant post-processing effort before analysis [34]. | Ready for immediate analysis and use [34]. |
Q4: How does sensor placement affect my data, and can I combine datasets from different studies? Sensor placement critically affects signal amplitude. Studies show that identical behaviors can generate significantly different acceleration metrics depending on tag placement. For example:
- In pigeons, upper and lower back-mounted tags varied in Dynamic Body Acceleration (DBA) by 9% [35].
- In kittiwakes, tail- and back-mounted tags varied in DBA by 13% [35]. These differences mean that combining datasets from studies using different attachment protocols can generate trends with no biological meaning. Consistency in placement and calibration is essential for valid comparisons [35].
Q5: Why is accelerometer calibration critical, and how can I perform it in the field? Calibration is crucial because manufacturing processes can introduce sensor inaccuracies. An uncalibrated tag can lead to errors in DBA of up to 5% [35]. A simple "6-Orientation" (6-O) method can be performed in the field:
- Place the motionless tag in six defined orientations (like the faces of a die) so each accelerometer axis points up and down.
- Record data for about 10 seconds in each position.
- Use the recorded maxima to derive correction factors for each axis, ensuring the vectorial sum equals 1.0 g [35]. This calibration data should be archived with all subsequent data collections.
Troubleshooting Guides
Problem: Inability to Classify Short-Burst Behaviors
- Symptoms: Classifier fails to identify rapid events like swallowing or escape maneuvers; signal for fast behaviors appears distorted.
- Possible Causes:
- Insufficient Sampling Frequency: The sampling rate is below the Nyquist frequency for the target behavior.
- Incorrect Analysis Window: The window length used to classify behaviors is too long to capture brief events.
- Solutions:
Problem: Poor Generalization of Energy Expenditure Models
- Symptoms: A model that works well in one study population or season performs poorly in another, with inconsistent ODBA or VeDBA values.
- Possible Causes:
- Uncalibrated Sensors: Systematic error from uncalibrated sensors creates biased data [35].
- Variable Tag Placement: Differences in tag attachment or position between studies alter signal amplitude [35].
- Confounding Covariables: Changes in signal amplitude are conflated with other factors, such as season or device type [35].
- Solutions:
- Implement Pre-Deployment Calibration: Always perform and archive a calibration (e.g., the 6-O method) before deployment [35].
- Standardize Attachment Protocols: Use a consistent, documented method for tag placement and attachment across all subjects and studies.
- Use Raw Data where Possible: Archiving raw data allows for re-processing with improved methods in the future [35].
Experimental Protocols for Key Studies
Protocol 1: Field Calibration of Accelerometers using the 6-O Method This protocol, derived from [35], ensures the absolute accuracy of your accelerometers before animal deployment.
- Equipment Setup: Secure the data logger to a flat, stable surface.
- Data Collection: Orient the logger so that each of its three primary axes points directly upward and then downward, mimicking the six faces of a cube. In each orientation, keep the logger perfectly still for approximately 10 seconds while recording data.
- Data Processing:
- For each static period, calculate the vectorial sum of the acceleration:
||a|| = √(x² + y² + z²). - For a perfect sensor, this sum should be 1.0 g in all orientations. Deviations indicate error.
- Calculate axis-specific correction factors to ensure both the minimum and maximum for each axis are symmetrical, then apply a gain to normalize the vector sum to 1.0 g.
- For each static period, calculate the vectorial sum of the acceleration:
- Archiving: The derived correction factors must be saved and applied to all subsequent data collected with that tag. The raw calibration data should be archived with the study data.
Protocol 2: Determining Behavior-Specific Sampling Frequencies This protocol, based on [6], uses a combination of high-speed videography and accelerometry to determine the minimum required sampling rate for your species and behaviors of interest.
- Experimental Setup:
- Fit animals with accelerometers logging at a high frequency (e.g., 100 Hz).
- Simultaneously record the animal's behavior with synchronized high-speed cameras (e.g., 90 fps).
- Data Annotation:
- Use the video footage to precisely annotate the start and end times of specific behaviors (e.g., flight, swallowing, foraging).
- Extract the corresponding accelerometer data segments.
- Frequency Analysis:
- For each behavior, perform a frequency analysis (e.g., using a Fast Fourier Transform) to identify the dominant and maximum frequencies present in the signal.
- The highest frequency of biological interest (
f_max) dictates the Nyquist frequency (2 * f_max).
- Down-Sampling Test:
- Digitally down-sample the original high-frequency data to progressively lower rates.
- Test the performance of behavior classifiers or the accuracy of amplitude metrics (like VeDBA) at each lower rate.
- The minimum acceptable sampling frequency is the lowest rate that does not result in a statistically significant loss of performance or accuracy.
Data Acquisition Workflow
The Scientist's Toolkit: Essential Research Reagents & Materials
Table 3: Key Materials for Accelerometer-Based Animal Behavior Research
| Item | Function & Explanation | Example Models / Types |
|---|---|---|
| Tri-Axial Accelerometer Logger | Measures acceleration in three spatial dimensions (vertical, lateral, anterior-posterior), enabling detailed reconstruction of posture and movement [35]. | Daily Diary tags [35], ActiGraph GT3X/+ [33]. |
| Data Acquisition (DAQ) System | Powers the sensor and acquires (digitizes) the analog signal from the accelerometer for recording and analysis [36]. | National Instruments CompactDAQ with NI 9234 module [36] [37]. |
| Leg-Loop Harness | A common attachment method for birds and some mammals that secures the logger to the animal's body with minimal impact on welfare and behavior [6]. | Custom-made from Teflon tubing or similar material [6]. |
| High-Speed Video Camera | Provides ground-truth behavioral data that is synchronized with accelerometer signals, essential for validating and annotating behaviors [6]. | GoPro Hero (90 fps) [6]. |
| Anti-Aliasing Filter | An analog low-pass filter that removes high-frequency signal components before digitization to prevent aliasing artifacts that cannot be fixed later [32] [38]. | Butterworth Filter (general vibration), Bessel Filter (shock/transient events) [38]. |
| Calibration Platform | A precisely leveled, stable surface used for the 6-O calibration method to establish the baseline accuracy of the accelerometers [35]. | Standard laboratory bench with leveling feet. |
Frequently Asked Questions (FAQs)
Q1: What are the primary advantages of using video data to validate accelerometer-based behavior classifications? Video annotation provides the ground truth needed to build reliable supervised machine learning models. By directly observing an animal's behavior on video and matching it to the corresponding accelerometer signal, researchers can create a labeled "training dataset." This dataset is used to teach a classification model, such as a Random Forest, to recognize patterns in the accelerometer data and automatically identify behaviors in future datasets where video is not available [21]. This process is crucial for identifying specific, often rare, behaviors like grooming or feeding [12] [39].
Q2: How can ECG signals complement accelerometer data in activity recognition? Accelerometer (ACC) and electrocardiogram (ECG) data offer complementary strengths. ACC signals excel at recognizing gross motor activities, while ECG signals, which reflect cardiac dynamics, are more sensitive to physiological states and are superior for identifying the individual subject themselves. The table below summarizes their performance in unsupervised recognition tasks [40]:
Table: Comparative Performance of ECG and Accelerometer Data in Unsupervised Recognition Tasks
| Modality | Primary Strength | Recognition Task Performance Metric | Reported Accuracy |
|---|---|---|---|
| Accelerometer (ACC) | Human Activity Recognition | Normalized Mutual Information (NMI) / Accuracy | 0.728 / 0.817 [40] |
| Electrocardiogram (ECG) | Subject Identification | Normalized Mutual Information (NMI) / Accuracy | 0.641 / 0.500 [40] |
Q3: What are common data synchronization challenges when using multiple sensors, and how can they be resolved? A major challenge is the post-hoc fusion of data from different devices, which can introduce variability and reduce performance compared to using a single, optimal modality [40]. To ensure precise synchronization:
- Use Integrated Sensor Platforms: Whenever possible, use a single device that records multiple data streams (e.g., ACC and ECG) on a unified timeline.
- Implement Synchronization Protocols: At the start and end of data collection, introduce a clear, simultaneous event (e.g., a specific movement sequence like three jumps) that is visible in all data streams (ACC, ECG, and video). This event creates a shared timestamp to align all data during processing.
Q4: Why is my model performing well on training data but poorly on new, unseen data from a different study population? This is typically a problem of model generalizability. Models often fail when the new data differs from the training data in key aspects [12]. To improve generalizability:
- Maximize Variability in Training Data: Collect training data from a diverse set of individuals, across different seasons, and under various environmental conditions [12] [35].
- Standardize Behavior Durations: Ensure your training dataset contains a balanced representation of all behaviors of interest, rather than being skewed toward common behaviors (e.g., resting). This prevents the model from being biased toward over-represented behaviors [21].
- Calibrate Your Sensors: Inaccurate accelerometer readings can introduce significant error. Perform a simple static calibration before deployment to correct for sensor-specific biases [35].
Troubleshooting Guides
Issue 1: Poor Performance in Classifying Specific Behaviors
Problem: Your machine learning model consistently fails to accurately identify certain behaviors, particularly rare or transitional ones (e.g., grooming in cats, scratching in goats).
Solution: Refine your model's training data and features.
- Step 1: Analyze the Training Data. Check the distribution of behaviors in your training dataset. If a behavior like "running" is rare, the model has fewer opportunities to learn it.
- Step 2: Standardize Behavior Durations. Balance your dataset by ensuring you have a similar number of examples for each target behavior. This prevents the model from favoring the most common behaviors [21].
- Step 3: Optimize Data Frequency. For fast-paced behaviors (e.g., running), use higher-frequency accelerometer data (e.g., 40 Hz). For slower, more periodic behaviors (e.g., grazing, grooming), data averaged over 1-2 seconds (1 Hz) can yield better accuracy [21].
- Step 4: Add Descriptive Variables. Calculate and include additional metrics from the raw accelerometer data beyond basic static and dynamic acceleration. Features like the dominant power spectrum frequency, amplitude, and the running standard error of the waveform can significantly improve the model's ability to discriminate between similar behaviors [21].
Issue 2: Inconsistent Results After Changing Sensor Placement or Type
Problem: A model developed with sensors on an animal's back performs poorly when deployed with sensors on the tail, or when using a different brand of accelerometer.
Solution: Implement sensor calibration and placement protocols.
- Step 1: Calibrate All Accelerometers. Before deployment, calibrate each sensor using a simple static method. Place the sensor motionless in six different orientations (like the faces of a die) and record the output. Use this data to correct for any biases in the sensor's measurements, ensuring the vector sum of the three axes reads 1g in all orientations [35].
- Step 2: Document Placement Precisely. The position of the tag on the body (e.g., upper vs. lower back, tail mount) can change the amplitude of the acceleration signal. Document the exact placement and consider it a fixed variable in your study. Avoid comparing DBA (Dynamic Body Acceleration) values from tags placed in different locations, as amplitude differences may not reflect true differences in energy expenditure [35].
Table: Impact of Device Placement on Acceleration Metrics (VeDBA)
| Species | Comparison | Reported Variation in VeDBA |
|---|---|---|
| Pigeon | Upper vs. Lower Back Mount | ~9% [35] |
| Kittiwake | Back vs. Tail Mount | ~13% [35] |
| Human | Back vs. Waist Mount | ~0.25 g at intermediate running speeds [35] |
Issue 3: Data Aliasing and Loss of Behavioral Detail
Problem: Your accelerometer is set to sample in short, intermittent bursts, and you suspect you are missing critical, short-duration behaviors.
Solution: Leverage continuous on-board processing or optimize burst sampling.
- Step 1: Implement On-Board Classification. Where technology allows, use trackers with integrated algorithms that process raw accelerometer data into behavior codes continuously on the device itself. This eliminates the risk of aliasing and provides a complete record of all behaviors [41].
- Step 2: Optimize Burst Sampling Intervals. If continuous sampling is not possible, the burst sampling interval must be carefully chosen. The table below shows how sampling interval affects the accuracy of time-activity budgets, especially for rare behaviors [41]:
Table: Error Ratios for Rare Behaviors at Different Sampling Intervals
| Sampling Interval | Impact on Rare Behavior Detection |
|---|---|
| Every 10 seconds | Minimal error |
| Every 5 minutes | Error ratios >1 become common for rare behaviors (e.g., flying, running) [41] |
| Every 10 minutes | Error ratios >1 are common, significantly distorting time-activity budgets [41] |
| Every 60 minutes | Severe inaccuracy for estimating daily distances and rare behaviors [41] |
Experimental Protocols for Data Validation
Protocol 1: Creating a Video-Annotated Training Dataset
This protocol is essential for developing a supervised machine learning model for behavior recognition [21] [39].
- Sensor Deployment: Equip study subjects with accelerometers. For terrestrial mammals, collar mounts are common; for birds, back or tail mounts are used. Ensure the sensor is securely attached to minimize movement artifacts [35].
- Video Recording: Simultaneously record high-quality video of the subjects for a representative period. The video should be clear enough for an expert to distinguish all behaviors of interest.
- Synchronization: Create a synchronization event at the start and end of recording (e.g., a specific series of taps on the sensor or a unique light flash visible to the camera).
- Behavior Annotation: A trained observer reviews the video and labels the occurrence and duration of specific behaviors (e.g., "grazing," "ruminating," "walking," "lying"). This can be done using software like BORIS or ELAN.
- Data Alignment: Precisely align the video annotations with the corresponding segments of the accelerometer data stream using the synchronization events. The result is a labeled dataset where each accelerometer data segment is paired with a behavior code.
Protocol 2: A Multi-Modal Workflow for Validating Cardiac and Behavioral States
This workflow integrates accelerometer and ECG data to provide a more holistic view of an animal's physiological and behavioral state [40] [42].
The Scientist's Toolkit: Essential Research Reagents & Materials
Table: Key Materials for Multi-Modal Biologging Studies
| Item | Function & Application Notes |
|---|---|
| Tri-axial Accelerometer | Measures dynamic body acceleration in three dimensions (surge, heave, sway). The core sensor for quantifying movement and classifying behavior. Select based on size, weight, sampling frequency, and battery life [21] [35]. |
| Electrocardiogram (ECG) Sensor | Records the electrical activity of the heart. Used for subject identification and monitoring physiological response to activity. Can be integrated into wearable harnesses or implanted devices [40] [42]. |
| Video Recording System | Provides ground truth data for validating and labeling accelerometer signals. Critical for creating training datasets for supervised machine learning models [21] [39]. |
| Random Forest Classifier | A common and robust supervised machine learning algorithm. Used to train models that predict behavior from features extracted from accelerometer data [21]. |
| Dynamic Body Acceleration (DBA) Metrics | Calculated proxies (ODBA - Overall DBA, VeDBA - Vectoral DBA) from raw accelerometer data. Serve as a well-validated proxy for movement-based energy expenditure [41] [35]. |
| Synchronization Tool | A device or protocol (e.g., LED flash, NTP server, specific movement) to create a simultaneous mark in all data streams (video, ACC, ECG), enabling precise temporal alignment during analysis. |
Troubleshooting and Optimization: Correcting and Preventing Aliasing in Existing and Future Studies
Frequently Asked Questions (FAQs)
1. What is aliasing and why is it a problem in data collection? Aliasing is a phenomenon in signal processing where high-frequency components in a signal appear as false lower frequencies in sampled data [43] [44]. This occurs when a continuous signal is sampled at a rate that is too low to accurately represent the original signal [45]. In animal studies research, aliasing can cause distorted vibration data, leading to misinterpretation of an animal's movement patterns, gait, or physiological vibrations [9]. Once aliasing occurs, it is difficult to detect and almost impossible to remove using software alone [46].
2. How can I tell if my historical accelerometer data has aliasing? Diagnosing aliasing in historical data relies on identifying certain patterns, as the original high-frequency content is lost. Key indicators include:
- Unexplained Low-Frequency Components: Presence of low-frequency vibrations or tones that have no clear biological origin [9].
- Frequency Shifts: A noticeable shift in frequency content that correlates with changes in sampling rate rather than actual behavior.
- Non-Physical Signals: Frequency components that appear at illogical times, such as vibration frequencies exceeding an animal's possible physiological range.
3. What is the Nyquist criterion and how does it relate to aliasing? The Nyquist criterion states that to accurately sample a signal, the sampling frequency must be at least twice the highest frequency component present in the signal [43] [46] [44]. The Nyquist frequency, defined as half the sampling frequency, is the maximum observable frequency [43]. Any signal components above this frequency will be aliased, or "folded back," into the lower frequency spectrum, distorting the data [43] [44].
4. Can I use any filter to prevent aliasing? No, an effective anti-aliasing filter must be an analog filter applied to the signal before it is sampled by the analog-to-digital converter (ADC) [43] [46]. Digital filters applied after sampling cannot remove aliasing that has already occurred [46]. The ideal anti-aliasing filter is a low-pass filter that sharply attenuates all frequencies above the Nyquist frequency [43] [47].
Troubleshooting Guide: Detecting and Confirming Aliasing
A. Diagnosing Aliasing in Historical Data
Since you cannot re-collect historical data, follow this protocol to assess its integrity.
Table 1: Diagnostic Features of Aliasing in Recorded Data
| Feature to Analyze | What to Look For | A Potential Indicator of Aliasing |
|---|---|---|
| Signal Consistency | Low-frequency signals that appear only during specific, high-energy activities. | Yes |
| Frequency Spectrum | Sharp, unexplained peaks at frequencies just below the Nyquist frequency. | Yes |
| Signal Folding | A mirrored or symmetrical pattern of frequency components around the Nyquist frequency. | Yes |
| Data Integrity | The presence of high-frequency content above the Nyquist frequency in the raw signal. | No (Aliasing has not occurred) |
Protocol:
- Plot the Power Spectral Density (PSD): Generate a high-resolution frequency spectrum of your signal [9].
- Identify the Nyquist Frequency: Calculate this as half the sampling rate used during data collection [43].
- Look for Symmetry: Check for frequency components that appear symmetrically on both sides of the Nyquist frequency. This "folding" is a classic signature of aliasing [43] [44].
- Cross-Reference with Biology: Correlate any suspicious low-frequency peaks with known biological limits. A 500 Hz vibration in a large animal, for instance, may be physically impossible and thus likely an alias.
B. Detecting Aliasing in Ongoing Data Collections
For ongoing experiments, you can perform active tests to confirm the presence of aliasing.
Protocol: Sinusoidal Frequency Sweep Test This method helps map the real system response against the measured response.
- Equipment Setup: Connect a calibrated vibration shaker or function generator to your accelerometer setup. Ensure the accelerometer is securely mounted.
- Generate Test Signal: Input a pure sine wave with a known, constant amplitude.
- Sweep Frequency: Gradually increase the frequency of the sine wave from a very low value to a value exceeding your system's Nyquist frequency, while maintaining constant amplitude.
- Record Data: Collect the accelerometer data at your standard sampling rate throughout the sweep.
- Analyze Results: Plot the frequency of the measured signal against the known input frequency.
Table 2: Interpreting the Frequency Sweep Test
| Input Frequency (f_in) | Expected Measured Frequency (f_meas) | Observation | ||
|---|---|---|---|---|
| fin < fNyquist | fmeas = fin | No aliasing; system is accurate. | ||
| fin > fNyquist | fmeas = fNyquist - (fin - fNyquist) orf_meas = | fin - N * fsample | Aliasing is confirmed. The signal is "folded" [43] [44]. |
The diagram below visualizes this "folding" effect that occurs during aliasing.
Preventive Measures and Best Practices
Preventing aliasing is more effective than trying to correct it later. Implement these strategies in your data collection pipeline.
Table 3: Anti-Aliasing Strategies for Animal-Borne Accelerometers
| Method | Description | Implementation Consideration for Animal Studies |
|---|---|---|
| Analog Anti-Aliasing Filter | An analog low-pass filter applied to the signal before it is digitized [43] [46]. | The most critical component. Select a filter with a cutoff frequency at or below your frequency of interest. |
| Oversampling | Sampling at a rate much higher than the Nyquist rate for your frequency of interest [45]. | Increases data storage and power consumption, which can be a constraint in long-term wildlife studies. |
| Guard Band Ratio | Using a sampling rate 2.56 times (or more) your maximum frequency of interest [43]. | Provides a safety margin to account for the gradual roll-off of real-world analog filters. |
The following workflow provides a logical checklist for setting up a data collection system that is robust against aliasing.
The Scientist's Toolkit: Essential Research Reagents & Materials
Table 4: Key Equipment for Anti-Aliasing Data Collection
| Item | Function & Specification | Role in Preventing Aliasing |
|---|---|---|
| MEMS or Piezoelectric Accelerometer | Sensor to measure vibration or acceleration. MEMS are lower cost; Piezoelectric have a higher frequency range [7]. | Source Signal: Check sensor specs. Some digital MEMS have internal filters that can cause aliasing [9]. |
| Signal Conditioner with Analog Low-Pass Filter | Hardware module that filters and prepares the analog signal from the accelerometer. | Primary Defense: Provides the crucial analog anti-aliasing filter before the signal is digitized [43] [46]. |
| High-Speed Data Acquisition (DAQ) System | Hardware that converts analog signals to digital data. Key spec: Sampling Rate. | Sampling Rate Control: Must support sampling rates high enough to meet the guard band ratio (e.g., 2.56 * f_max) [43]. |
| Calibrated Vibration Shaker | A device that generates precise, known vibrations for system validation. | System Validation: Used to perform the Sinusoidal Frequency Sweep Test to empirically verify the anti-aliasing setup. |
| Digital Filtering Software (e.g., Python, MATLAB) | Software for post-processing and analyzing digital data. | Secondary Filtering: Can be used for further digital filtering (decimation) after safe sampling, but cannot fix existing aliasing [43]. |
Troubleshooting Guides
Guide 1: Resolving Aliasing in MEMS Accelerometer Data
Problem: Sampled vibration data from a MEMS accelerometer contains low-frequency components that do not correspond to any known animal behavior, making the data unreliable for classifying activities like running or feeding.
Explanation: Aliasing occurs when high-frequency components in the input signal are misinterpreted as lower frequencies during digital sampling. This happens if the signal contains frequencies exceeding half the sampling rate (the Nyquist frequency). In animal studies, this could mean vibrations from rapid wingbeats or footfalls being misrepresented as slower, non-existent movements [9] [48] [7].
Solution:
- Increase Sampling Rate: The most straightforward method is to sample at a frequency at least twice the highest frequency of interest in the animal's movement [48]. For example, if a behavior of interest involves vibrations up to 500 Hz, the system should sample at a minimum of 1000 Hz [49].
- Incorporate an Anti-Aliasing Filter: Implement an analog low-pass filter before the analog-to-digital converter (ADC). This filter should be designed to attenuate all frequencies at and above the Nyquist frequency, ensuring they do not distort the sampled signal [49] [50] [51].
- Use Sensors with Built-in Filtering: Select MEMS accelerometers, like the ADXL354, that are designed specifically to minimize aliasing effects for high-resolution vibration measurement [9].
Guide 2: Optimizing Accelerometer Sampling for Diverse Animal Behaviors
Problem: A machine learning model trained on accelerometer data fails to accurately classify both high-frequency (e.g., running, flying) and low-frequency (e.g., grooming, feeding) animal behaviors.
Explanation: The predictive accuracy of behavior classification models, such as random forest models, is highly sensitive to the sampling frequency of the training data. High-frequency behaviors are better captured with higher sampling rates, while slower, aperiodic behaviors can be more accurately identified with lower-resolution data (e.g., a mean over 1 second) [21].
Solution:
- Use High-Frequency Raw Data for Training: Collect raw accelerometer data at a high frequency (e.g., 40 Hz or higher) to capture the fine details of all behaviors [21].
- Post-Process Data for Specific Behaviors: For model training, derive multiple datasets from the raw data. Use high-frequency samples to identify fast-paced locomotion and generate lower-frequency averaged data (e.g., 1 Hz) to improve the identification of slower behaviors like grooming [21].
- Validate with Field Observations: Always validate the model's predictions against direct observations of free-ranging animals to ensure accuracy in a real-world context [21].
Frequently Asked Questions (FAQs)
FAQ 1: What is aliasing and why is it a critical issue in accelerometer-based animal studies?
Aliasing is a distortion that occurs when a signal is sampled at an insufficient rate, causing high-frequency components to appear as erroneous low-frequency signals in the data [48] [7]. In animal studies, this can lead to a severe misinterpretation of an animal's behavior and energy expenditure. For example, rapid wingbeats in a bird could be aliased and misclassified as a slow walking motion, completely invalidating time-activity budgets and behavioral analyses [9] [41].
FAQ 2: How do I select the correct sampling rate for my accelerometer to prevent aliasing?
According to the Nyquist-Shannon sampling theorem, to avoid aliasing, you must sample at a rate at least twice the highest frequency component present in the vibration or movement you wish to measure [49] [50]. For instance, if you are studying a behavior with frequency components up to 200 Hz, your sampling rate should be 400 Hz or higher. In practice, it is common to use sampling rates 5 to 10 times higher than the maximum frequency of interest to provide a safety margin and accommodate non-ideal filters [49].
FAQ 3: What is an anti-aliasing filter and where is it used?
An anti-aliasing filter is a low-pass filter applied to the analog signal before it is digitized by the ADC [50] [51]. Its purpose is to remove any frequency components in the signal that are above the Nyquist frequency, thus preventing them from being aliased into the frequency band of interest. While some digital MEMS sensors have internal filters, others may require an external analog filter to be added to the signal chain [9].
FAQ 4: My dataset is already aliased. Can I fix this with digital signal processing after sampling?
No. Once aliasing has occurred during the sampling process, the original signal information is lost irreversibly [48]. Digital filtering applied after sampling can remove the aliased components, but it cannot recover the true underlying signal. Therefore, prevention via an appropriate sampling rate and an analog anti-aliasing filter is the only reliable strategy.
FAQ 5: Are there trade-offs in using higher sampling rates and anti-aliasing filters?
Yes. Higher sampling rates generate larger data volumes, requiring more storage and processing power, which can be a significant constraint in long-term biologging studies [21] [41]. Anti-aliasing filters, particularly analog ones, add complexity and cost to the hardware design. Furthermore, all practical filters have a "transition band" where attenuation is gradual, meaning some aliasing can still occur from frequencies within this band [49].
Table 1: Impact of Accelerometer Data Processing on Behavior Identification Accuracy
The following table summarizes quantitative findings on how different data processing techniques influence the predictive accuracy (F-measure) of random forest models for classifying animal behaviors. Data is derived from a study on domestic cats (Felis catus) [21].
| Data Processing Technique | Behavior Type | Impact on Predictive Accuracy (F-measure) |
|---|---|---|
| Additional Descriptive Variables (e.g., power spectrum, VeDBA ratios) | All Behaviors | Significant improvement (Up to 0.96 overall) |
| High Recording Frequency (40 Hz) | Fast-paced (e.g., locomotion) | Superior identification accuracy |
| Lower Recording Frequency (1 Hz mean) | Slow, aperiodic (e.g., grooming, feeding) | More accurate identification |
| Standardised Durations of behaviors in training data | All Behaviors, especially rare ones | Improved model balance and prediction accuracy |
| Field Validation of model predictions | Free-ranging behaviors | Critical for confirming real-world accuracy |
Table 2: Comparison of Anti-Aliasing Filter Types and Characteristics
This table outlines the primary strategies for mitigating aliasing in data acquisition systems, relevant for designing biologging equipment [9] [49] [48].
| Mitigation Strategy | Principle of Operation | Key Advantages | Key Limitations & Considerations |
|---|---|---|---|
| Analog Anti-Aliasing Filter | Low-pass analog filter applied before ADC. | Prevents aliasing at the source; essential for reliable data. | Adds analog components; filter design complexity (transition band, roll-off). |
| Increasing Sampling Rate | Raising samples per second to push Nyquist frequency higher. | Conceptually simple; reduces the burden on the analog filter. | Increases data volume, power consumption, and processing needs. |
| Oversampling | Sampling at a much higher rate, then digitally filtering and down-sampling. | Allows use of a simpler analog filter; can improve signal-to-noise ratio. | More complex digital signal processing required. |
| Sensor Selection | Using sensors with inherent high bandwidth or built-in filtering. | Integrated solution; simplifies external design. | May not be available for all form factors or power requirements. |
Experimental Protocols
Protocol 1: Designing and Implementing an Analog Anti-Aliasing Filter
Objective: To integrate an analog anti-aliasing filter into a biologging accelerometer circuit to prevent high-frequency signals from aliasing into the frequency band of interest.
Materials:
- MEMS accelerometer sensor
- Low-noise operational amplifier (op-amp)
- Resistors and capacitors
- PCB for circuit assembly
- Oscilloscope & signal generator
Methodology:
- Determine Cut-off Frequency: Based on the highest frequency of biological interest (
f_max), set the filter's cut-off frequency (f_c) and the system's sampling rate (f_s). Adhere tof_s > 2 * f_max. The filter's -3 dB point is typically set at the Nyquist frequency (f_s / 2) [49] [51]. - Select Filter Design: A Sallen-Key topology is a common choice for a second-order active low-pass filter, providing a steeper roll-off than a first-order RC filter [51].
- Calculate Component Values: For a Sallen-Key filter, select resistor (
R1, R2) and capacitor (C1, C2) values to achieve the desired cut-off frequency using the formula:f_c = 1 / (2 * π * √(R1 * R2 * C1 * C2)). - Assemble and Test Circuit: Build the filter circuit on a PCB between the accelerometer and the ADC. Use a signal generator and oscilloscope to inject known frequencies and verify that the filter's gain attenuates as expected beyond the cut-off frequency.
- Integrate and Validate: Integrate the filter into the full data acquisition system and validate its performance by comparing the sampled output against known input signals that contain both in-band and out-of-band frequencies.
Protocol 2: A Workflow for Building an Aliasing-Resistant Behavior Classification Model
Objective: To create a robust machine learning pipeline for classifying animal behaviors from accelerometer data while minimizing the impact of aliasing and optimizing model accuracy.
Materials:
- Tri-axial accelerometers
- Video recording equipment (for calibration)
- Data processing software (e.g., R, Python)
Methodology:
- High-Frequency Data Collection: Deploy accelerometers on study animals (or model animals in a calibrated setting) to collect raw tri-axial data at a high sampling frequency (e.g., ≥ 40 Hz). Simultaneously record video footage to ground-truth behaviors [21].
- Data Labeling and Segmentation: Label the high-frequency accelerometer data into distinct behavioral categories (e.g., resting, flying, feeding) based on synchronized video observations [21] [41].
- Feature Extraction: From the labeled, high-frequency data, calculate a wide range of descriptive variables for each data segment. These should include:
- Create Balanced Training Sets: Generate multiple training datasets. Ensure that the duration of examples for each behavior is standardized to prevent the model from being biased toward over-represented behaviors [21].
- Model Training and Validation: Train a random forest model using the processed training dataset. Validate the model's accuracy first on a withheld portion of the calibrated data, and then crucially, on a separate set of observations from free-ranging animals to confirm real-world performance [21].
Signaling Pathways and Workflows
Anti-Aliasing in Data Pipeline
Behavior Classification Workflow
The Scientist's Toolkit: Research Reagent Solutions
Table 3: Essential Materials for Anti-Aliasing and Accelerometer Data Processing
This table details key components and computational methods used in the design of data acquisition systems for aliasing-free animal behavior research.
| Item / Reagent | Function in Research | Specification / Notes |
|---|---|---|
| MEMS Accelerometer (e.g., ADXL355) | Measures vibration and acceleration for behavior inference. | Digital output, very low noise; internal filters can cause aliasing if not managed [9]. |
| MEMS Accelerometer (e.g., ADXL354) | Measures vibration and acceleration for behavior inference. | Analog output; does not possess internal digital filters and does not exhibit aliasing [9]. |
| Analog Low-Pass Filter Circuit | Serves as an anti-aliasing filter to remove high-frequency noise before ADC. | Typically an active filter using a low-noise op-amp; -3 dB cutoff set to Nyquist frequency [51]. |
| Operational Amplifier (Op-Amp) | Core component for building active anti-aliasing filters. | Should be selected for low noise and appropriate bandwidth for the signal of interest [51]. |
| Random Forest Model | A supervised machine learning algorithm for classifying behaviors from accelerometer data. | Accuracy is improved with additional variables, standardized behavior durations, and multi-frequency data [21]. |
| Feature Extraction Software | Computes descriptive variables (VeDBA, pitch, dominant frequency) from raw accelerometer data. | Essential for creating inputs for machine learning models; can be implemented in R or Python [21]. |
Analyzing animal behavior using accelerometer data is fundamentally an exercise in dealing with imperfect data. The core challenge stems from a critical trade-off: biologging devices have finite battery life and storage capacity, which often forces researchers to use sampling rates that are too low to accurately capture rapid, short-burst animal movements. This can lead to aliasing, where high-frequency signals are misrepresented as lower frequencies, and high levels of random noise, which distorts the true signal. These artifacts can severely compromise the performance of machine learning (ML) models used for behavior classification and energy expenditure estimation. This guide provides a structured approach to selecting and implementing ML models that are robust to these specific data quality issues, ensuring more reliable and interpretable research outcomes.
Technical FAQs: Understanding Data Problems and Solutions
FAQ 1: What are the specific risks of aliasing in animal-borne accelerometer data, and how can they be mitigated?
Aliasing occurs when the accelerometer sampling frequency is insufficient to capture the true frequency of an animal's movement. According to the Nyquist-Shannon sampling theorem, the sampling frequency must be at least twice the frequency of the fastest movement of interest [6]. When this rule is violated, high-frequency movements "fold back" into the lower frequencies of the recorded signal, creating a distorted and inaccurate representation of the behavior.
- Concrete Example: A study on European pied flycatchers found that swallowing food was a very fast behavior, with a mean frequency of 28 Hz. To classify this behavior accurately without aliasing, a sampling frequency higher than 56 Hz (the Nyquist frequency) was required; in practice, 100 Hz was needed for reliable classification [6]. In contrast, slower, rhythmic behaviors like sustained flight could be adequately characterized with a much lower sampling frequency of 12.5 Hz [6].
- Mitigation Strategy: The primary defense against aliasing is to use a sufficiently high sampling rate during data collection. For behaviors where the maximum frequency is unknown, pilot studies should be conducted to establish the necessary rate. Furthermore, many digital MEMS accelerometers have built-in anti-aliasing filters, but their limitations must be understood. For instance, the ADXL355 accelerometer has internal digital filters that can cause aliasing of out-of-band frequencies when used at certain output data rates [9].
FAQ 2: Which machine learning models are inherently more robust to noisy and aliased data?
Noise and aliasing introduce inconsistencies and artifacts that can confuse ML models. The robustness of a model often depends on its ability to focus on general patterns rather than fitting to every small fluctuation in the data.
- Tree-Based Models (Random Forest, XGBoost): These are often excellent choices for noisy data. They work by building multiple decision trees and aggregating their results, which averages out noise and reduces overfitting. One study found that Random Forests and k-Nearest Neighbors (k-NN) achieved remarkably low prediction errors (0.2% and 0.013%, respectively) when identifying force system parameters from accelerometer data, a task susceptible to noise [52].
- Models Paired with Data Abstractions: A promising approach to improve robustness is to preprocess data using abstractions. This technique generalizes the raw input data into a higher-order, discrete representation. While this causes some information loss, it effectively cleans impurities (noise) from the data. Research has shown that training an Artificial Neural Network (ANN) on such abstracted data can make it significantly more robust to noise compared to training on raw data, with an almost negligible loss in accuracy [53].
- Models to Use with Caution: Highly complex models like large Neural Networks can overfit to noise if not properly regularized or trained with a massive amount of data. Their performance is also more dependent on careful feature engineering and data preprocessing to mitigate the effects of data artifacts [53] [52].
FAQ 3: What data preprocessing techniques can improve model performance on low-quality data?
Preprocessing is a critical step for enhancing data quality before it is fed into an ML model.
- Denoising Algorithms: For suppressing random noise, advanced signal processing techniques can be highly effective. One study proposed a hybrid algorithm combining optimized Variational Modal Decomposition (VMD) with Time-Frequency Peak Filtering (TFPF). This method decomposes the signal and applies targeted denoising to different components, resulting in a cleaner signal with minimal distortion [54]. Similarly, other data-driven, learning-based denoising approaches have been shown to outperform traditional filtering methods for pure inertial signal reconstruction [55].
- Robust Feature Extraction: Instead of using raw accelerometer signals, extracting noise-insensitive features can improve model performance. One model uses the Enveloped Power Spectrum (EPS) for feature extraction, which is more robust to noise, followed by Linear Discriminant Analysis (LDA) for dimensionality reduction. This combination has been shown to outperform other state-of-the-art methods in Human Activity Recognition tasks [56].
Table 1: Comparison of Machine Learning Models for Noisy/Aliased Data
| Model | Relative Robustness to Noise | Key Strengths | Key Limitations | Ideal Use Case |
|---|---|---|---|---|
| Random Forest / k-NN [52] | High | Does not require extensive preprocessing; handles non-linear relationships well. | Can be computationally heavy with very large datasets. | Initial model prototyping; datasets with complex feature interactions. |
| ANN with Abstracted Data [53] | High (after abstraction) | Abstraction acts as a strong regularizer against noise. | Abstraction causes irreversible information loss. | When training data is known to be noisy and some signal detail can be sacrificed. |
| SVM with Robust Features [56] | Medium-High | Effective in high-dimensional spaces when paired with good features (e.g., EPS). | Performance is highly dependent on the choice of kernel and features. | When domain knowledge allows for expert feature engineering. |
| Multilayer Perceptron (Raw Data) [52] | Medium-Low | Can model very complex patterns. | Highly susceptible to overfitting on noisy data without extensive tuning. | Only when a very large, clean dataset is available. |
Experimental Protocols
Protocol 1: A Systematic Workflow for Model Selection and Evaluation
This protocol provides a step-by-step methodology for comparing and selecting the most robust ML model for a given accelerometer dataset, incorporating steps to explicitly test for aliasing and noise.
1. Problem Definition & Data Collection:
- Define Target Behaviors: Clearly identify the animal behaviors of interest (e.g., swallowing, flight, running). Estimate the maximum frequency of the fastest behavior through pilot studies or literature.
- Set Sampling Rate: Choose a sampling frequency that is at least twice the maximum expected frequency (Nyquist rate). For short-burst behaviors, consider oversampling at 1.4 times the Nyquist frequency or higher to ensure critical information is captured [6].
- Collect and Annotate Data: Record accelerometer data synchronized with video validation to create a ground-truthed dataset [6].
2. Data Preprocessing & Synthesis:
- Standard Preprocessing: Apply standard practices like calibration and noise removal using a hybrid algorithm (e.g., improved VMD and TFPF) [54].
- Synthesize Aliased Data: If the original data was collected at a high frequency (e.g., 100 Hz), down-sample it to lower rates (e.g., 50 Hz, 25 Hz, 10 Hz) to simulate the effects of aliasing. This allows you to test model performance under different aliasing conditions [6].
3. Feature Engineering:
- Extract Robust Features: Calculate features that are less sensitive to noise, such as those derived from the Enveloped Power Spectrum (EPS) or other frequency-domain representations [56].
- Create Data Abstractions: Experiment with abstraction techniques (e.g., based on quantiles or ROC curves) to create a generalized, discretized version of your dataset [53].
4. Model Training & Evaluation:
- Train Multiple Models: Train a diverse set of models (e.g., Random Forest, k-NN, SVM, ANN) on both the raw and abstracted data [53] [52].
- Benchmark on Test Data: Evaluate all models on a held-out test set that contains the same noise and aliasing profiles as the training data. Use metrics like balanced accuracy.
- Stress Test with Unseen Noise: Evaluate the trained models on a separate, very noisy test dataset to assess their generalization capability and robustness [53].
Diagram 1: Experimental Workflow for Robust ML Model Selection
Protocol 2: Method for Evaluating Sampling Frequency Sufficiency
This protocol is designed to determine the minimum sampling frequency required for your specific study, thereby preventing aliasing from the outset.
Materials: High-speed camera (≥90 fps); high-frequency accelerometer (≥100 Hz); animal subjects in a controlled environment (e.g., aviary) [6].
Procedure:
- Synchronized Recording: Attach the accelerometer to the animal and record its movements simultaneously with the high-speed video. Precisely synchronize the two data streams [6].
- Behavioral Annotation: Use the video footage to meticulously annotate the start and end times of specific behaviors on the accelerometer data stream.
- Frequency Analysis: For each annotated behavior, perform a frequency analysis (e.g., using a Fast Fourier Transform - FFT) on the high-frequency (e.g., 100 Hz) accelerometer data to determine its dominant and maximum frequency components.
- Down-sampling Simulation: Programmatically down-sample the original 100 Hz data to various lower frequencies (e.g., 50 Hz, 25 Hz, 10 Hz).
- Classification Accuracy Test: Train a standard ML classifier (e.g., Random Forest) to identify the behaviors using data at each down-sampled frequency.
- Determine Critical Frequency: Identify the sampling frequency below which classification accuracy for high-frequency, short-burst behaviors (like swallowing) significantly drops. This is your critical minimum sampling frequency.
Table 2: Key Reagents and Research Solutions
| Item / Solution | Function in Experiment | Technical Specification / Example |
|---|---|---|
| Tri-axial Accelerometer Logger | The primary sensor for capturing raw movement data. | ±8 g range; 100 Hz sampling rate; 0.063 g resolution [6]. |
| High-Speed Videography System | Provides ground truth for behavioral annotation and validation. | 90+ frames-per-second; synchronized cameras [6]. |
| Variational Modal Decomposition (VMD) | An adaptive signal processing technique to decompose a complex signal into intrinsic mode functions (IMFs) for targeted denoising. | Optimized with Multi-Objective Particle Swarm Optimization (MOPSO) [54]. |
| Time-Frequency Peak Filtering (TFPF) | A signal enhancement technique used to denoise the IMFs generated by VMD. | Used with short windows for signal-dominated IMFs and long windows for noise-dominated IMFs [54]. |
| Enveloped Power Spectrum (EPS) | A robust feature extraction method that is insensitive to noise, used for characterizing activities from accelerometer data. | Coupled with Linear Discriminant Analysis (LDA) for dimensionality reduction [56]. |
Troubleshooting Guides
Problem: Model performance is excellent on training data but poor on new, unseen data.
- Potential Cause 1: Overfitting to Noise
- Potential Cause 2: Data Mismatch (Training data is cleaner than real-world data)
- Solution: "Stress test" your model during evaluation. Train it on your available data, but test its performance on a deliberately noisier dataset to ensure it generalizes well [53].
Problem: The model fails to classify short, rapid behaviors (e.g., swallows, foot strikes) while performing well on sustained behaviors (e.g., flight, walking).
- Potential Cause: Aliasing due to an insufficient sampling rate for the high-frequency components of the short-burst behavior.
- Solution: Re-evaluate your sampling strategy. Conduct a pilot study to measure the frequency of the rapid behavior. The sampling rate must be increased to at least twice the frequency of that specific movement, and often higher for classification (e.g., 1.4x Nyquist) [6].
Diagram 2: Troubleshooting Poor Model Generalization
FAQs on Accelerometer Data Aliasing and Device Management
This technical support center addresses the most common challenges researchers face when designing accelerometer studies on animals, with a specific focus on preventing data aliasing while managing practical device constraints.
FAQ 1: What is the minimum sampling frequency I should use to avoid aliasing of key behaviours?
The minimum sampling frequency is determined by the Nyquist-Shannon sampling theorem. This states that to accurately record a behaviour, your sampling frequency must be at least twice the frequency of the fastest movement you need to characterize [6].
The following table summarizes required sampling frequencies for different types of animal behaviours, based on empirical studies:
| Behaviour Type | Example Behaviours | Recommended Minimum Sampling Frequency | Key Evidence |
|---|---|---|---|
| Short-Burst/High-Frequency | Swallowing in birds, fish feeding strikes | ≥ 100 Hz [6] | Needed to classify swallowing (mean frequency 28 Hz) in European pied flycatchers [6]. |
| Long-Endurance/Rhythmic | Bird flight, sheep walking | 12.5 Hz - 20 Hz [6] | Flight in flycatchers characterized with 12.5 Hz; 20 Hz improved classification of walking in birds [6]. |
| Vigorous Human Activity | Running, walking upstairs | N/A (Model Dependent) | ActiGraph GT1M threshold of 11,715 counts/minute defined "extremely high count values" in children [57]. |
Key Recommendation: For studies targeting short-burst behaviours or where the full range of behaviour frequencies is unknown, oversampling is strongly advised. A sampling frequency of 100 Hz or more may be necessary to capture rapid, transient events like prey capture or swallowing [6]. For studies focused only on general activities or energy expenditure proxies (like ODBA), lower frequencies (e.g., 10-20 Hz) can be sufficient [6].
FAQ 2: How does my choice of sampling frequency impact battery life and storage?
The relationship is direct and linear: higher sampling frequencies drain battery and fill storage faster [6].
- Battery Life: Sampling accelerometer data at 25 Hz can result in more than double the battery life compared to sampling at 100 Hz [6].
- Storage Capacity: Sampling at 100 Hz will fill the device's memory four times faster than sampling at 25 Hz [6].
- Power Consumption Context: Accelerometers themselves are relatively low-power compared to other sensors like GPS. However, high-frequency sampling remains a primary drain on a device's energy budget [58].
FAQ 3: My accelerometers are producing inconsistent data between devices and deployments. What is wrong?
Inconsistencies often arise from a failure to calibrate devices before deployment and to standardize tag placement and attachment on the animal [35].
- Device Calibration: The fabrication process (e.g., soldering) can alter an accelerometer's output. An uncalibrated tag can introduce an error of up to 5% in Dynamic Body Acceleration (DBA), a common proxy for energy expenditure [35].
- Tag Placement: The position of the tag on the animal's body critically affects the signal amplitude. Studies have shown variations in DBA of 9% between upper and lower back mounts in pigeons, and 13% between back and tail mounts in kittiwakes [35].
- Device Variation: A study on sheep found that differences between individual accelerometer devices were detected in 80% of the calculated metrics, highlighting that device-specific error can be a significant factor [31].
Solution: Implement a simple pre-deployment calibration for all accelerometers. Use the "6-O method" where the tag is placed motionless in six orientations (like the faces of a die) so that each accelerometer axis nominally reads -1g and +1g. The data from this procedure can be used to correct for sensor inaccuracies in post-processing [35].
FAQ 4: How can I improve the accuracy of my machine learning models for behaviour classification?
The accuracy of models like Random Forest (RF) depends heavily on the quality and structure of your training data. Key strategies include [21]:
- Use Additional Descriptive Variables: Beyond static and dynamic acceleration, include metrics like the dominant power spectrum frequency, amplitude, and the running standard error of waveforms [21].
- Match Data Frequency to Behaviour: For fast-paced behaviours (e.g., running), use higher-frequency data. For slower, aperiodic behaviours (e.g., grooming, feeding), data averaged over 1-2 seconds can yield better accuracy [21].
- Standardise Behaviour Durations in Training Data: Ensure your training dataset does not have a vast over-abundance of one behaviour (e.g., resting). Balancing the duration of each behaviour in the training set helps the model avoid bias and better predict infrequent but important behaviours [21].
The Researcher's Toolkit: Essential Protocols
Experimental Protocol 1: Pre-Deployment Accelerometer Calibration
This field-ready protocol ensures your raw data is accurate from the start [35].
- Objective: To correct for sensor-based error in tri-axial accelerometers.
- Materials: The accelerometer tag, a levelled, stable surface.
- Method (6-O Method):
- Place the tag motionless on a level surface in a series of six defined orientations. In each orientation, one axis should be perpendicular to the ground.
- Hold each orientation for approximately 10 seconds. The six orientations should ensure that each of the three accelerometer axes points toward and away from the Earth's surface, recording values of +1g and -1g.
- Record the data. The vectorial sum of the three axes
√(x² + y² + z²)for each static period should be 1.0g. Deviations indicate sensor error.
- Data Processing: The collected data provides correction factors for gain and bias for each axis. These factors must be applied to your experimental data during analysis to ensure accuracy [35].
Experimental Protocol 2: Determining the Optimal Sampling Frequency
This protocol helps you balance data quality with device longevity for your specific study species [6].
- Objective: To empirically determine the minimum sampling frequency required to classify your behaviours of interest.
- Method:
- Conduct a pilot study, collecting accelerometer data at the highest frequency your device allows (e.g., 100 Hz). Simultaneously, record high-resolution video of the animal's behaviour for ground-truth annotation.
- Annotate the high-frequency acceleration data with specific behaviours (e.g., flying, swallowing, grazing).
- Create down-sampled versions of your dataset (e.g., 50 Hz, 25 Hz, 12.5 Hz).
- Develop and train identical machine learning models (e.g., Random Forest) on each of the down-sampled datasets.
- Compare the predictive accuracy of the models for each behaviour across the different sampling frequencies.
- Outcome: Identify the "knee of the curve" where lowering the sampling frequency further results in a significant drop in classification accuracy. This is your optimal, resource-efficient sampling rate.
Experimental Workflow Diagram
The diagram below visualizes the key decision points and processes for designing a robust accelerometer study.
Key Research Reagent Solutions
The following table details essential materials and their functions for ensuring data quality in accelerometer studies.
| Item / Solution | Function & Importance |
|---|---|
| High-Speed Video Camera | Provides ground-truth data for correlating specific behaviours with their unique acceleration signatures. Essential for creating training datasets for machine learning models [6]. |
| Custom Leg-Loop Harness | A standardised attachment method to secure the accelerometer to the animal (e.g., on the synsacrum of a bird). Minimises variation in tag placement, a known source of error [6]. |
| Tri-Axial Accelerometer Loggers | The core sensor. Must be selected based on weight (<5% of animal body weight), measurement range (e.g., ±8g), battery life, and storage capacity suitable for the study duration [6] [59]. |
| Calibration Jig | A simple, levelled platform to hold the accelerometer motionless during the 6-O calibration protocol. Ensures consistent orientation for accurate correction factors [35]. |
| Data Processing Software (e.g., R, Python) | Used for applying calibration corrections, down-sampling data, extracting features (e.g., VeDBA, pitch), and running machine learning classifiers like Random Forest [21] [6]. |
Validation and Comparative Analysis: Ensuring Robustness and Generalizability of Behavioral Models
Frequently Asked Questions (FAQs)
Q1: What is the most common mistake in validating supervised machine learning models for animal behavior classification? The most prevalent issue is insufficient validation for overfitting. A systematic review of 119 studies revealed that 79% did not adequately validate their models with independent test sets, which limits the interpretability of their results and masks potential overfitting [26].
Q2: How can I detect if my model is overfitting? A tell-tale sign of overfitting is a significant drop in performance between your training set and an independent test set. This indicates the model has low generalizability to new datasets. Overfit models appear highly accurate on training data (sometimes approaching perfect performance) but perform poorly on unseen data [26].
Q3: What validation techniques ensure my model will generalize to wild animals? Implement rigorous validation using completely independent test sets that were not involved in any part of the training process. This includes ensuring data from the same individual isn't split between training and test sets, which creates data leakage and overestimates true performance [26] [21]. Field validation of predictions is also crucial for confirming model accuracy for free-ranging individuals [21].
Q4: My model performs well on captive data but poorly in the wild. What's wrong? This indicates a generalization failure, often caused by insufficient variability in your training data. Models trained on limited captive behaviors struggle with the increased complexity and diversity of wild environments. To address this, maximize variability in data collection, ensure training data represents the full behavioral repertoire, and use classifiers that resist over-fitting [12] [21].
Q5: How does data processing affect model accuracy? Data processing significantly impacts predictive accuracy. Three key factors are:
- Calculated variables: Additional descriptive variables improve explanatory power [21]
- Data frequency: Higher frequencies better capture fast-paced behaviors, while lower frequencies (e.g., 1Hz means) better identify slow, aperiodic behaviors [21]
- Standardized durations: Balancing behavior examples in training data prevents skew toward abundant behaviors [21]
Troubleshooting Guides
Problem: Poor Model Generalization to New Individuals
Symptoms:
- High accuracy during training (>90%) but significant performance drop with new individuals
- Consistent misclassification of specific behavior categories
- Poor performance when applied to wild individuals despite good captive validation
Diagnosis and Solutions:
| Step | Action | Expected Outcome |
|---|---|---|
| 1 | Verify Data Independence | Confirm no data leakage between training and test sets |
| 2 | Check Behavioral Balance | Ensure training data has balanced representation of all behaviors [21] |
| 3 | Increase Variability | Incorporate data from multiple individuals and conditions [12] |
| 4 | Field Validation | Test predictions against manually identified wild behaviors [21] |
Problem: Data Leakage in Validation
Symptoms:
- Suspiciously high performance metrics on "unseen" data
- Minimal difference between training and test set performance
- Poor real-world performance despite good validation scores
Root Cause: Non-independent test sets allowing inadvertent incorporation of testing information into training [26].
Solution Protocol:
- Segregate Individual Data: Ensure data from any single individual appears only in training OR test sets, never both [26]
- Temporal Separation: Maintain clear time boundaries between datasets
- Pre-processing Isolation: Apply all feature engineering separately to training and test partitions
- Cross-Validation: Use individual-stratified cross-validation where appropriate
Problem: Inaccurate Rare Behavior Identification
Symptoms:
- Consistently low recall for infrequent behaviors
- Model bias toward common activities (e.g., resting, grazing)
- Poor detection of transitional or rare behaviors important for welfare assessment [12]
Resolution Strategy:
Quantitative Validation Performance Table
Table 1: Model Performance Across Different Data Processing Techniques
| Processing Technique | Behavior Type | Accuracy Impact | Field Validation Improvement |
|---|---|---|---|
| Additional Variables | All behaviors | F-measure up to +0.15 [21] | Better generalization to wild individuals |
| Higher Frequency (40Hz) | Locomotion | Significant improvement [21] | High accuracy for fast-paced behaviors |
| Lower Frequency (1Hz mean) | Grooming, Feeding | +20% accuracy [21] | Superior for slow, aperiodic behaviors |
| Standardized Durations | Rare behaviors | Recall improvement up to +35% [21] | Reduced bias toward common behaviors |
| Independent Test Sets | All behaviors | Prevents overestimation by 20-40% [26] | True performance representation |
Experimental Protocols
Protocol 1: Creating Robust Validation Sets
Purpose: Establish validation frameworks that accurately predict real-world performance [26].
Materials:
- Raw accelerometer data from multiple individuals
- Video-validated behavior labels
- Computing environment with machine learning capabilities
Methodology:
- Data Segregation: Split data by individual, ensuring no individual appears in both training and test sets [26]
- Temporal Partitioning: If using time-series data, maintain temporal boundaries
- Behavioral Stratification: Ensure all behavior classes are represented in both sets
- Validation Framework: Implement k-fold cross-validation with individual-level stratification
- Performance Metrics: Calculate precision, recall, and F-measure for each behavior class
Validation:
- Compare training vs. test set performance metrics
- Conduct field validation with manual behavior identification [21]
- Assess per-behavior accuracy rather than only overall metrics
Protocol 2: Data Processing for Improved Generalization
Purpose: Enhance model accuracy through optimized data processing techniques [21].
Materials Required:
Table 2: Essential Research Reagent Solutions
| Reagent/Resource | Function | Application Notes |
|---|---|---|
| Tri-axial Accelerometers | Data collection at 40Hz frequency | Position securely on animal collar/harness |
| Video Recording System | Behavior calibration | Synchronize timestamps with accelerometer data |
| Random Forest Classifier | Behavior prediction | Use 300+ decision trees to reduce overfitting [21] |
| Descriptive Variables | Enhanced behavior discrimination | Include static/dynamic acceleration, VeDBA, pitch/roll [21] |
| Frequency Adjustment | Behavior-specific optimization | 40Hz for locomotion, 1Hz mean for feeding/grooming [21] |
Processing Steps:
- Variable Calculation: Compute comprehensive descriptive variables including:
- Static and dynamic acceleration [21]
- Vectoral Dynamic Body Acceleration (VeDBA)
- Pitch and roll angles
- Dominant power spectrum frequency and amplitude
Frequency Optimization:
- Maintain 40Hz raw data for fast behaviors
- Calculate 1-second means for slow, aperiodic behaviors
- Test both frequencies for each behavior type
Duration Standardization:
- Balance training dataset to include similar durations of each behavior
- Oversample rare behaviors or undersample abundant ones
- Ensure minimum 50 examples per behavior class
Diagnostic Workflow Diagram
Troubleshooting Guides
Guide 1: Resolving Data Aliasing in Accelerometer Setups
Problem: My machine learning model is failing to classify animal behaviors accurately. I suspect the raw accelerometer data is aliased.
Explanation: Aliasing occurs when an accelerometer is sampled at a rate that is too slow to accurately capture high-frequency movements [60]. High-frequency signals "disguise" themselves as lower, erroneous frequencies that distort the data [60]. For animal studies, this can mean that a quick head shake or a rapid leg movement is misrepresented in the data, making it impossible for ML algorithms to learn the correct patterns.
Solution:
Determine the Required Sampling Rate: First, identify the highest frequency of movement you need to capture for your specific animal and behavior. According to the Nyquist theorem, your sampling rate must be at least twice this maximum frequency [60]. For time-domain analysis (like classifying behavior bouts), a more conservative rate of 10 times the maximum frequency is recommended [60].
- Example: If you are studying goat rumination and need to capture jaw movements with frequencies up to 5 Hz, you should set your sampling rate to at least 50 Hz [60].
Apply an Anti-Aliasing Filter: Before digitization, raw analog acceleration data should be passed through an analog low-pass filter [60]. This filter removes the high-frequency energy that the sampling rate cannot capture, preventing it from aliasing back into your frequency band of interest. Consumer-grade accelerometers often have this built-in [24].
Verify with an Oscilloscope: If possible, view the signal using an oscilloscope set to a high sample rate. This can reveal signal clipping or high-frequency ringing that might be lost or aliased at lower sampling rates used in your main data acquisition system [1].
Guide 2: Addressing Poor Model Performance on Clean Data
Problem: I have verified that my accelerometer data is clean and not aliased, but my ML model's performance is still unsatisfactory.
Explanation: Even with clean data, model performance depends heavily on how the raw data is processed and fed into the algorithm. A lack of informative features or incorrect data segmentation can prevent the model from learning effectively [17].
Solution:
Review and Optimize Data Pre-processing: The pipeline from raw data to model input is critical. A study on dairy goats showed that tuning pre-processing steps for each specific behavior significantly improved prediction models [17].
- Window Segmentation: Choose an appropriate time window for segmenting the continuous data stream. Test different window sizes (e.g., 1s, 5s, 10s) to find the optimal one for capturing a distinct behavioral event [17].
- Feature Engineering: From each data window, extract a wide range of descriptive features that characterize the acceleration signal. These can include statistical features (mean, variance, skewness), frequency-domain features (entropy, spectral energy), and species-specific features [17] [61]. Using automated feature extraction tools (like
tsfresh) can be beneficial [17].
Benchmark with a Simple Algorithm: Start with a straightforward, interpretable algorithm like a Decision Tree or K-Nearest Neighbors (KNN) [62]. This provides a performance baseline. If complex models like Random Forests do not significantly outperform this baseline, the issue likely lies in the data features, not the model's sophistication.
Experiment with Ensemble Methods: If your baseline is strong, move to ensemble algorithms like Random Forest or Gradient Boosting [62]. These are often top performers for activity recognition because they combine multiple weak models to create a single, robust predictor, reducing the risk of overfitting [62].
Frequently Asked Questions (FAQs)
Q1: What is the most suitable machine learning algorithm for classifying behavior from animal accelerometer data?
There is no single "best" algorithm, as performance is context-dependent. However, ensemble methods consistently show high performance. A Random Forest algorithm is an excellent starting point because it is robust to overfitting and can handle complex, high-dimensional feature sets derived from accelerometers [62]. For a more advanced approach, Gradient Boosting machines iteratively improve on previous errors, often leading to state-of-the-art results [62]. It's also effective to use an unsupervised approach like a Hidden Semi-Markov Model (HSMM) to let activity intensity categories emerge from the data without pre-defined labels, which is particularly useful for diverse or rapidly changing populations [61].
Q2: My dataset is large, but I don't have the resources to manually label every data point for supervised learning. What are my options?
You can leverage unsupervised learning algorithms. Techniques like K-means clustering or Hidden Semi-Markov Models (HSMM) do not require pre-labeled data [62] [61]. They identify hidden patterns, structures, and states directly from the raw or pre-processed accelerometer data. A study on children's physical activity found that an HSMM approach correlated more strongly with developmental abilities than traditional supervised methods [61]. You can also use a small, accurately labeled dataset to train a model and then apply it to a larger, unlabeled dataset.
Q3: How can I assess the quality of my accelerometer data before starting extensive ML training?
Initial checks should include:
- Visual Inspection: Plot the raw accelerometer traces for each axis and look for periods of unrealistic values, long stretches of zero values (indicating a removed device), or obvious noise [1].
- Statistical Summary: Generate summary statistics (min, max, mean, standard deviation) for the raw signal. Unexpected values can indicate sensor malfunction or calibration issues.
- Data Cleansing: Use automated tools to detect and handle missing values, duplicates, and outliers that could distort analysis [63] [64]. Ensuring AI-ready data is a foundational step for project success [64].
Experimental Protocols for Benchmarking ML Algorithms
Protocol: Comparing Algorithm Performance on Aliased and Clean Data
Objective: To quantitatively evaluate the performance degradation of common machine learning algorithms when trained on aliased accelerometer data compared to clean data.
Materials:
- Animal subjects (e.g., dairy goats [17] or cattle [65])
- Tri-axial accelerometers (e.g., ActiGraph, Axivity [66])
- Data acquisition system capable of high-frequency recording (≥100 Hz [61])
- Video recording system for ground-truth behavior labeling [17]
- Computing environment with machine learning libraries (e.g., Scikit-Learn, TensorFlow [66])
Methodology:
Data Collection:
- Mount accelerometers on the animals (e.g., ear, ankle, or collar-mounted) [17] [65].
- Record raw tri-axial acceleration at a high sampling rate (e.g., 100 Hz) to ensure a clean, alias-free source dataset [61].
- Simultaneously record video of the animals to serve as ground truth for behavior labeling (e.g., "ruminating," "grazing," "lying") [17].
Data Set Creation:
- Clean Data Set: From the high-frequency raw data, apply an appropriate anti-aliasing digital filter. Then, downsample the data to a suitable rate for behavior analysis (e.g., 25 Hz) to create the clean dataset [60].
- Aliased Data Set: Take the same high-frequency raw data and downsample it to a very low rate (e.g., 5 Hz) without applying an anti-aliasing filter. This artificially introduces aliasing.
- Labeling: Synchronize the video and accelerometer data. Annotate the clean and aliased datasets with behavior labels based on the video evidence [17].
Feature Extraction & Model Training:
- For both datasets, segment the data into windows (e.g., 5-second epochs) and extract features (e.g., mean, standard deviation, FFT coefficients) [17].
- Split both the clean and aliased feature sets into training and testing subsets.
- Train a selection of machine learning algorithms on the training sets of both the clean and aliased data. Recommended algorithms include:
Performance Evaluation:
- Test each trained model on the held-out testing sets.
- Evaluate using metrics like Accuracy, F1-Score, and Area Under the Curve (AUC) [17].
- Record the results in a comparative table.
Expected Outcome: Models trained on clean data will significantly outperform those trained on aliased data across all metrics, demonstrating the critical importance of proper data acquisition.
Performance Comparison of ML Algorithms
Table 1: Hypothetical results showing the performance degradation of various ML algorithms when applied to aliased data compared to clean data. Performance is measured in Area Under the Curve (AUC).
| Machine Learning Algorithm | AUC on Clean Data | AUC on Aliased Data | Performance Drop |
|---|---|---|---|
| Random Forest | 0.95 | 0.72 | 24% |
| Gradient Boosting | 0.94 | 0.70 | 26% |
| Support Vector Machine (SVM) | 0.91 | 0.68 | 25% |
| K-Nearest Neighbors (KNN) | 0.89 | 0.65 | 27% |
Key Research Reagent Solutions
Table 2: Essential materials and tools for accelerometer-based animal behavior research.
| Item | Function in Research | Example Use Case |
|---|---|---|
| Tri-axial Accelerometer | Measures acceleration in three perpendicular planes (X, Y, Z), providing detailed movement data [24]. | Capturing multi-directional movement for complex behavior recognition in goats [17]. |
| Anti-Aliasing Filter | An analog or digital filter that removes high-frequency signal components to prevent aliasing before digitization [60]. | Ensuring data integrity in pyrotechnic shock tests or high-frequency animal movements [60]. |
| Data Processing Software (e.g., GGIR) | Open-source software packages for processing raw accelerometer data, including calibration, filtering, and activity count calculation [66]. | Standardizing data pre-processing pipelines across large cohort studies [66]. |
| Machine Learning Library (e.g., Scikit-Learn) | Provides implemented and tested versions of standard ML algorithms (SVM, Random Forest, K-means) for model development [62] [66]. | Rapid prototyping and benchmarking of different classifiers for behavior detection [17]. |
Workflow and Signal Processing Diagrams
Data Processing for Animal Behavior Recognition
Aliasing Effect on Signal
Frequently Asked Questions (FAQs)
What constitutes a "gold standard" for animal behavior in accelerometer studies? A gold standard refers to the ground-truth behavioral annotations against which accelerometer data is validated. This is typically established by direct observation (e.g., video recording) of the tagged animal, with behaviors cataloged using a predefined ethogram—a comprehensive inventory of defined behaviors [29]. The accuracy of any machine learning model is limited by the quality of this benchmark data [29].
My model performs well on training data but poorly on new data. What is wrong? This is a classic sign of overfitting. It occurs when a model learns the specific details and noise in the training data to the extent that it negatively impacts performance on new data [21]. To address this:
- Ensure Dataset Balance: Standardize the duration of each behavior in your training dataset to prevent the model from being biased towards more frequent behaviors [21].
- Use Robust Models: Employ methods like Random Forest, which are less prone to overfitting by generating multiple decision trees from data subsets [21].
- Independent Validation: Always validate your model's predictions against manually identified behaviors from free-ranging animals, as accuracy can vary significantly between controlled and field settings [21].
How does data sampling frequency (Hz) impact behavior identification? The optimal sampling frequency depends on the specific behaviors of interest [21].
- High-frequency data (e.g., the raw 40 Hz) is superior for identifying fast-paced, rhythmic behaviors like running or locomotion.
- Lower-frequency data (e.g., a mean over 1 second, or 1 Hz) can more accurately identify slower, aperiodic behaviors like grooming or feeding. Using data at different frequencies can affect the accuracy and reliability of your model, so align your sampling rate with your primary behavioral targets [21].
What is the "unit of analysis" and why is it critical for laboratory studies? In laboratory animal experiments, the cage is often the correct unit of statistical analysis, not the individual animal, due to "cage effects"—where animals in the same cage experience a shared environment that influences their behavior [67]. Using the individual animal as the unit when treatments are assigned to entire cages constitutes a Cage-Confounded Design (CCD). This misidentification inflates sample size spuriously (pseudoreplication), narrows confidence limits, reduces p-values, and dramatically increases the probability of false-positive results [67]. Valid designs, such as Completely Randomized Designs (CRD) or Randomized Block Designs (RBD), control for cage effects [67].
Troubleshooting Guide: Common Experimental Pitfalls
Symptoms Your machine learning model has low predictive accuracy (e.g., F-measure) during validation on unseen data.
Probable Causes and Corrective Actions
| Symptom | Probable Cause | Corrective Action |
|---|---|---|
| Low accuracy on new data | Overfitting due to unstandardized training data | Balance your training dataset to include a similar duration of each behavior class to prevent model bias [21]. |
| Poor identification of specific behaviors | Insufficient or non-discriminative features | Calculate additional descriptive variables from the accelerometer data, such as the dominant power spectrum frequency, amplitude, or ratios of Vectoral Dynamic Body Acceleration (VeDBA) to dynamic acceleration [21]. |
| Model fails to generalize to field data | Difference between controlled training and field environments | Validate model predictions against direct observations of free-ranging animals to ensure robustness and ecological validity [21]. |
Problem: Aliasing and Signal Artifacts in Accelerometer Data
Symptoms The collected waveform data appears distorted or contains low-frequency noise that doesn't correspond to actual animal movements.
Probable Causes and Corrective Actions
| Symptom | Probable Cause | Corrective Action |
|---|---|---|
| Signal appears "clipped" or truncated | Sensor overload/Saturation from high-amplitude vibration | The amplifier has saturated and cannot faithfully reflect the measured parameter. Visually, the waveform will look flattened. Consider using a lower sensitivity sensor or a higher power supply voltage if possible [68]. |
| "Ski-slope" spectrum in FFT (low-frequency noise) | Intermodulation distortion from sensor overload | This occurs when a saturated amplifier introduces nonlinearities. Check for severe mechanical sources like cavitation, impacts, or gear meshing. A mounting resonance can also be the root cause [68]. |
| Erratic bias voltage and jumpy time waveform | 1. Poor connections:2. Ground loops:3. Thermal transients: | 1. Check for corroded, dirty, or loose connectors; repair and use non-conducting silicone grease to prevent contamination.2. Ensure the cable shield is grounded at one end only.3. This is sensed by the sensor as a low-frequency signal and is more evident in low-frequency sensors [68]. |
Experimental Protocols & Methodologies
Protocol: Establishing a Gold Standard Benchmark with Video-Observed Ethograms
This protocol outlines the creation of a ground-truth dataset for supervised machine learning, as exemplified by the Bio-logger Ethogram Benchmark (BEBE) [29].
1. Equipment and Data Collection
- Animal-borne Sensors: Tri-axial accelerometers (and optionally gyroscopes) recording at a high frequency (e.g., 40 Hz).
- Video Recording System: A synchronized camera system to record the subject's behavior during accelerometer data collection.
- Ethogram: A predefined, mutually exclusive list of behavioral states (e.g., resting, locomotion, feeding, grooming).
2. Procedure
- Deploy Tags: Equip study animals with the bio-loggers.
- Record Synchronized Data: Simultaneously record accelerometer data and video footage.
- Annotate Behaviors: A human expert annotates the video footage, labeling the behavior at each time point according to the ethogram. These labels are then synchronized with the accelerometer data streams.
- Create Benchmark Dataset: The combined dataset of sensor data and behavioral annotations forms the benchmark. BEBE, for instance, comprises 1654 hours of data from 149 individuals across nine taxa [29].
The workflow for this process is standardized as follows:
Protocol: Designing a Valid Laboratory Animal Experiment
To avoid the pitfalls of Cage-Confounded Designs (CCD), use a Randomized Complete Block Design (RCBD), which controls for cage effects [67].
1. Experimental Design
- Blocking: Treat each cage as a "block."
- Assignment: Randomly assign one animal from each treatment group to each cage. For example, if you have four treatments, each cage houses four animals, each receiving a different treatment.
- Blinding: The investigators must be blinded to the identity of the treatment groups until after data analysis is complete.
- Unit of Analysis: The individual animal is the correct unit of analysis because each treatment is represented within every cage (block).
2. Procedure
- Acclimatization: Allow animals to acclimate to the facility and caging.
- Randomization: Randomly assign animals to cages and treatments to cages as described.
- Conduct Experiment: Perform the experimental procedures (e.g., administering a vaccine or drug).
- Data Analysis: Analyze data using a two-way ANOVA, with treatment and cage (block) as the factors of interest [67].
The logical structure of a valid experimental design that controls for cage effects is as follows:
Data Presentation
Key Factors Influencing Model Accuracy
A study on domestic cats (Felis catus) tested how data processing influences the predictive accuracy of Random Forest models. The table below summarizes the findings [21].
| Data Processing Factor | Description | Impact on Model Accuracy |
|---|---|---|
| Additional Descriptive Variables | Adding metrics like dominant power spectrum frequency, amplitude, and ratios of VeDBA. | Improved explanatory power and specificity of behaviors, enhancing accuracy [21]. |
| Altered Data Frequencies | Comparing raw high-frequency data (40 Hz) vs. mean over 1 second (1 Hz). | 40 Hz: Better for fast-paced locomotion.1 Hz: Better for slower, aperiodic behaviors (grooming, feeding) [21]. |
| Standardized Durations of Behaviors | Balancing the training dataset so each behavior class has a similar number of examples. | Prevents model bias toward over-represented behaviors and improves prediction of infrequent behaviors [21]. |
Composition of the Bio-logger Ethogram Benchmark (BEBE)
The BEBE benchmark is a concrete example of a gold-standard resource for comparing machine learning techniques [29].
| Benchmark Metric | Specification |
|---|---|
| Total Duration | 1654 hours of data [29] |
| Individuals | 149 individuals [29] |
| Taxonomic Diversity | 9 different taxa [29] |
| Primary Sensor | Tri-axial accelerometers (TIA), with some datasets including gyroscopes and environmental sensors [29] |
| Model Performance Finding | Deep neural networks outperformed classical machine learning methods across all nine datasets. Self-supervised learning pre-training was especially effective when training data was limited [29]. |
The Scientist's Toolkit: Essential Research Reagents & Materials
| Item | Function in Behavioral Research |
|---|---|
| Tri-axial Accelerometer | The primary sensor for measuring dynamic body acceleration and posture, providing the raw kinematic data used for behavior inference [29] [21]. |
| Synchronized Video System | Critical for establishing ground truth; allows expert annotation of behaviors that are directly linked to the recorded sensor data streams [29] [21]. |
| Predefined Ethogram | A standardized inventory of defined behavioral states (e.g., "resting," "grooming," "feeding"). Ensures consistency in behavioral annotation across observers and time [29]. |
| Randomized Complete Block Design (RCBD) | An experimental design that controls for "cage effects" by assigning one animal from each treatment group to each cage, ensuring the individual animal is the correct unit of analysis [67]. |
| Self-Supervised Learning Model | A machine learning approach where a model is first pre-trained on a large corpus of unlabeled data (e.g., human accelerometer data) to learn general features, then fine-tuned on a smaller, labeled animal dataset. This can boost performance, especially with limited training data [29]. |
Assessing Model Generalizability Across Species, Breeds, and Environmental Contexts
Frequently Asked Questions (FAQs)
Q1: What is the most common cause of poor model performance when applying an existing accelerometer-based behavior classification model to a new species? The most frequent cause is a mismatch between the sampling frequency of the original model and the kinematic characteristics of the new species' behavior. For instance, a model trained on flight data (a long-endurance, rhythmic movement) sampled at 12.5 Hz will fail to accurately classify short-burst behaviors in a new species, such as a swallow feeding, which requires a sampling frequency of 100 Hz to capture its mean frequency of 28 Hz [6]. The key is to ensure the sampling frequency meets the Nyquist-Shannon criterion for the fastest behavior of interest, which states that the sampling rate should be at least twice the frequency of the movement [6].
Q2: How much can tag placement affect my acceleration metrics, and how do I control for this when comparing across studies? Tag placement can significantly affect acceleration metrics. Studies have shown that device position can cause variations in Dynamic Body Acceleration (DBA), a common proxy for energy expenditure, of 9% to 13% in birds, depending on whether tags are mounted on the upper back, lower back, or tail [35]. This variation can be large enough to generate trends with no biological meaning. To control for this:
- Standardize Protocols: Use a consistent attachment method and position within a study [35].
- Calibrate Devices: Perform a simple field calibration before deployment to correct for sensor inaccuracies that can cause further signal deviation [35].
- Report Methodology Thoroughly: Always document the exact tag type, attachment method, and position on the animal to enable critical evaluation of cross-study comparisons [35] [69].
Q3: My model works well in captive animals but fails in the wild. What environmental factors should I investigate? This is a classic issue of generalizability. The controlled conditions of captivity often lack the behavioral complexity and environmental challenges of the wild. Key factors to investigate include:
- Substrate and Terrain: Movement on rugged, uneven, or slippery natural terrain creates different acceleration signals than on flat, captive enclosure surfaces [70].
- Behavioral Context and Energetic Demands: Foraging, escaping predators, and territorial disputes in the wild involve more intense and varied movements than are typically observed in captivity [70] [69].
- Data Volume and Diversity: Captive observations may not capture the full repertoire or duration of natural behaviors, leading to models that are overfitted to a limited set of actions [70].
Q4: What is the minimum number of animals and observations needed to build a generalizable model for a new species? While there is no universal number, the goal is to capture the within-species variability in performing behaviors. The study on Eurasian beavers, which successfully classified seven behaviors, provides a good template. They used a combination of 12 free-ranging animals and 4 captive control animals [69]. The captive animals provided meticulously annotated data for model training, while the data from wild animals helped capture natural behavioral variation. It is critical to have a sufficient number of high-fidelity, labeled examples for each behavior you wish to classify [69].
Q5: How can I handle missing accelerometer data in a way that does not bias my energy expenditure estimates? Missing data is ubiquitous in biologging. The best approach is a multi-step process:
- Define Missingness: Establish rules to distinguish device non-wear (true missing data) from periods of inactivity (valid zero acceleration) [71].
- Use Principled Statistical Methods: Simple methods like complete-case analysis can be biased. Instead, use Multiple Imputation (MI) to generate plausible values for missing data points based on the observed data patterns [71].
- Incorporate Auxiliary Variables: Strengthen your imputation model by including variables like time of day, weather, or previous activity levels to make the missing-at-random assumption more plausible [71] [72].
Troubleshooting Guides
Problem: Model fails to classify short-duration, high-frequency behaviors.
| Potential Cause | Recommended Action | Expected Outcome |
|---|---|---|
| Insufficient sampling frequency leading to aliasing [6]. | 1. Determine the frequency of the fastest behavior of interest.2. Set your sampling frequency to at least twice this value (the Nyquist frequency). For amplitude estimation, use 4 times the signal frequency [6]. | Accurate capture of rapid transient movements, such as swallowing or prey capture manoeuvres. |
| Analysis window too long, smoothing out brief behavioral events [6]. | Shorten the data segmentation window used for feature extraction and classification to match the time scale of the target behavior. | The model becomes sensitive to brief, important behavioral events rather than averaging them out. |
Problem: High error in energy expenditure (e.g., DBA/ODBA) estimates when comparing different tag models or deployments.
| Potential Cause | Recommended Action | Expected Outcome |
|---|---|---|
| Uncalibrated accelerometers introducing sensor-level error [35]. | Perform a pre-deployment 6-orientation (6-O) calibration [35]. Place the tag motionless in six orientations (e.g., like the faces of a die) and correct the raw acceleration values so the vector sum is 1g in all positions. | Eliminates a fundamental source of sensor inaccuracy, reducing errors in DBA by up to 5% [35]. |
| Inconsistent tag placement on the animal's body [35]. | 1. Standardize the attachment procedure and position for all individuals in a study.2. If comparing across studies with different placements, treat the data as coming from different "sensors" and validate the relationship between the metrics (e.g., back-DBA vs. tail-DBA) [35]. | Reduces within-study noise and provides a basis for cross-study data harmonization. |
Problem: Model trained on one species performs poorly on another, even with similar locomotor modes.
| Potential Cause | Recommended Action | Expected Outcome |
|---|---|---|
| Species-specific movement signatures despite similar behavior labels (e.g., "walking" differs between a beaver and a goat) [70] [69]. | 1. Do not assume direct transferability. Collect a small, labeled dataset from the target species.2. Use transfer learning techniques: retrain the final layers of your pre-trained model using the new species' data. | The model adapts to the unique kinematic signature of the new species, improving classification accuracy without requiring a massive new dataset. |
| Differences in body size and morphology affecting acceleration dynamics. | Include morphometric data (e.g., body mass, limb length) as covariates in your model, or normalize acceleration signals by body size parameters. | The model accounts for allometric scaling, improving generalizability across a wider range of body sizes. |
Experimental Protocols for Key Validation Experiments
Protocol 1: Determining the Minimum Sampling Frequency for a New Species
Objective: To empirically determine the appropriate accelerometer sampling frequency for classifying all behaviors of interest in a new study species, thereby preventing aliasing and ensuring model generalizability.
Materials:
- High-speed video camera (e.g., >90 fps [6]).
- Accelerometer loggers capable of high-frequency sampling (e.g., ≥100 Hz).
- Synchronization tool between video and accelerometer.
Methodology:
- Setup: Equip a subject animal (captive or wild) with an accelerometer logger set to its highest sampling frequency (e.g., 100 Hz). Simultaneously, record its behavior using a synchronized high-speed video camera [6].
- Data Collection: Record a session where the animal freely performs its full repertoire of behaviors, with a focus on identifying the fastest, shortest-duration actions (e.g., swallowing, foot scratches, wingbeats).
- Video Annotation: Use the video to identify the start and end times of specific behaviors and create a ground-truth dataset [6] [69].
- Data Analysis:
- Identify Maximum Frequency: For each behavior, calculate the dominant frequency from the raw high-frequency accelerometer data using a Fast Fourier Transform (FFT).
- Down-sampling Test: Down-sample your original high-frequency dataset to lower frequencies (e.g., 50 Hz, 25 Hz, 12.5 Hz).
- Performance Comparison: Build behavior classification models on each down-sampled dataset and compare their accuracy against the video-annotated ground truth.
Decision Workflow: The following diagram outlines the logical process for determining the correct sampling frequency.
Protocol 2: Multi-Species Model Validation with Captive Controls
Objective: To validate the generalizability of an accelerometer-based behavior classification model across multiple species or breeds.
Materials:
- Tri-axial accelerometer loggers.
- Video recording equipment.
- Captive individuals of the target species (for controlled labeling) [69].
Methodology:
- Controlled Data Collection (Captive): Deploy accelerometers on captive individuals of each target species. Record synchronized video to create a meticulously labeled dataset for each species. This serves as your training and initial validation set [69].
- Model Training and Testing:
- Species-Specific Model: Train a model using data from Species A and test it on held-out data from Species A.
- Cross-Species Model: Train a model using data from Species A and test it directly on data from Species B.
- Mixed-Species Model: Train a single model using a combined dataset from both Species A and Species B, then test on both.
- Field Validation (Free-Ranging): Deploy the best-performing model(s) from step 2 on free-ranging individuals of both species. If possible, collect a small amount of validation data in the wild (e.g., through direct observation or short-term video) to assess real-world performance [69].
- Analysis: Compare the accuracy, precision, and recall of the different models. The drop in performance from the species-specific to the cross-species model quantifies the "generalizability gap."
The Scientist's Toolkit: Essential Research Reagents & Materials
| Item | Function & Application | Key Considerations |
|---|---|---|
| Tri-axial Accelerometer Logger [70] [69] | Measures acceleration in three dimensions (surge, sway, heave) to capture posture and movement dynamics. The core sensor for behavior and energy expenditure studies. | Select based on size/weight, sampling frequency, memory/battery life, and output resolution (e.g., 8-bit vs. 12-bit) [6] [70]. |
| High-Speed Video Camera [6] | Provides ground-truth data for validating accelerometer signals and labeling behaviors for supervised machine learning. | Temporal resolution (frames-per-second) must be high enough to resolve the fastest behaviors of interest [6]. |
| Synchronization Device [6] | Aligns accelerometer data streams with video recordings in time, enabling precise matching of signals to behaviors. | Can be a custom electronic trigger [6] or a shared, visible event (e.g., a sharp tag movement) recorded by both systems. |
| Calibration Jig [35] | A platform to hold the accelerometer logger motionless in precise, known orientations for the 6-O calibration method. | Corrects for sensor bias and scale factor errors, which is critical for accurate DBA calculation and cross-device comparisons [35]. |
| Leg-Loop or Backpack Harness [6] [69] | A standardised method for attaching loggers to the animal, minimizing movement artefact and ensuring consistent sensor placement. | Must be designed to minimize welfare impact and avoid affecting natural behavior. Placement (e.g., back vs. tail) significantly impacts the signal [35] [69]. |
Conclusion
Effectively addressing accelerometer data aliasing is not merely a technical exercise but a fundamental requirement for ensuring data integrity in animal studies, with direct implications for the reliability of preclinical research in drug development. A proactive approach, combining appropriate sampling rates, robust study design, and thorough validation, is paramount. Future directions should focus on the development of standardized protocols for different animal models, the creation of larger, shared datasets for algorithm training, and the integration of advanced sensor technologies that minimize aliasing risks. By adopting these practices, researchers can generate more accurate and reproducible behavioral endpoints, ultimately strengthening the translational value of animal studies and accelerating the development of new therapeutics.
References
- 1. What's Wrong With My Accelerometer? [https://www.modalshop.com/calibration/learn/accelerometers/what-bad-what-wrong]
- 2. The statistical building blocks of animal movement simulations [https://movementecologyjournal.biomedcentral.com/articles/10.1186/s40462-024-00507-4]
- 3. Quantification of acceleration as activity counts in ... [https://www.nature.com/articles/s41598-022-16003-x]
- 4. Leveraging Accelerometry as a Prognostic Indicator for ... [https://pmc.ncbi.nlm.nih.gov/articles/PMC9688173/]
- 5. Nyquist–Shannon sampling theorem [https://en.wikipedia.org/wiki/Nyquist%E2%80%93Shannon_sampling_theorem]
- 6. Accelerometer sampling requirements for animal behaviour ... [https://animalbiotelemetry.biomedcentral.com/articles/10.1186/s40317-023-00339-w]
- 7. How to Avoid Big Errors Using Accelerometers [https://www.volersystems.com/blog/sensors/125-how-to-avoid-big-errors-using-accelerometers]
- 8. 20 Image Sampling and Aliasing [https://visionbook.mit.edu/sampling_and_aliasing.html]
- 9. Aliasing Effects in Digital MEMS Accelerometers ... [https://www.analog.com/en/resources/technical-articles/elusive-tones-aliasing-effects-in-digital-mems-accelerometers-in-condition-monitoring.html]
- 10. Sample Rate & Aliasing [https://endaq.com/pages/sample-rate-aliasing?srsltid=AfmBOopEVHJwIvEl_fFNGRVzGO6GSKtD7rlYiJqgi5UCc6pX2zQJl4oH]
- 11. Sample Rate & Aliasing [https://endaq.com/pages/sample-rate-aliasing?srsltid=AfmBOor0qwNkWqtQz_-KqWLOb7jR_ici1hgalXAPwHu5UIggeq2hNxxR]
- 12. Predicting livestock behaviour using accelerometers [https://www.sciencedirect.com/science/article/pii/S016816992100627X]
- 13. Classification of individual dairy cow behaviors using ... [https://bmcvetres.biomedcentral.com/articles/10.1186/s12917-025-05092-1]
- 14. Calibration and validation of accelerometer-based activity ... [https://www.sciencedirect.com/science/article/pii/S0966636218313092]
- 15. Validation of Accelerometry Data to Identify Movement ... [https://pmc.ncbi.nlm.nih.gov/articles/PMC7739769/]
- 16. A Case Study Using Accelerometers to Identify Illness in ... [https://pmc.ncbi.nlm.nih.gov/articles/PMC8833334/]
- 17. A pipeline with pre-processing options to detect behaviour ... [https://peercommunityjournal.org/articles/10.24072/pcjournal.545/]
- 18. Validation of an accelerometer system for measuring ... [https://pmc.ncbi.nlm.nih.gov/articles/PMC10460328/]
- 19. How to Prevent Aliasing in Digital MEMS Sensors [https://www.digikey.com/en/articles/how-to-prevent-aliasing-in-digital-mems-sensors]
- 20. Sample Rate & Aliasing [https://endaq.com/pages/sample-rate-aliasing?srsltid=AfmBOop_KeDOHY4SiK-_KwKrQatSiXc5sDayufr-OxWt4ay8-PIkBV0d]
- 21. Identifying animal behaviours from accelerometers [https://pmc.ncbi.nlm.nih.gov/articles/PMC11097004/]
- 22. Comparing the accuracy of machine learning methods for ... [https://animalbiotelemetry.biomedcentral.com/articles/10.1186/s40317-025-00401-9]
- 23. Analysis of dog movement using a single accelerometer in ... [https://www.frontiersin.org/journals/veterinary-science/articles/10.3389/fvets.2025.1551341/full]
- 24. Physical Activity Monitors in Companion Animal Chronic ... [https://pmc.ncbi.nlm.nih.gov/articles/PMC12291673/]
- 25. Spatiotemporal Mapping of Grazing Livestock Behaviours ... [https://pmc.ncbi.nlm.nih.gov/articles/PMC12349537/]
- 26. Practical guidelines for validation of supervised machine ... [https://pmc.ncbi.nlm.nih.gov/articles/PMC12214441/]
- 27. harnessing ear tag device behavioral data for pregnancy ... [https://www.frontiersin.org/journals/animal-science/articles/10.3389/fanim.2025.1547395/full]
- 28. Review of Sensor Technologies, DC-DC Converters, and ... [https://www.sciencedirect.com/science/article/pii/S2590123025040265]
- 29. A benchmark for computational analysis of animal behavior ... [https://movementecologyjournal.biomedcentral.com/articles/10.1186/s40462-024-00511-8]
- 30. Head Mounted Animal Telemetry Future-proof Strategies [https://www.archivemarketresearch.com/reports/head-mounted-animal-telemetry-206250]
- 31. Evaluation of experimental error in accelerometer monitoring [https://www.sciencedirect.com/science/article/pii/S2772375524000376]
- 32. Sample Rate & Aliasing [https://endaq.com/pages/sample-rate-aliasing?srsltid=AfmBOorlmKEHP0ODuAn9EGLHrm01k9kO3uD9f2OgvVgw21Wadms_I4uc]
- 33. Accelerometer Data Collection and Processing Criteria to ... [https://pmc.ncbi.nlm.nih.gov/articles/PMC6231536/]
- 34. Raw vs Jpg Difference [https://chrisbrayphotography.com/tips/raw_vs_jpg.php]
- 35. Ecological inference using data from accelerometers ... [https://pmc.ncbi.nlm.nih.gov/articles/PMC9303593/]
- 36. from an Acquire - MATLAB & Simulink Data Accelerometer [https://ww2.mathworks.cn/help/daq/acquire-data-from-an-accelerometer.html]
- 37. Solved: Accelerometer - NI Community data acquisition [https://forums.ni.com/t5/Multifunction-DAQ/Accelerometer-data-acquisition/td-p/4312675]
- 38. DATA ACQUISITION (DAQ) SYSTEM SELECTION [https://endaq.com/pages/data-acquisition-daq-system-selection?srsltid=AfmBOoqI24e17ixcdB435AvA8RMZYcmFinx9RN1HVXZClLAzQv37IVax]
- 39. Data paper: A goat behaviour dataset combining labelled ... [https://www.sciencedirect.com/science/article/pii/S2772694025000044]
- 40. Comparative Evaluation of ECG and Motion Signals in the ... [https://pmc.ncbi.nlm.nih.gov/articles/PMC12526925/]
- 41. Increasingly detailed insights in animal behaviours using ... [https://movementecologyjournal.biomedcentral.com/articles/10.1186/s40462-022-00341-6]
- 42. Deep neural network valve detection for accelerometer ... [https://www.nature.com/articles/s41598-025-00845-2]
- 43. Dynamic Signal Analysis Review - Aliasing Frequency [https://dataphysics.com/blog/dynamic-signal-analysis/dynamic-signal-analysis-review-part-3-aliasing/]
- 44. Aliasing [https://en.wikipedia.org/wiki/Aliasing]
- 45. Aliasing Effect [https://www.geeksforgeeks.org/electronics-engineering/aliasing-effect/]
- 46. What are aliasing errors? Are they hard to detect? [https://www.tek.com/en/support/faqs/what-are-aliasing-errors-are-they-hard-detect]
- 47. ABAQUS/CAE User's Manual (v6.6) [https://classes.engineering.wustl.edu/2009/spring/mase5513/abaqus/docs/v6.6/books/usi/pt06ch43s01.html]
- 48. Aliasing Effects in Digital MEMS Sensors [https://www.enrgtech.co.uk/blog/aliasing-effects-in-digital-mems-sensors/?srsltid=AfmBOopYLgMiPMrIShyUecFfqXVGs0rwA7mTE7N5KYZtXBwiJwpV8htV]
- 49. Anti-Aliasing Filters and Their Usage Explained [https://www.ni.com/en/shop/data-acquisition/measurement-fundamentals/analog-fundamentals/anti-aliasing-filters-and-their-usage-explained.html?srsltid=AfmBOoqlXX9NKVGIppMnOlQRCMB0YZmu7_DOKaZl8jyp1y1WgjKtcE_L]
- 50. Anti-aliasing filter [https://en.wikipedia.org/wiki/Anti-aliasing_filter]
- 51. Anti-aliasing Filter Design and Applications in Sampling [https://resources.pcb.cadence.com/blog/2020-anti-aliasing-filter-design-and-applications-in-sampling]
- 52. Comparative Analysis of Machine Learning Techniques for ... [https://www.mdpi.com/1424-8220/24/20/6675]
- 53. Improving Noise Robustness through Abstractions and its ... [https://arxiv.org/html/2406.08428v1]
- 54. A Hybrid Algorithm for Noise Suppression of MEMS ... [https://pmc.ncbi.nlm.nih.gov/articles/PMC9229132/]
- 55. Data-driven denoising of stationary accelerometer signals [https://www.sciencedirect.com/science/article/pii/S0263224123007820]
- 56. A Robust Feature Extraction Model for Human Activity ... [https://pubmed.ncbi.nlm.nih.gov/33297389/]
- 57. Quality Control Methods in Accelerometer Data Processing [https://pmc.ncbi.nlm.nih.gov/articles/PMC3890298/]
- 58. Battery Limitations for Wearable Devices [https://www.volersystems.com/blog/ultra-low-power/battery-limitations-wearable-devices]
- 59. Accelerometer Comparison Sheet (2024) for Longitudinal ... [https://web.fibion.com/articles/accelerometer-longitudinal-study-guide/]
- 60. Sample Rate & Aliasing [https://endaq.com/pages/sample-rate-aliasing?srsltid=AfmBOop4meG1o8ngAHHq0iLUWIWQb6sXqTVRoA1ZEGxLeT6Ja2GjDukK]
- 61. Using unsupervised machine learning to quantify physical ... [https://pmc.ncbi.nlm.nih.gov/articles/PMC10075441/]
- 62. 10 Machine Learning Algorithms to Know in 2025 [https://www.coursera.org/articles/machine-learning-algorithms]
- 63. The Role of Machine Learning in Data Cleaning [https://numerous.ai/blog/machine-learning-data-cleaning]
- 64. AI Starts with Clean Data: Key Steps to Achieve It 2025 [https://tkxel.com/blog/ai-starts-with-clean-data/]
- 65. Use of animal-mounted accelerometers to identify positive ... [https://dairysciencemanagement.biomedcentral.com/articles/10.1186/s44363-025-00018-6]
- 66. Applying Machine Learning to Accelerometry Data [https://web.fibion.com/articles/machine-learning-accelerometry-data/]
- 67. A call to action to address critical flaws and bias in ... [https://www.nature.com/articles/s41598-025-15935-4]
- 68. Accelerometer Troubleshooting [https://skftechnicalsupport.zendesk.com/hc/en-us/articles/1500001563501-Accelerometer-Troubleshooting]
- 69. The Use of Acceleration to Code for Animal Behaviours; A Case Study in Free-Ranging Eurasian Beavers Castor fiber - PMC [https://pmc.ncbi.nlm.nih.gov/articles/PMC4552556/]
- 70. Observing the unwatchable through acceleration logging of animal behavior | Animal Biotelemetry | Full Text [https://animalbiotelemetry.biomedcentral.com/articles/10.1186/2050-3385-1-20]
- 71. A framework for handling missing accelerometer outcome ... [https://trialsjournal.biomedcentral.com/articles/10.1186/s13063-021-05284-8]
- 72. Considerations to address missing data when deriving ... [https://www.sciencedirect.com/science/article/pii/S1551714421003979]