Developing and Testing Ecological Indicators: A Comprehensive Guide for Environmental Researchers and Risk Assessment
This article provides a systematic framework for the development, testing, and validation of ecological indicators for researchers and environmental professionals.
Developing and Testing Ecological Indicators: A Comprehensive Guide for Environmental Researchers and Risk Assessment
Abstract
This article provides a systematic framework for the development, testing, and validation of ecological indicators for researchers and environmental professionals. Covering foundational concepts to advanced applications, it explores how indicator species reflect environmental conditions and integrate cumulative ecosystem effects. The content examines selection criteria based on conceptual soundness, feasibility, and response variability, alongside practical methodologies for processing complex assemblage data using statistical tools. It addresses common challenges in implementation and offers optimization strategies, while establishing robust validation protocols and comparative assessment frameworks. Particularly relevant for pharmaceutical and synthetic drug production impact assessment, this guide synthesizes current research trends and technological advancements to support effective ecological monitoring and risk management decisions.
The Science Behind Ecological Indicators: Foundations and Selection Criteria
Technical Troubleshooting Guides
Guide: Addressing Poor Correlation Between Indicator Values and Measured Environmental Parameters
Problem: Calculated mean ecological indicator values (EIVs) show a weak or unexpected correlation with in-situ measured environmental parameters (e.g., soil pH, temperature).
Solution: This is often related to the choice of the EIV system or the weighting method used to calculate the mean values [1].
- Step 1: Verify the EIV System Coverage. Check if the EIV system you are using contains indicator values for a high percentage of the taxa in your vegetation plots. Systems with low coverage can lead to biased results. The Ecological Indicator Values for Europe (EIVE) 1.0 system, with values for 14,835 taxa, is recommended to minimize this issue [1].
- Step 2: Re-calculate Mean EIVs Using an Unweighted Approach. Research indicates that using an unweighted (presence-based) mean often performs as well as or better than cover-weighted means. Re-run your analysis using the simple arithmetic mean of species EIVs, as this approach effectively leverages the "wisdom of the crowd" by incorporating data from more taxa [1].
- Step 3: Compare Systems if Necessary. If the correlation remains poor, compare results using a different, well-established regional EIV system (e.g., Landolt for the Alps) to see if it better captures local conditions [1].
Guide: Interpreting Weak or Inconsistent Signals from Biological Indicators in Aquatic Toxicity Testing
Problem: Results from aquatic toxicity tests using bioindicators are unclear or do not show a clear dose-response relationship with a chemical stressor.
Solution: This can arise from issues with test organism sensitivity, experimental conditions, or endpoint measurement [2].
- Step 1: Confirm Test Organism Sensitivity and Health. Ensure the test organisms (e.g., freshwater shrimp, mayfly larvae) are appropriate for the pollutant of concern and are healthy at the start of the test. Species vary greatly in tolerance; for example, mayfly larvae indicate clean water, while sludge worms tolerate high pollution [2].
- Step 2: Standardize Experimental Conditions. Closely control and monitor water quality parameters, as they can influence toxicity. Key parameters to check include:
- Step 3: Verify Endpoint Measurement. For acute toxicity tests like LC50 (lethal concentration for 50% of test organisms) and EC50 (effective concentration for 50%), ensure the exposure duration (e.g., 96 hours for LC50) is strictly followed and that the endpoints (death, immobility) are consistently and accurately recorded [2].
Frequently Asked Questions (FAQs)
Q1: What exactly are ecological indicators, and why are they significant? A1: Ecological indicators are measurable characteristics of an ecosystem that provide information about its condition, trends, or responses to environmental changes or stressors [3]. Their significance lies in simplifying complex ecological data, allowing policymakers, scientists, and managers to identify conservation priorities, monitor policy effectiveness, and anticipate emerging environmental issues [3].
Q2: What are the main types of ecological indicators? A2: Indicators can be broadly categorized as follows [3]:
| Type of Indicator | Characteristics | Examples |
|---|---|---|
| Biological Indicators | Measure the presence, abundance, or health of specific species or communities. | Species population trends, community composition, biodiversity indices [3]. |
| Chemical Indicators | Measure the concentration of specific chemicals or pollutants in the environment. | Nutrient levels (e.g., nitrates), pH, heavy metal concentrations [3] [2]. |
| Physical Indicators | Measure physical properties of the environment. | Water temperature, sediment quality, habitat structure [3]. |
Q3: What are the common challenges when using indicator species? A3: Key challenges and pitfalls include [2]:
- Oversimplification: Judging an ecosystem's health based on a single indicator species may not be sufficient.
- Correlation vs. Causation: It can be difficult to ensure a scientifically sound link between the indicator and the environmental condition.
- Survey Difficulty: Some indicator species can be time-consuming or difficult to identify and monitor effectively.
Q4: What is the difference between 'LC50' and 'EC50' in ecotoxicity testing? A4: Both are measures of toxicity [2]:
- LC50 (Lethal Concentration 50): This is the concentration of a substance that is lethal to 50% of the test organisms within a specified time, typically 96 hours for acute tests.
- EC50 (Effective Concentration 50): This is the concentration that causes a specific, non-lethal effect (e.g., immobility, loss of fertility) in 50% of the test population.
Q5: Which new European EIV system is recommended for pan-European studies? A5: The Ecological Indicator Values for Europe (EIVE) 1.0 is a comprehensive system designed for this purpose. With indicator values for 14,835 vascular plants, it offers broader taxonomic and geographic coverage than many regional systems and has been shown to provide excellent performance in predicting site conditions like soil pH and temperature [1].
Experimental Protocols & Methodologies
Protocol: Calculating and Validating Mean Ecological Indicator Values (EIVs)
Purpose: To assess site conditions (e.g., soil pH, moisture, temperature) using the flora present in a vegetation plot.
Principle: The mean EIV for a site is calculated from the individual EIVs of all plant species present, based on the concept that the plant community composition reflects the integrated environmental conditions of that site [1].
Materials:
- Dataset of vegetation plots (species occurrence and/or cover data).
- A calibrated EIV system (e.g., EIVE 1.0 database).
- Statistical software (e.g., R, Python).
Procedure:
- Data Preparation: Compile your list of species recorded in the vegetation plot. Taxonomically match species names to the EIV system being used.
- EIV Assignment: Assign the relevant EIV (e.g., for soil pH) to each species from the chosen EIV system.
- Calculate Mean EIV: Calculate the mean indicator value for the plot. Research suggests using an unweighted mean (presence/absence of species) is effective [1]. The formula is: ( E = \frac{\sum{i=1}^{n} xi}{n} ) Where ( E ) is the mean ecological indicator, ( x_i ) is the EIV of the ( i^{th} ) species, and ( n ) is the number of species with an EIV in the plot.
- Validation: Validate the calculated mean EIV by correlating it (e.g., using Pearson's correlation coefficient) with directly measured environmental parameters from the same plots [1].
Protocol: Conducting an Acute Aquatic Toxicity Test (LC50)
Purpose: To determine the concentration of a chemical that is lethal to 50% of a test population of aquatic organisms under defined conditions.
Principle: Test organisms are exposed to a range of concentrations of the test chemical for a fixed period (e.g., 96 hours). Mortality is recorded, and the LC50 is calculated statistically [2].
Materials:
- Test Organisms: Healthy, same-age juveniles or adults of a standard species (e.g., Daphnia magna, fathead minnow).
- Test Chemical: Stock solution of known concentration.
- Dilution Water: Clean, dechlorinated water with known pH, hardness, and alkalinity.
- Test Chambers: Glass or plastic containers of sufficient volume.
- Aeration System: To maintain dissolved oxygen.
- Water Quality Kits: For measuring temperature, pH, and dissolved oxygen.
Procedure:
- Acclimation: Acclimate test organisms to the test conditions for at least 48 hours.
- Range-Finding Test: Perform a preliminary test with a wide range of concentrations to determine the approximate LC50.
- Definitive Test: Prepare a geometric series of at least five test concentrations and a control. Randomly assign organisms to each chamber.
- Exposure & Monitoring: Expose organisms for 96 hours. Do not feed during the test. Monitor and record water quality (temperature, pH, DO) daily.
- Data Recording: Record the number of dead organisms in each chamber at 24, 48, 72, and 96 hours. Define death operationally (e.g., lack of movement upon gentle prodding).
- Data Analysis: Calculate the LC50 value with 95% confidence limits using an appropriate statistical method (e.g., Probit analysis, Spearman-Karber method).
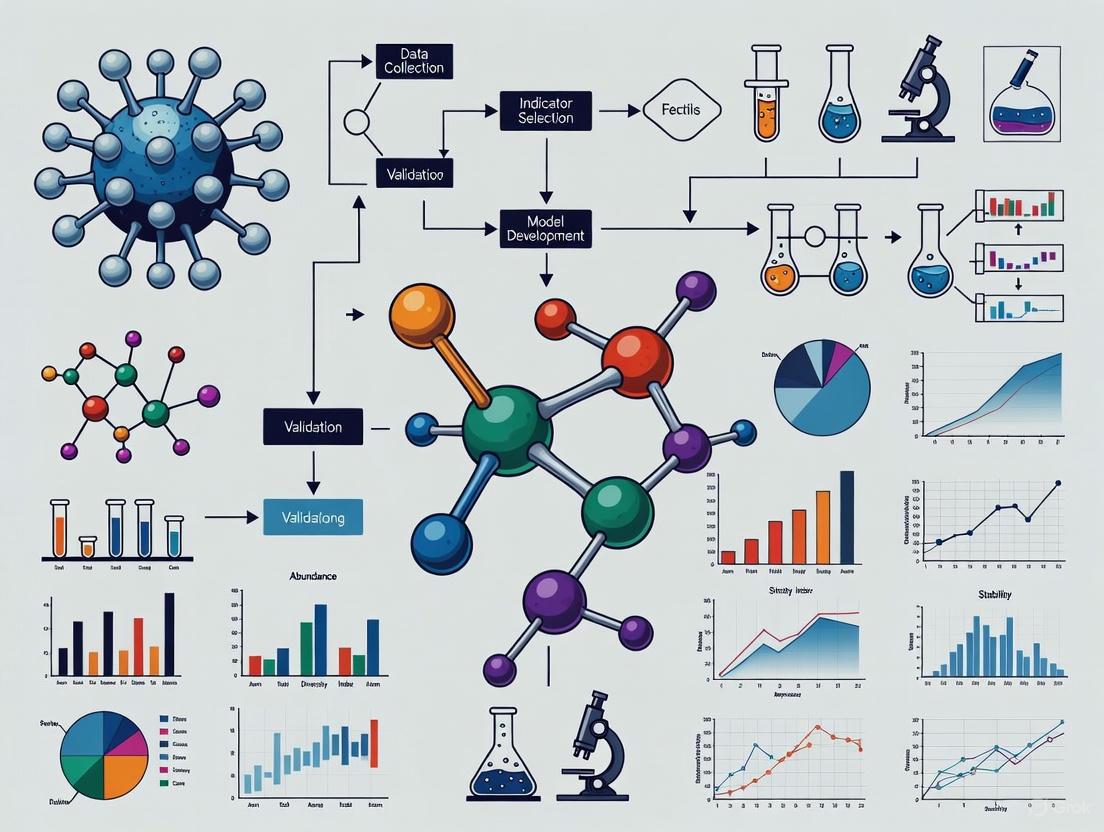
Workflow Visualization: Ecological Indicator Development and Application
Ecological Indicator Application Workflow
The Scientist's Toolkit: Essential Research Reagents & Materials
Table: Essential Materials for Ecological Indicator Research
| Item | Function & Application |
|---|---|
| EIV Database (e.g., EIVE 1.0) | Provides standardized ecological indicator values for vascular plant species, enabling the assessment of site conditions based on vegetation surveys [1]. |
| Standard Test Organisms (e.g., Daphnia, Fathead Minnow, Freshwater Shrimp) | Used in controlled aquatic toxicity tests (LC50/EC50) to determine the biological impact and safe levels of pollutants [2]. |
| Water Quality Probe (Measures DO, pH, Temperature, Conductivity) | Essential for monitoring and maintaining standardized conditions in aquatic experiments and for using these parameters as chemical/physical indicators of ecosystem health [2]. |
| Lichens and Mosses | Act as sensitive biological indicators (bioindicators) for air quality and heavy metal pollution, as they absorb nutrients and contaminants directly from the atmosphere [2]. |
| Benthic Macroinvertebrates (e.g., Mayfly, Stonefly, and Caddisfly Larvae) | Used in stream and river health assessments. The presence/absence and diversity of these organisms are key biological indicators of water pollution levels [2]. |
FAQs: Core Concepts and Troubleshooting
Q1: What precisely is an indicator species, and what defines a good one? An indicator species is an organism whose presence, absence, abundance, or physiological health provides information about the condition of an ecosystem or a specific environmental factor [4]. Good indicator species are characterized by [5] [4] [6]:
- Specificity: They exhibit a strong, predictable response to a particular environmental stressor (e.g., a pollutant).
- Sensitivity: They are sensitive to changes in the environmental condition they indicate, providing an early warning.
- Commonness and Ease of Identification: They should be common enough to be found and easily recognizable by field technicians, allowing for widespread monitoring without highly specialized training.
Q2: Our monitoring program uses a standard list of indicator species. Why are we getting unreliable results in our estuary? This is a common challenge. The core issue is that species' tolerances and preferences are not static; they can change along environmental gradients like salinity, temperature, or between different biogeographic regions [6]. A species considered "tolerant" in one sea might behave as "sensitive" in another. Troubleshooting Steps:
- Audit Your Species List: Verify that the indicator values for your species are calibrated for your specific region and habitat type (e.g., estuarine vs. open ocean).
- Check for Confounding Factors: Analyze if natural environmental gradients (e.g., a strong salinity gradient in your estuary) are influencing the species' response more than the target pollutant. What appears to be a pollution signal might be a natural response.
- Recommendation: Move towards a multi-metric approach that uses a suite of species or a biotic index, which is more robust than relying on a single static species list [5].
Q3: We need to monitor a large, remote forest for air quality. What is the most efficient method? For large-scale air quality monitoring, lichen biomonitoring is a highly efficient and established method [5] [4]. Lichens are particularly effective because they absorb nutrients and pollutants directly from the air.
- Protocol Outline:
- Site Selection: Establish a grid or transect system across the forest area.
- Data Collection: At each sampling point, record the following:
- Lichen Diversity: Identify and count the number of lichen species present.
- Percent Cover: Estimate the area of the tree bark or rock surface covered by lichens.
- Morphotype Analysis: Note the abundance of specific lichen types (e.g., foliose, crustose), as certain forms are more sensitive to pollution than others [5].
- Analysis: A decline in diversity, cover, or the presence of sensitive morphotypes indicates poor air quality.
Q4: In aquatic toxicology, what is the difference between a bioindicator and a bioaccumulator? This is a critical distinction for ecotoxicology studies.
- Bioindicator: An organism whose health or population dynamics reflects ecosystem health. For example, the decline of a mayfly population indicates deteriorating water quality [7].
- Bioaccumulator: An organism that accumulates pollutants in its tissues from the environment, often at concentrations much higher than the surrounding water or sediment. They are used to detect and measure the presence of contaminants like heavy metals or pesticides [5]. Mussels and other bivalves are classic bioaccumulators used in "mussel watch" programs.
Q5: What are the key limitations of using indicator species in research? While powerful, the approach has constraints that must be considered in experimental design [5] [6] [7]:
- Lack of Universality: A species' indicative value is not always transferable across different regions or ecosystems.
- Oversimplification: A single species cannot represent the complexity of an entire ecosystem.
- Multiple Stressors: It can be difficult to disentangle the effects of a specific pollutant from other natural or anthropogenic stressors.
- Scale Dependency: An indicator valid for a large vertebrate may not reflect the status of insect or microbial communities.
Key Experimental Protocols
Protocol 1: Validating a Species as a Bioindicator for a Novel Stressor
This workflow outlines the key stages and decision points in validating a new bioindicator species, from initial selection to final implementation.
Objective: To systematically determine if a candidate species reliably indicates exposure to a specific environmental stressor (e.g., a new chemical pollutant, temperature change).
Materials:
- Equipment for field collection (nets, traps, water samplers, GPS).
- Environmental monitoring equipment (e.g., YSI meter for water quality, air samplers).
- Laboratory aquaria/mesocosms with environmental control.
- Equipment for physiological/behavioral measurement (microscope, spectrophotometer, PCR machine for genetic analysis).
- Statistical analysis software (R, PRIMER, etc.).
Methodology:
- Field Correlation Studies:
- Sampling: Collect data on the abundance and health of the candidate species across a gradient of the stressor (e.g., from polluted to pristine sites).
- Environmental Data: Simultaneously, measure the concentration of the target stressor and other key environmental variables (pH, salinity, temperature) at each site [6].
- Analysis: Use multivariate statistics (e.g., Redundancy Analysis) to identify if the candidate species' distribution is significantly correlated with the stressor, after accounting for other environmental factors.
Controlled Laboratory Exposure:
- Acclimation: Acclimate healthy individuals of the candidate species to standard laboratory conditions.
- Exposure: Expose groups of individuals to a range of concentrations of the stressor, including a control group with zero exposure.
- Endpoint Measurement: Monitor and quantify specific biological endpoints at defined intervals. These can include:
- Molecular: Gene expression changes, metallothionein induction.
- Physiological: Growth rate, respiration rate, photosynthetic efficiency (for plants/algae).
- Behavioral: Feeding rate, avoidance behavior.
- Morphological: Developmental deformities.
Dose-Response Modeling: Analyze the laboratory data to establish a quantitative relationship between the stressor level and the magnitude of the biological response. This confirms a causal link.
Field Validation: Return to the field to test if the dose-response relationship observed in the lab holds true under natural conditions. This step verifies the species' utility as a real-world sentinel.
Protocol 2: Benthic Macroinvertebrate Survey for Water Quality Assessment
Objective: To assess the ecological health and water quality of a freshwater stream or lake using the benthic macroinvertebrate community.
Materials:
- D-frame kick net.
- White plastic tray.
- Fine-tipped forceps, pipettes.
- Sampling jars and preservative (e.g., 70% ethanol).
- Ice chest for temporary storage.
- Water quality test kit (for pH, dissolved oxygen, nitrates).
Methodology:
- Site Selection: Choose representative reaches of the stream (e.g., riffle areas where flow is turbulent).
- Sample Collection:
- Place the kick net firmly on the stream bed, facing upstream.
- Disturb the substrate (rocks, gravel) immediately upstream of the net for a standardized time (e.g., 3 minutes), allowing dislodged organisms to be carried into the net.
- Sample Processing:
- Transfer the contents of the net to a white tray partially filled with clean water.
- Use forceps and pipettes to pick out all macroinvertebrates (e.g., insect larvae, worms, crustaceans) and place them in a jar with preservative.
- Laboratory Analysis:
- Identify organisms to the finest practical taxonomic level (usually family or genus) using dichotomous keys.
- Count the number of individuals in each taxonomic group.
- Data Analysis and Interpretation:
Data Presentation: Quantitative Profiles of Common Indicator Species
Table 1: Characteristics and Applications of Common Bioindicator Species
| Indicator Species | Environmental Parameter Monitored | Type of Response Measured | Typical Experimental Context |
|---|---|---|---|
| Lichens [5] [4] | Air Quality (SO₂, NOx, Heavy Metals) | - Presence/Absence of sensitive species- Total lichen diversity- Morphotype community shifts | - Transect surveys on tree bark or rocks.- Analysis of pollutant concentrations in thallus. |
| Freshwater Frogs [5] [8] | Water Quality, Chemical Pollutants, UV Radiation | - Population decline- Morphological deformities (e.g., limb malformations)- Egg hatching success rate | - Field population censuses.- Laboratory Tadpole Assay (FET) for teratogenicity. |
| River Otter [5] | Health of Freshwater Ecosystems, Bioaccumulation of Mercury | - Population density and reproductive success- Tissue concentration of mercury and other contaminants | - Non-invasive surveys (camera traps, spraint analysis).- Post-mortem analysis of tissue contaminants. |
| Planktonic Communities [5] [4] | Trophic Status of Water Bodies, Eutrophication | - Chlorophyll-a concentration- Species composition shifts (e.g., diatom to cyanobacteria ratio)- Algal bloom formation | - Water sampling and microscopic analysis.- In vivo chlorophyll fluorescence measurement. |
| Polychaete Worms (e.g., Nereis diversicolor) [5] [6] | Marine Sediment Health, Organic Enrichment, Toxic Substances | - Abundance of opportunistic vs. sensitive species- Bioaccumulation of heavy metals in tissues | - Sediment core sampling and benthic community analysis.- Atomic Absorption Spectroscopy of worm tissues. |
The Scientist's Toolkit: Essential Reagents and Materials
Table 2: Key Research Reagents and Solutions for Indicator Species Studies
| Item/Solution | Function/Application | Key Considerations |
|---|---|---|
| RNA Later Stabilization Solution | Presves RNA integrity in tissue samples for gene expression studies (e.g., stress response gene analysis). | Critical for -80°C storage; prevents degradation during transport from field to lab. |
| Liquid Nitrogen | Flash-freezing tissue samples for metabolomic, proteomic, and transcriptomic analyses. | Preserves labile metabolites and RNA; requires safe handling and storage protocols. |
| Ethanol (70-95%) | Standard preservative for macroinvertebrate, benthic, and botanical specimens. | Concentration depends on specimen type; required for morphological identification. |
| Formalin Buffer Solution | Fixative for histological analysis of tissues (e.g., for detecting pathological changes). | Handling requires fume hood due to toxicity; being replaced by safer alternatives like ethanol. |
| ICP-MS Standard Solutions | Calibration for Inductively Coupled Plasma Mass Spectrometry to quantify heavy metals in bioaccumulator tissues. | Requires high-purity, element-specific standards for accurate quantification of trace metals. |
| DNA Extraction Kits (for eDNA) | Isolating environmental DNA from water, soil, or sediment samples to detect rare/elusive species [9]. | Allows detection without physical capture; kit choice depends on sample type and inhibitor load. |
| LSC Cocktail for Liquid Scintillation | Quantifying radiolabeled compound uptake in bioaccumulation studies. | For use with radioactive tracers (e.g., C-14, H-3); requires radiation safety protocols. |
| Fluorescent Dyes (e.g., DCFDA) | Measuring oxidative stress in cells/tissues as a sub-lethal response to pollutants. | Provides a quantitative measure of cellular health; requires a fluorescence plate reader. |
Conceptual Framework for Indicator Species in Ecological Assessment
This diagram illustrates the conceptual pathway from an environmental stressor to the measurable response in an indicator species, and how this informs ecological assessment and management.
Conceptual Soundness: Establishing a Robust Theoretical Foundation
What is conceptual soundness and why is it critical for ecological indicators?
Conceptual soundness refers to the logical coherence and theoretical justification for why a specific parameter should function as a reliable indicator. It ensures that the indicator accurately represents the ecological construct or process it is intended to measure, forming the bedrock of credible research. A conceptually sound indicator has a clear, defensible link to the ecosystem state it signifies, preventing misinterpretation of data and ensuring that management decisions are based on valid information [10].
How can I verify the conceptual soundness of an ecological indicator?
Verification involves multiple lines of inquiry, as detailed in the table below.
Table 1: Framework for Assessing Conceptual Soundness
| Assessment Question | Methodology | Example from Ecological Research |
|---|---|---|
| Is the ecological concept well-defined and relevant? | Conduct a comprehensive literature review and hold expert workshops to define the theoretical boundaries of the concept (e.g., "resilience," "health"). | Clearly defining "biodiversity" not just as species count, but including genetic, functional, and structural diversity [11]. |
| Is the indicator appropriate for the target population or ecosystem? | Perform cognitive interviews and focus groups with end-users and local experts to assess relevance and comprehension [12]. | Ensuring a forest integrity indicator is relevant to both tropical and boreal systems, adapting metrics as needed. |
| Is there evidence of reliability and validity? | Execute pilot studies to obtain preliminary estimates of reliability (test-retest, internal consistency) and assess score distributions and floor/ceiling effects [12]. | Testing if a benthic index shows consistent results when applied to the same set of samples at different times. |
| Does the indicator show responsiveness to change? | Analyze data from long-term monitoring or controlled experiments to confirm the indicator changes predictably in response to stressors or management actions. | Verifying that a macroinvertebrate index shifts accordingly with changes in water pollution levels. |
What are common pitfalls in establishing conceptual soundness?
A frequent pitfall is adopting indicators developed in one biogeographical or cultural context and applying them to another without testing for conceptual equivalence. An activity deemed meaningful in one ecosystem might be irrelevant in another, leading to a failure to detect important changes [12]. Another pitfall is a lack of clear causality; a correlation may exist, but without a understood mechanistic link, the indicator's value is questionable.
Feasibility: Ensuring Practical Viability in Research and Monitoring
What key areas should a feasibility assessment cover?
Feasibility extends beyond simple cost analysis. A comprehensive assessment, drawing from public health and behavioral science frameworks, should evaluate several key areas to determine if an indicator can be successfully implemented in practice [13].
Table 2: Key Focus Areas for Feasibility Assessment
| Area of Focus | The Feasibility Study Asks... | Sample Quantitative & Qualitative Outcomes |
|---|---|---|
| Acceptability | To what extent is the indicator and its measurement method judged as suitable or attractive? | Satisfaction ratings; perceived appropriateness; intent to continue use; feedback from stakeholders [13]. |
| Implementation | To what extent can the indicator be measured successfully as planned in a real-world context? | Degree of execution success; resources required (time, personnel); factors affecting ease/difficulty [13]. |
| Practicality | To what extent can the measurement be carried out with existing means, resources, and circumstances? | Ability of field crews to follow protocols; completion rates and times for measurements; perceived burden [12] [13]. |
| Integration | To what extent can the indicator be integrated within an existing monitoring system? | Perceived fit with infrastructure; costs to the organization; fit with organizational goals [13]. |
What quantitative metrics can I use to evaluate feasibility?
Pilot studies are essential for collecting quantitative feasibility data. Key indicators include [12]:
- Recruitment Rate: The number and percentage of target sites or subjects that agree to participate.
- Retention Rate: The proportion of sites or subjects that remain in the monitoring program until completion.
- Data Completion Rate: The percentage of data points successfully collected versus those planned.
- Protocol Adherence: The extent to which field staff or automated systems correctly follow the defined measurement protocols.
- Cost and Time Metrics: Average cost per sample and time required for collection, processing, and analysis.
How do I design a pilot study for feasibility testing?
Design a small-scale study that mirrors the protocols of the future large-scale study as closely as possible. The primary goal is to field-test logistical aspects, not to test ecological hypotheses [12]. Use a combination of quantitative methods (e.g., tracking recruitment and completion rates) and qualitative methods (e.g., semi-structured interviews with field technicians about challenges) to gather comprehensive feasibility data. This mixed-methods approach identifies not just if a protocol fails, but why [12].
Response Variability: Quantifying and Accounting for Noise
Understanding and partitioning the sources of variability is crucial to distinguish true ecological change from background noise. The main sources include:
- Natural Spatial Variability: Inherent patchiness and heterogeneity in the environment.
- Natural Temporal Variability: Changes due to diel, seasonal, and inter-annual cycles.
- Sampling Variance: Error introduced by the process of measuring, sub-sampling, and analyzing samples.
- Observer Bias: Differences in how measurements are taken or organisms are identified by different individuals.
What experimental protocols minimize unwanted variability?
Employ rigorous, standardized protocols:
- Stratified Random Sampling: Design surveys to capture known environmental gradients explicitly, rather than assuming homogeneity.
- Calibration and Training: Regularly calibrate instruments and conduct inter-observer calibration exercises to ensure consistency among different technicians [12].
- Blinded Protocols: Where possible, have technicians process samples without knowledge of the treatment group or site status to reduce subconscious bias.
- Quality Control Replicates: Incorporate field blanks, lab replicates, and positive controls into the sampling design to quantify measurement error.
How is response variability analyzed and reported?
The core tool for analysis is variance components analysis, which statistically partitions the total observed variance into its constituent sources (e.g., spatial, temporal, measurement error). Furthermore, confidence intervals should always be reported around estimates of effect sizes, adherence rates, or indicator values. With small pilot samples, these intervals will be large, providing a more honest representation of the uncertainty and preventing overconfidence in preliminary results [12].
The Scientist's Toolkit: Research Reagent Solutions
Table 3: Essential Reagents and Materials for Indicator Development and Testing
| Item | Function in Research |
|---|---|
| Standardized Field Collection Kits | Ensures consistency in sample collection (e.g., water, soil, benthic organisms) across different teams and time points, reducing sampling variance. |
| Preservative and Fixative Solutions | (e.g., RNA later, DMSO buffer, formalin). Maintains the integrity of biological samples from the moment of collection until lab analysis, critical for genetic, microbiological, and taxonomic indicators. |
| Calibration Standards and Blanks | Essential for quality control of chemical and physical analyses (e.g., nutrient assays, sensor readings). Used to create standard curves and account for background contamination or instrument drift. |
| Primers and Probes for eDNA/barcoding | Allows for the identification of species and functional genes from environmental samples, forming the basis for modern molecular ecological indicators. |
| Reference Samples and Vouchers | A curated collection of verified specimens or samples used to train staff and validate taxonomic identifications or chemical fingerprints, ensuring long-term data consistency. |
Workflow Visualization: Ecological Indicator Assessment
Frequently Asked Questions (FAQs)
1. What are the primary advantages of using biotic indicators over traditional physicochemical water quality assessments?
Biotic indicators provide a time-integrated measure of environmental health, reflecting the cumulative effects of both short- and long-term pollution events and habitat degradation. Unlike instantaneous chemical measurements, the structure of biological communities captures impacts on living organisms and reveals the ecological consequences of stressors, making it a more comprehensive tool for assessing ecosystem integrity [14] [15] [16].
2. How do I select the most appropriate taxonomic group and specific metrics for my bioassessment study?
The choice depends on your study's specific objectives, the type of ecosystem, and the stressors of interest. A multi-taxa approach is often most robust. For general water quality and organic pollution, macroinvertebrates are a standard choice, with metrics like the EPT index (Ephemeroptera, Plecoptera, Trichoptera) being highly sensitive [17] [14] [15]. Algae, particularly diatoms, are excellent indicators of nutrient enrichment and rapid changes in water chemistry [16]. Fish are ideal for assessing broader ecosystem health, including habitat structure and food web dynamics, over larger spatial scales [18].
3. What is a key taxonomic challenge when working with macroinvertebrates, and how can it be addressed?
A significant challenge is the level of taxonomic identification. While identification to genus or species is most sensitive, it requires extensive expertise and time. Identification to the family level often provides a reliable compromise for detecting water quality gradients, though the required resolution depends on the program's goals [14] [15] [19]. Emerging solutions include using DNA barcoding to improve accuracy and efficiency [20] [19].
4. My biomonitoring results show a degraded community. How can I troubleshoot the specific cause?
A depressed biotic index score indicates a problem but does not diagnose the cause. Follow these steps:
- Correlate with Habitat Assessment: A poor score coupled with poor habitat ratings (e.g., eroded banks, lack of substrate) strongly suggests habitat degradation is the primary stressor [14].
- Correlate with Water Chemistry: Check for anomalies in dissolved oxygen, nutrients, pH, or specific contaminants. For example, low dissolved oxygen often eliminates sensitive stonefly and mayfly larvae [14].
- Analyze the Community Composition: A community dominated by pollution-tolerant taxa like aquatic worms (Oligochaeta) and certain midges (Chironomidae) indicates organic pollution [15]. The loss of specific functional feeding groups can also provide clues.
Troubleshooting Common Experimental and Field Challenges
| Challenge | Possible Causes | Solutions & Checks |
|---|---|---|
| Low Taxonomic Diversity | Pollution Impact: Chemical pollutants (organic, toxic).Habitat Loss: Poor substrate, sedimentation.Natural Variability: Seasonality, inappropriate reference site. | - Conduct concurrent water chemistry and habitat surveys [14].- Use ecoregion-specific reference conditions for comparison [18].- Sample across multiple seasons to account for natural cycles [19]. |
| High Variability Between Replicates | Inconsistent Sampling: Technique, effort, or habitat.Patchy Distribution: Natural invertebrate aggregation.Improper Sample Processing. | - Implement standardized, proven protocols (e.g., EPA Rapid Bioassessment Protocols) [14].- Collect a sufficient number of replicates (e.g., 3+ fyke nets for fish) [18].- Implement quality control via expert review of specimen identifications [21]. |
| Inability to Detect Expected Trends | Insufficient Statistical Power: Low sample size.Incorrect Taxonomic Resolution: Identifying to too coarse a level.Mismatched Indicator and Stressor. | - Conduct a power analysis before study design [21].- Increase identification resolution (e.g., from order to family) [14] [15].- Ensure selected indicator group is sensitive to target stressor [16] [18]. |
| Difficulty Identifying Specimens | Lack of Regional Keys: Inadequate taxonomic resources.Damaged Specimens: Improper preservation/handling. | - Use DNA barcoding to confirm difficult taxa [20] [19].- Preserve specimens immediately in appropriate agents (e.g., ethanol) [14]. |
Table 1: Summary of the primary biotic indicator groups, their applications, and standardized metrics.
| Indicator Group | Key Advantages | Common Metrics & Indices | Typical Taxonomic Level | Sensitive To |
|---|---|---|---|---|
| Algae (esp. Diatoms) | - Rapid reproduction reflects short-term changes [16].- Direct response to nutrients [16].- Easy sampling, cost-effective [16]. | - Diatom Index [16].- Palmer's Algal Index [16].- Species Diversity [16]. | Species / Genus | Nutrient enrichment, pH, organic pollution, toxicants. |
| Benthic Macroinvertebrates | - Integrate conditions over time [17] [14].- Sedentary nature pinpoints pollution source [14].- Well-established protocols [14] [21]. | - EPT Index [14] [15] [19].- Hilsenhoff Biotic Index [19].- BMWP/ASPT [15]. | Family / Genus | Dissolved oxygen, sedimentation, organic pollution, habitat degradation. |
| Fish | - Reflect health of entire watershed [18].- Long-lived, indicate chronic effects [18].- High public and economic value [18]. | - Index of Biotic Integrity (IBI) [18].- Species Richness & Composition [18].- Trophic Composition [18]. | Species | Habitat fragmentation, flow regime, chemical pollution, trophic structure. |
Detailed Experimental Protocols
Protocol 1: Streamside Biosurvey for Benthic Macroinvertebrates This protocol is adapted from the EPA's tiered framework for volunteer monitoring and is ideal for problem identification and screening [14].
- Site Selection & Habitat Assessment: Select a representative riffle area. Before sampling, conduct a habitat assessment evaluating bank stability, channel alteration, riparian vegetation, and substrate type [14].
- Sample Collection: Using a D-frame kick net, place the net securely on the stream bottom with the opening facing upstream. Disturb the substrate for a set time (e.g., 3 minutes) and distance (e.g., 1 meter) upstream of the net, allowing the flow to carry dislodged organisms into the net [14].
- Field Processing: Transfer the sample to a white pan with clean water. Using forceps, sort macroinvertebrates live into broad taxonomic orders (e.g., Ephemeroptera, Plecoptera, Trichoptera, Diptera, Oligochaeta). This can be done visually or with a hand lens [14].
- Data Analysis & Interpretation: Categorize collected organisms into sensitivity groups (e.g., pollution-sensitive, somewhat sensitive, tolerant). Calculate a simple index score based on the abundance and diversity of these groups to provide a preliminary ranking of site quality [14].
Protocol 2: Laboratory-Based Intensive Biosurvey This more rigorous protocol requires microscopy and professional supervision, yielding data suitable for trend analysis and regulatory reporting [14].
- Sample Collection & Preservation: Collect composite benthic samples from multiple habitats (e.g., riffles, pools, snags) using appropriate gear (e.g., Surber samplers, kick nets, or grab samplers) [14] [19]. Immediately preserve the entire sample in a labeled container with 70-95% ethanol.
- Laboratory Processing: In the lab, spread the sample in a gridded tray and systematically pick out all macroinvertebrates under a dissecting microscope.
- Taxonomic Identification: Identify specimens under a microscope to the family level (or genus where possible) using dichotomous keys specific to your ecoregion. A quality control step, where a second taxonomist verifies a subset (e.g., 10%) of identifications, is critical [21].
- Multimetric Data Analysis: Calculate a suite of metrics, which may include:
- Richness Measures: Total taxa, EPT taxa richness.
- Composition Metrics: % of Dominant taxon, % EPT.
- Tolerance Metrics: Hilsenhoff Biotic Index, Average Score Per Taxon (ASPT). These metrics are then combined into a multimetric index (e.g., an Index of Biotic Integrity) and compared to reference site conditions to assess ecological health [14] [15] [18].
The Scientist's Toolkit: Essential Research Reagents & Materials
Table 2: Key equipment and reagents required for establishing a biomonitoring program.
| Item | Function & Application |
|---|---|
| D-frame Kick Net | Standardized collection of benthic macroinvertebrates in wadable streams with rocky substrates [14]. |
| Fyke Nets | Passive capture of fish assemblages in wetland and littoral zone habitats; used in vegetation-stratified sampling [18]. |
| Surber Sampler | Quantitative sampling of macroinvertebrates in stream riffles; provides a defined area and downstream collection [19]. |
| Ethanol (70-95%) | Standard preservative for macroinvertebrate and fish samples; prevents decomposition and maintains integrity for identification [14]. |
| Dissecting Microscope | Essential for accurate sorting and identification of macroinvertebrates to family or genus level in the laboratory [14] [19]. |
| Diatom Sampling Substrate | Artificial substrates (e.g., glass slides) or natural rocks for collecting periphyton diatom communities for water quality inference [16]. |
| Water Quality Multiprobe | For concurrent measurement of key physicochemical parameters (e.g., dissolved oxygen, pH, conductivity, temperature) to correlate with biological data [15] [21]. |
| Regional Taxonomic Keys | Specialized guides for identifying aquatic organisms to the required taxonomic level (species, genus, family) within a specific geographic area [14]. |
Experimental Workflow for Biotic Indicator Development
The diagram below outlines the logical workflow for developing and testing a biotic index, such as an Index of Biotic Integrity (IBI).
Biotic Index Development Workflow
Field Sampling Design for Habitat-Stratified Assessment
The diagram below illustrates a stratified sampling approach for complex habitats, such as coastal wetlands, where vegetation type significantly influences community composition.
Habitat-Stratified Sampling Design
The continuous release of pharmaceutical residues into aquatic environments represents a significant threat to ecosystem health and stability. These pharmaceutical contaminants, originating from human and veterinary medicine, enter water bodies through various pathways, including wastewater effluent, agricultural runoff, and improper medication disposal [22] [23]. Unlike traditional pollutants, pharmaceuticals are specifically designed to be biologically active at low concentrations, making them particularly concerning for non-target aquatic organisms [24]. Their pseudo-persistent nature, due to continuous input and incomplete removal by conventional wastewater treatment plants (WWTPs), creates chronic exposure scenarios for aquatic life [22] [25]. This technical guide addresses the key challenges in monitoring these pollutants and provides troubleshooting support for researchers developing ecological indicators for aquatic ecosystem assessment.
The Scientist's Toolkit: Essential Reagents and Materials
Table 1: Key Research Reagents and Materials for Pharmaceutical Pollutant Analysis
| Item Name | Type/Category | Primary Function in Analysis | Example Applications |
|---|---|---|---|
| Oasis HLB Cartridges | Solid Phase Extraction (SPE) Sorbent | Extraction and pre-concentration of diverse pharmaceuticals from aqueous samples | Method development for 18 pharmaceuticals and 3 TPs in seawater [25] |
| Isotopically Labelled Internal Standards (ILIS) | Analytical Standards | Correction for matrix effects and quantification accuracy during mass spectrometry | Carbamazepine-d10, fluoxetine-d5 for UHPLC-HRMS analysis [25] |
| UHPLC-MS/MS Grade Solvents | Solvents/Reagents | High-purity mobile phase components to minimize background noise and ion suppression | Methanol and water for UHPLC-MS/MS analysis [26] [25] |
| Certified Pharmaceutical Standards | Analytical Standards | Method calibration, identification, and quantification of target analytes | Carbamazepine, ibuprofen, caffeine for method validation [26] |
| LC-HRMS/Orbitrap System | Instrumentation | High-resolution accurate-mass measurement for identification and quantification | UHPLC-LTQ/Orbitrap MS for multiclass pharmaceutical detection [25] |
Troubleshooting Guide: Common Analytical Challenges
Low Analytical Sensitivity and Recovery
Problem: Inability to detect pharmaceuticals at environmentally relevant concentrations (ng/L).
- Potential Cause 1: Inefficient sample pre-concentration or excessive sample loss during Solid Phase Extraction (SPE).
- Solution: Optimize the SPE protocol. Test different sorbent types (e.g., Oasis HLB, C18). The Oasis HLB cartridge has demonstrated high recoveries (61.6%–118.8%) for a wide range of pharmaceuticals in seawater [25]. Ensure sample pH is adjusted prior to loading and use appropriate elution solvents.
- Potential Cause 2: Inadequate instrument detection limits.
- Solution: Employ tandem mass spectrometry (MS/MS) in Multiple Reaction Monitoring (MRM) mode. This provides significantly higher sensitivity and selectivity compared to UV or single-stage MS detection. UHPLC-MS/MS can achieve limits of detection as low as 100 ng/L for compounds like carbamazepine [26].
Matrix Interferences in Complex Samples
Problem: Signal suppression or enhancement caused by co-extracted compounds from complex environmental matrices (e.g., wastewater, seawater).
- Potential Cause: The sample matrix contains salts, organic matter, or other contaminants that interfere with the ionization of target analytes.
- Solution:
- Use Isotopically Labelled Standards: Add ILIS (e.g., carbamazepine-d10) before extraction. These standards correct for matrix effects and losses during sample preparation [25].
- Improve Chromatographic Separation: Utilize Ultra-High-Performance Liquid Chromatography (UHPLC) to enhance peak resolution and separate analytes from interferences.
- Dilute and Re-inject: If contamination is severe, dilute the sample extract and re-analyze to reduce the matrix concentration.
Challenges in Biomarker-Based Ecotoxicology
Problem: High variability in physiological biomarker responses (e.g., enzyme activities) in exposed organisms.
- Potential Cause 1: Uncontrolled environmental or husbandry factors (temperature, diet, stress) influencing the biochemical endpoints.
- Solution: Strictly standardize acclimation and exposure conditions. Maintain stable water quality parameters (temperature, pH, dissolved oxygen) and use a controlled diet throughout the experiment [24].
- Potential Cause 2: Inappropriate biomarker selection for the target pharmaceutical.
- Solution: Base biomarker selection on the known mode of action. For neuroactive drugs (e.g., bromazepam), measure acetylcholinesterase (AChE) and monoamine oxidase (MAO) activities in brain tissue. For contaminants causing oxidative stress, analyze antioxidant response elements [24].
Experimental Protocols for Indicator Development
Protocol: Multi-Residue Analysis of Pharmaceuticals in Water
Method: Off-line Solid Phase Extraction followed by UHPLC-High Resolution Mass Spectrometry [25].
Workflow Overview:
Detailed Steps:
- Sample Collection and Preservation: Collect water samples in pre-cleaned containers. Filter immediately through 0.45 μm membrane filters (e.g., Millipore) to remove suspended solids. Store samples at -20°C until extraction to prevent degradation.
- Solid Phase Extraction:
- Condition Oasis HLB cartridges (200 mg, 6 mL) with 5-10 mL of methanol followed by 5-10 mL of reagent water.
- Load a known volume of filtered water sample (e.g., 100-1000 mL) onto the cartridge at a steady flow rate (e.g., 5-10 mL/min).
- Dry the cartridge under vacuum for ~15-30 minutes to remove residual water.
- Elute target analytes with 2 x 5-10 mL of an appropriate organic solvent (e.g., methanol or acetonitrile).
- Concentration and Reconstitution: Gently evaporate the eluate to dryness under a stream of nitrogen gas. Reconstitute the dry extract in a small volume (e.g., 100-200 μL) of methanol/water (e.g., 10/90, v/v) compatible with the LC mobile phase.
- UHPLC-HRMS Analysis:
- Chromatography: Use a C18 UHPLC column with a gradient elution program. Mobile phase A is often water with 0.1% formic acid, and phase B is methanol or acetonitrile with 0.1% formic acid. A typical short run time is around 10 minutes [26].
- Detection: Operate the HRMS (e.g., Orbitrap) in positive electrospray ionization (ESI+) mode. Use full-scan/data-dependent MS2 (dd-MS2) for non-target screening or parallel reaction monitoring (PRM) for targeted quantification.
Validation Parameters:
- Linearity: Correlation coefficient (R²) ≥ 0.991 [25].
- Precision: Relative Standard Deviation (RSD) for intra-day and inter-day precision < 5% [26] [25].
- Accuracy: Recovery rates typically between 70-120% [26] [25].
- Limits of Quantification (LOQ): Method should achieve LOQs in the ng/L range (e.g., 1.2 ng/L for carbamazepine) [25].
Protocol: Assessing Sub-Leththal Effects in Aquatic Bioindicators
Method: Histopathological and Neurological Biomarker Analysis in Fish [24].
Workflow Overview:
Detailed Steps:
- Test Organism and Acclimation: Use a standardized bioindicator species such as Common carp (Cyprinus carpio). Acclimate fish to laboratory conditions for a minimum of two weeks in dechlorinated, aerated water with controlled temperature (e.g., 25 ± 2°C), pH (7-8), and hardness, while providing a standard diet [24].
- Exposure Experiment: Expose fish to environmentally relevant concentrations of the target pharmaceutical(s) via waterborne exposure. Include a control group and multiple exposure concentrations. A typical exposure duration is 15 days, with daily monitoring of water quality and fish health.
- Tissue Sampling: After the exposure period, euthanize fish humanely and dissect to collect relevant tissues (e.g., brain, liver, kidney, gills).
- Biomarker Analysis:
- Neurological Markers: Homogenize brain tissue. Assess acetylcholinesterase (AChE) and monoamine oxidase (MAO) activities using standardized spectrophotometric or fluorometric assays. A significant reduction indicates neurotoxic effects [24].
- Immunological Markers: Analyze pro-inflammatory cytokines like Interleukin-1β (IL-1β) and Interleukin-6 (IL-6) in tissue homogenates or plasma using ELISA kits to identify inflammatory responses.
- Histopathological Examination: Preserve tissues (e.g., liver, kidney) in neutral buffered formalin. Process, embed in paraffin, section, and stain with Hematoxylin and Eosin (H&E). Examine slides under a light microscope for tissue alterations such as necrosis, inflammation, and fatty degeneration.
Frequently Asked Questions (FAQs)
Q1: Which pharmaceuticals are considered priority indicators for monitoring aquatic pollution? A1: Key indicator pharmaceuticals include carbamazepine (an anticonvulsant, due to its high persistence), caffeine (a marker for domestic wastewater), and ibuprofen (a common NSAID) [26]. The revised EU Urban Wastewater Treatment Directive also lists diclofenac, venlafaxine, citalopram, and several antibiotics as substances for mandatory monitoring, providing a regulatory-based priority list [27].
Q2: Our analytical method lacks sensitivity for trace-level detection. What is the most effective upgrade path? A2: Transitioning to LC-MS/MS is the most effective upgrade. It is considered the gold standard for this application, offering superior sensitivity (LODs in the ng/L range), high selectivity via MRM, and the ability to confirm analytes based on specific fragmentation patterns, thereby minimizing matrix interferences [26]. Incorporating an SPE pre-concentration step that omits solvent evaporation can also enhance sensitivity while aligning with Green Analytical Chemistry principles [26].
Q3: What are the critical effects of pharmaceutical pollutants on aquatic organisms? A3: Effects are diverse and can occur at low concentrations:
- Neurological & Behavioral: Disruption of neurotransmitter systems (e.g., inhibited AChE activity) [24].
- Immunological: Induction of pro-inflammatory cytokines (e.g., IL-1β, IL-6), leading to chronic stress [24].
- Histopathological: Damage to vital organs like liver and kidney [24].
- Ecological: Contribution to antibiotic resistance (e.g., from azithromycin) and endocrine disruption, which can impact reproduction and population dynamics [22] [23].
Q4: How can we make our monitoring methods more sustainable ("green")? A4: Adopt the principles of Green Analytical Chemistry (GAC). Key strategies include:
- Reducing Solvent Use: Eliminate or reduce evaporation steps in SPE [26].
- Shortening Analysis Time: Utilize fast UHPLC gradients (e.g., 10-minute runs) [26].
- Miniaturizing Methods: Explore micro-extraction techniques.
- Using Less Hazardous Chemicals: Choose safer solvents where possible. These approaches minimize environmental impact while maintaining high-quality results [26].
Q5: What are the biggest knowledge gaps in current research? A5: Critical gaps include:
- The environmental fate and long-term ecotoxicity of understudied but widely used pharmaceuticals like azithromycin, dexamethasone, and prednisone [23].
- The ecological impact of transformation products (TPs) generated from parent pharmaceuticals [23] [25].
- The effects of complex mixtures of pharmaceuticals and other contaminants (e.g., microplastics) on aquatic ecosystems [22].
- Long-term sublethal exposure data and the resulting ecological risks [23].
From Data to Decisions: Methodological Approaches for Indicator Implementation
Statistical Tools for Assemblage Data Analysis
The analysis of assemblage data, common in ecological indicator research, requires specialized statistical tools to handle complex, multi-species datasets. The table below summarizes key software options suitable for processing assemblage data, particularly in contexts like diatom assessment or other bioindicator studies.
Table 1: Statistical Software for Assemblage Data Analysis
| Software Tool | Primary Use Case | Key Features for Assemblage Data | Usage Considerations |
|---|---|---|---|
| R Foundation [28] [29] | General statistical analysis, data mining, and custom metric development | Extensive packages for multivariate statistics, community ecology, and data visualization; highly customizable for novel indices [30]. | Free and open-source; requires coding knowledge; steep learning curve [29]. |
| PRIMER (Not listed in results) | Community ecology & multivariate analysis | Specialized for similarity percentages, ordination, and analyzing species abundance data. | (Information from external knowledge) |
| SPSS [28] [29] | Social science research & general statistical analysis | User-friendly GUI; can compile descriptive statistics and perform parametric/non-parametric analyses [29]. | Less specialized for ecology; good for beginners; can automate analysis with scripts [28]. |
| GraphPad Prism [28] [29] | Biology-focused statistics | Versatile statistical capabilities; publication-worthy graphs; intuitive GUI for most tasks [29]. | Ideal for biologists; may lack advanced multivariate methods. |
| PC-ORD (Not listed in results) | Multivariate analysis of ecological data | Comprehensive suite of ordination and clustering methods designed explicitly for ecological communities. | (Information from external knowledge) |
| XLSTAT [28] [29] | Data mining & multivariate analysis in Excel | Excel add-on; provides tools for data visualization, descriptive statistics, and regression analysis [29]. | Good for users already familiar with Excel; enhances native capabilities [28]. |
Simplification and Dimensionality Reduction Techniques
Assemblage data often contains a high number of variables (e.g., species), making simplification a crucial step before analysis. The following techniques help reduce dimensionality and identify underlying patterns.
Table 2: Data Simplification and Analysis Techniques
| Technique | Primary Purpose | Application in Assemblage Studies | Key Concepts |
|---|---|---|---|
| Cluster Analysis [31] [30] | Group similar objects based on characteristics | Identify groups of similar samples or sites based on species composition. | K-means, Hierarchical Clustering; groups data points based on similarities [30]. |
| Factor Analysis [31] | Identify underlying latent variables | Reduce many correlated species into a few underlying environmental gradients. | Exploratory/Confirmatory Factor Analysis; simplifies datasets into fewer dimensions called factors [31]. |
| Principal Component Analysis (PCA) [30] | Reduce dimensionality while preserving variance | Visualize and summarize the main patterns in species assemblage data. | A type of dimensionality reduction; finds linear combinations of features capturing the most variance [30]. |
| Metric Development [32] | Create tailored indices for specific methods | Develop new, method-specific metrics (e.g., for DNA metabarcoding data) that mirror traditional indices. | Recalibrate existing indices for new data types; essential when method differences cause bias [32]. |
Experimental Workflow for Assemblage Data Processing
The diagram below outlines a generalized protocol for processing and analyzing assemblage data, from raw data to ecological interpretation. This workflow is critical for ensuring reproducible research in ecological indicator development.
Frequently Asked Questions (FAQs)
How do I handle the major differences in data structure between traditional microscopy and modern high-throughput sequencing (HTS) methods?
Fundamental differences in the nature of assemblage data generated by different methods (e.g., light microscopy vs. DNA metabarcoding) mean that using metrics designed for one method on another can give biased results [32]. The proportions of key species often differ significantly between methods.
- Recommended Approach: Do not simply apply correction factors. Instead, recalibrate existing indices or develop new metrics specifically designed for the new data type. For instance, a Trophic Diatom Index can be recalibrated for HTS data to maintain sensitivity to nutrient pressures while acknowledging that perfect agreement with the original method is unlikely [32].
- Expected Outcome: While correlation between well-calibrated metrics from different methods can be good (e.g., r = 0.86), a significant proportion of sites (e.g., 30%) may still change ecological status class. This necessitates informed discussion about the benefits and challenges of new methodologies [32].
My dataset has many rare species. Should I remove them before analysis?
Rare species can introduce noise, but their removal should be a justified, documented decision, not an automatic step.
- Guidance: Conduct a sensitivity analysis. Run your core analysis (e.g., ordination, index calculation) twice: once with the full dataset and once with rare species removed (e.g., species occurring in fewer than 5% of samples or with very low abundance).
- Decision Point: If the overall interpretation of the main patterns or the site rankings do not change significantly, removing rare species can simplify the model and highlight stronger signals. If results change drastically, this indicates that rare species may be important bioindicators in your system and should be investigated further or retained.
What is the best way to visualize complex assemblage data for a scientific publication?
Effective visualization is key to communicating complex data. Adhere to the following best practices:
- Choose the Right Chart: For assemblage data, ordination plots (e.g., PCA, NMDS), heatmaps, and bar charts of indicator species are most common [33].
- Maximize Data-Ink Ratio: Remove unnecessary chart borders, backgrounds, and redundant labels. Make gridlines light gray or remove them if exact values are not critical. Use direct labeling on chart elements instead of legends where possible [33].
- Use Color Strategically and Accessibly:
- Use a limited palette (5-7 distinct colors) to avoid overwhelming the reader [33].
- Ensure high contrast between elements and the background [34].
- Do not rely on color alone. Use different shapes, patterns, or textures to distinguish groups, ensuring the visualization is interpretable for those with color vision deficiencies [35].
Troubleshooting Common Experimental Issues
Problem: Statistical model fails to converge or produces unreliable results.
| Potential Cause | Diagnostic Steps | Solution |
|---|---|---|
| Data Not Properly Scaled | Check the range of values for different species. Is there a mix of very large and very small numbers? | Apply data transformation (e.g., log(x+1), square root) or standardization (e.g., converting to z-scores) to make variables comparable [30]. |
| Too Many Variables (Species) | The number of species may be exceeding the number of samples. | Apply dimensionality reduction techniques (e.g., PCA, Factor Analysis) to reduce the number of variables before proceeding with further analysis [31] [30]. |
| Excessive Zero Inflation | A high proportion of zeros in the species count data can disrupt many statistical models. | Consider using statistical methods specifically designed for zero-inflated data (e.g., zero-inflated models) or simplify the dataset by aggregating species or sites. |
Problem: New metric developed from HTS data does not correlate well with traditional environmental gradients.
- Action 1: Verify the reference database. For molecular methods, ensure the taxonomic reference database is as complete and accurate as possible. However, note that for diatoms, gaps in the barcode database have been shown to be less impactful than the fundamental differences in data structure between methods [32].
- Action 2: Re-examine the variable selection. The environmental variables driving assemblage patterns in HTS data might be different or more nuanced than those for traditional data. Explore a broader set of potential environmental predictors.
- Action 3: Validate the metric. Use a separate, independent dataset to test the metric's performance, ensuring it is not over-fitted to the original calibration data.
Research Reagent Solutions for Molecular Assemblage Analysis
For researchers employing DNA metabarcoding in their assemblage studies, the following key reagents are essential.
Table 3: Essential Reagents for DNA Metabarcoding Workflow
| Reagent / Kit | Function in the Experimental Protocol |
|---|---|
| DNA Extraction Kit | Isolates total genomic DNA from environmental samples (e.g., water, sediment, biofilm). Critical for yield and purity. |
| PCR Primers | Targets and amplifies a specific, standardized gene region (e.g., rbcL for diatoms) for sequencing. |
| High-Fidelity DNA Polymerase | Performs PCR amplification with minimal errors, ensuring accurate sequence data. |
| Size-Selective Beads | Purifies and selects appropriately sized DNA fragments for library construction, removing primer dimers and large contaminants. |
| DNA Library Preparation Kit | Prepares the amplified DNA for sequencing by adding platform-specific adapters and indexes. |
| Reference Database | Not a physical reagent, but a crucial resource for assigning taxonomy to the sequenced DNA reads [32]. |
Technical Support Center
Troubleshooting Guides and FAQs
This section addresses common issues researchers encounter when applying multivariate methods in ecological indicator development.
Frequently Asked Questions
Q1: My NMDS analysis has a high stress value. What does this mean and how can I improve it?
A high stress value (typically above 0.20) indicates poor agreement between the ordination distances and the original dissimilarity matrix [36]. To improve your NMDS results:
- Increase dimensionality: Run the analysis in 3 or more dimensions if a 2-dimensional solution has high stress [36].
- Use multiple random starts: Execute the analysis with at least 100 random starting configurations to avoid local minima [37] [36].
- Check your distance measure: Ensure you're using an appropriate distance metric for your data (e.g., Bray-Curtis for ecological community data) [37] [38].
- Transform your data: Apply appropriate transformations (e.g., Wisconsin double standardization) to reduce the influence of dominant species [37] [38].
Q2: How do I determine the optimal number of clusters in cluster analysis?
The optimal number of clusters depends on your data and research question:
- Use a scree plot: Plot the within-cluster sum of squares against the number of clusters and look for an "elbow" point [39].
- Calculate silhouette scores: Measure how similar objects are to their own cluster compared to other clusters [40].
- Consider ecological relevance: Ensure the clusters make biological sense in your research context [38] [40].
- Try hierarchical methods first: Use dendrograms from hierarchical clustering to identify natural groupings before applying partitioning methods [38].
Q3: When should I choose PCA vs. NMDS for my ecological data?
The choice depends on your data characteristics and research goals:
- Use PCA when you assume linear relationships between variables and want to maximize variance explained by each axis [41] [42].
- Choose NMDS when you have non-linear relationships or want to use any distance measure appropriate for your data [37] [43] [41].
- NMDS is preferred for community ecology data where species responses to gradients are often non-linear [37] [41].
- PCA is more suitable for environmental data where variables have linear relationships [41].
Q4: How should I prepare ecological community data for these analyses?
Proper data preparation is crucial for meaningful results:
- Standardize your data: Convert raw counts to percentages or proportions to remove the effect of sample size [38].
- Transform appropriately: Use Wisconsin double standardization (species standardization followed by sample standardization) for community data [37].
- Handle missing values: Use imputation methods or remove cases with excessive missing data [40] [44].
- Select meaningful variables: Remove rare species that occur in only a few samples to reduce noise [38].
Comparative Analysis Tables
The following tables summarize key characteristics of the three multivariate methods for easy comparison.
Table 1: Method Overview and Applications
| Characteristic | Cluster Analysis | NMDS | PCA |
|---|---|---|---|
| Primary Goal | Group similar observations into clusters [39] [40] | Visualize similarity/dissimilarity between samples [37] [41] | Reduce dimensionality while preserving variance [41] [42] |
| Main Applications in Ecology | Identify regions with similar environmental characteristics [39]; Classify samples into distinct categories [38] | Compare community composition across sites [37] [41]; Identify environmental gradients [37] | Identify important environmental variables [41]; Analyze morphological data [42] |
| Nature of Method | Unsupervised learning [40] | Ordination technique [37] [41] | Eigenanalysis technique [41] [36] |
| Key Output | Clusters or groups [39] [40] | Ordination plot [37] [41] | Principal components [41] |
Table 2: Technical Specifications and Requirements
| Specification | Cluster Analysis | NMDS | PCA |
|---|---|---|---|
| Data Requirements | Requires complete data (handle missing values first) [44] | Can tolerate some missing pairwise distances [43] | Requires complete data matrix [41] |
| Distance Measures | Euclidean, Bray-Curtis, Jaccard [38] | Any measure (Bray-Curtis recommended for ecology) [37] [43] | Euclidean distance only [37] [41] |
| Assumptions | Minimal assumptions [40] | No assumption of linear relationships [37] [41] | Linear relationships between variables [41] |
| Computational Speed | Fast to moderate (depends on algorithm) [40] | Slow, particularly for large datasets [43] | Fast, efficient [41] |
Table 3: Result Interpretation and Validation
| Aspect | Cluster Analysis | NMDS | PCA |
|---|---|---|---|
| Goodness-of-fit Measures | Silhouette score [40]; Within-cluster sum of squares [44] | Stress value (Kruskal's Stress Formula) [37] [43] [36] | Percentage of variance explained [41] |
| Visualization Methods | Dendrograms (hierarchical) [38]; Scatterplots [44] | Ordination plots [37] [41]; Shepard diagrams [36] | Biplots [41]; Scree plots [36] |
| Acceptable Fit Values | Silhouette score > 0.5 (good) [40] | Stress < 0.20 (acceptable) [36] | Cumulative variance > 70% (good) |
| Validation Approaches | Stability checks with different samples [40]; Domain knowledge verification [40] | Procrustes rotation to compare with other ordinations [37]; Random starts [37] | Cross-validation; Bootstrap resampling |
Experimental Protocols
Protocol 1: Performing NMDS on Ecological Community Data
This protocol describes how to perform Non-metric Multidimensional Scaling on species abundance data using the vegan package in R [37].
Materials and Reagents
- Species abundance matrix (samples × species)
- R statistical environment (version 3.6 or higher)
- vegan package installed
- Optional: Environmental variables data frame
Procedure
- Data Preparation
- Load your species abundance data into a matrix format
- Apply Wisconsin double standardization using
decostand()function [37]
Dissimilarity Matrix Calculation
NMDS Execution
- Run NMDS with multiple random starts (
trymax=100) - Use
trace=FALSEto reduce output verbosity [37]
- Run NMDS with multiple random starts (
Result Evaluation
- Check stress value using
stressplot(varespec.nmds.bray) - Values below 0.20 are generally acceptable for interpretation [36]
- Check stress value using
Visualization
- Create ordination plot:
plot(varespec.nmds.bray, type="t") - Overlay environmental variables using
envfit()if available [37]
- Create ordination plot:
Troubleshooting Tips
- If stress remains high, increase
trymaxto 200 or more - For unstable solutions, run multiple iterations with different random seeds
- Consider data transformation if certain species dominate the analysis
Protocol 2: Hierarchical Cluster Analysis of Environmental Data
This protocol outlines steps for performing hierarchical cluster analysis on environmental data to identify groups of similar sampling sites [38].
Materials and Reagents
- Environmental measurement matrix (samples × variables)
- R statistical environment
- cluster and vegan packages installed
Procedure
- Data Standardization
- Convert data to comparable scales using appropriate transformations
- For ecological data, perform percent transformation followed by percent-maximum transformation [38]
Distance Matrix Calculation
- Compute dissimilarity matrix using Bray-Curtis dissimilarity [38]
Cluster Analysis
- Perform hierarchical clustering using Ward's method [38]
Dendrogram Visualization
- Plot dendrogram to visualize cluster relationships
- Identify natural groupings by examining branch lengths [38]
Cluster Interpretation
- Examine cluster characteristics using summary statistics
- Validate clusters with ecological knowledge of the system [38]
Troubleshooting Tips
- If clusters show chaining, try different linkage methods (e.g., UPGMA)
- Ensure variables are properly scaled to prevent dominance by high-magnitude variables
- Compare cluster results with ordination methods for validation
Workflow Visualizations
NMDS Analysis Workflow
Cluster Analysis Workflow
Method Selection Guide
The Scientist's Toolkit
Table 4: Essential Research Reagent Solutions for Multivariate Analysis
| Tool/Reagent | Function/Purpose | Example Applications |
|---|---|---|
| R Statistical Environment | Open-source platform for statistical computing and graphics [37] [38] | All multivariate analyses; data manipulation and visualization |
| vegan Package | Community ecology package for ordination and diversity analysis [37] [38] | NMDS, PERMANOVA, diversity calculations; contains essential functions like metaMDS(), vegdist() |
| Bray-Curtis Dissimilarity | Distance measure robust for ecological community data [37] [38] | Quantifying compositional differences between sites; ignores joint absences |
| Wisconsin Standardization | Double standardization method for species data [37] | Reducing influence of dominant species; equalizing contributions of rare and common species |
| Silhouette Analysis | Method for evaluating cluster quality and determining optimal number of clusters [40] | Validating cluster analysis results; measuring separation between clusters |
| Environmental Vector Fitting | Method for relating environmental variables to ordination patterns [37] | Identifying environmental drivers of community composition; envfit() function in vegan |
| Procrustes Rotation | Method for comparing two ordinations [37] | Assessing congruence between different multivariate analyses; validating NMDS results |
Within the expanding field of ecological indicator research, the development of robust and reliable risk assessment frameworks is paramount for translating scientific data into actionable environmental management practices. This technical support center addresses the core calculations that underpin these frameworks: the Predicted No-Effect Concentration (PNEC) and the Risk Quotient (RQ). These values are critical for determining the potential ecological risk of chemical substances, enabling researchers and risk assessors to establish safety thresholds and evaluate the likelihood of adverse effects in the environment. The following guides and FAQs provide detailed methodologies for these essential calculations, framed within the context of modern ecological research.
Core Concepts: PNEC and Risk Quotients
What is a Predicted No-Effect Concentration (PNEC)?
A Predicted No-Effect Concentration (PNEC) is the concentration of a substance in an environmental medium (e.g., water, soil, sediment) that is believed to be protective of the ecosystem; it is the concentration below which adverse effects are not expected to occur during long-term or short-term exposure [45] [46]. It is a benchmark derived from ecotoxicity data and is fundamental to ecological risk assessment.
What is a Risk Quotient (RQ)?
A Risk Quotient (RQ) is a ratio used to characterize ecological risk by comparing a substance's predicted environmental concentration to its toxicity [47] [45]. The formula is straightforward:
RQ = PEC / PNEC
Where:
- PEC is the Predicted Environmental Concentration.
- PNEC is the Predicted No-Effect Concentration.
The RQ is then compared to a Level of Concern (LOC). If the RQ is less than the LOC, the risk is generally considered acceptable. If the RQ exceeds the LOC, it indicates a potential risk that may warrant further investigation or management action [47].
Hazard Quotient (HQ) vs. Risk Quotient (RQ)
It is crucial to distinguish between Hazard Quotients (HQs) and Risk Quotients (RQs), as they are used in different assessment contexts [47].
Table: Comparison of Hazard Quotient (HQ) and Risk Quotient (RQ)
| Item | Hazard Quotient (HQ) | Risk Quotient (RQ) |
|---|---|---|
| Assessment Target | Human health (e.g., air toxics, industrial chemicals) | Ecological risk (e.g., pesticides) |
| Type of Risk Assessment | Human health risk assessment | Ecological risk assessment |
| Equation | HQ = Exposure Concentration / Reference Concentration (RfC) | RQ = Estimated Environmental Concentration (EEC) / Ecotoxicity Endpoint |
| Risk Description | Whether HQ is >1 or <1 | Whether RQ is > Level of Concern (LOC) or < LOC |
Detailed Methodologies and Protocols
How to Derive a PNEC Using the Assessment Factor (AF) Approach
The Assessment Factor (AF) approach is a standardized method for deriving a PNEC, especially when ecotoxicity data are limited [48] [46]. The core formula is:
PNEC = Critical Toxicity Value (CTV) / Assessment Factor (AF)
The AF accounts for uncertainties in the dataset, such as intra- and inter-species variability, differences between laboratory and field conditions, and the extrapolation of short-term data to long-term effects [46]. Environment and Climate Change Canada has developed a transparent AF approach that breaks down the overall uncertainty into three specific factors [48]:
- Endpoint Standardization Factor (FES): Standardizes various ecotoxicity endpoints (which can differ in duration, severity, and degree of effect) to a long-term, sub-lethal, no- or low-effect level.
- Species Variation Factor (FSV): Addresses the uncertainty due to the number of species and organism categories (primary producers, invertebrates, vertebrates) tested.
- Mode of Action Factor (FMOA): Considers whether the substance's specific mode of toxic action is adequately reflected in the available dataset.
The overall assessment factor is the product of these three factors: AF = FES × FSV × FMOA.
Table: Endpoint Standardization Factor (FES) Criteria [48]
| Is extrapolation needed for short-term to long-term exposure? | Is extrapolation needed for lethal to sub-lethal effects? | Is extrapolation needed for median to no/low effect concentrations? | FES |
|---|---|---|---|
| Yes | Yes | Yes | 10 |
| Yes/No | Yes/No | Yes/No | 5 |
| No | No | No | 1 |
Table: Species Variation Factor (FSV) Criteria [48]
| Number of Organism Categories | 1 species | 2 to 3 species | 4 to 6 species | 7 or more species |
|---|---|---|---|---|
| 1 | 50 | 20 | 10 | 5 |
| 2 | x | 10 | 5 | 2 |
| 3 | x | 5 | 2 | 1 |
Workflow for PNEC Derivation:
The following diagram illustrates the logical workflow for deriving a PNEC using the Assessment Factor approach.
Example Calculation from a Fictional Dataset [48]:
Table: Calculation of Standardized Ecotoxicity Values (SEV)
| Category | Organism | Endpoint | Ecotoxicity Value (mg/L) | FES | Standardized Ecotoxicity Value (SEV) (mg/L) |
|---|---|---|---|---|---|
| Vertebrate | Carp | 96-hour LC50 | 34 | 10 | 3.4 |
| Invertebrate | Water flea | 48-hour EC50 (immobilization) | 15 | 10 | 1.5 (Lowest SEV) |
| Invertebrate | Water flea | 21-day EC10 (reproduction) | 3 | 1 | 3 |
| Primary Producer | Algae | 72-hour EC50 | 10 | 5 | 2 |
- Critical Toxicity Value (CTV): 15 mg/L (the ecotoxicity value that resulted in the lowest SEV).
- FES: 10 (to extrapolate from an acute, severe-effect to a chronic, low-effect value).
- FSV: 5 (the dataset contains 3 different species covering all 3 organism categories).
- FMOA: 1 (the substance acts through a non-specific narcotic mode of action).
- Assessment Factor (AF): 10 × 5 × 1 = 50
- PNEC: 15 mg/L / 50 = 0.3 mg/L
How to Calculate a Risk Quotient (RQ) for Ecological Risk
The Risk Quotient calculation is a critical final step in the risk characterization phase. The following protocol outlines the process for aquatic organisms, a common assessment scenario [47].
Protocol: Calculating an Acute Risk Quotient for Aquatic Life
Determine the Estimated Environmental Concentration (EEC): The PEC/EEC is typically obtained through environmental monitoring or modeling that considers the substance's use patterns, physicochemical properties, and environmental fate.
- Example: EEC = 5 mg/L (from modeling)
Gather Relevant Acute Ecotoxicity Endpoints: Collect the lowest available acute values (e.g., LC50 or EC50) for species representing different trophic levels (e.g., fish, aquatic invertebrates, algae).
- Example Endpoints:
- EC50 (Algae growth inhibition): 50 mg/L
- LC50 (Acute toxicity to fish): 60 mg/L
- Example Endpoints:
Identify the Most Sensitive Endpoint: Select the lowest value from the gathered ecotoxicity data to be used in the RQ calculation.
- Example: The lowest value is the EC50 for algae (50 mg/L).
Calculate the Risk Quotient (RQ):
- RQ = EEC / (Lowest EC50 or LC50)
- Example: RQ = 5 mg/L / 50 mg/L = 0.1
Compare the RQ to the Level of Concern (LOC): Refer to regulatory benchmarks to interpret the RQ.
- Example US EPA LOC for Acute High Risk to aquatic organisms is 0.5 [47].
- Conclusion: Since the calculated RQ (0.1) is less than the LOC (0.5), it can be concluded that there is no high acute risk concern under this specific scenario.
Table: Example US EPA Levels of Concern (LOCs) for Pesticides [47]
| Risk Presumption | Risk Quotient (RQ) | LOC |
|---|---|---|
| Acute High Risk | EEC / (lowest LC50 or EC50) | 0.5 |
| Acute Restricted Use | EEC / (lowest LC50 or EC50) | 0.1 |
| Acute Endangered Species | EEC / (lowest LC50 or EC50) | 0.05 |
| Chronic Risk | EEC / (lowest NOAEC or NOEC) | 1.0 |
Frequently Asked Questions (FAQs) & Troubleshooting
FAQ 1: When should I use the Assessment Factor (AF) method versus the Species Sensitivity Distribution (SSD) method to derive a PNEC?
- Answer: The AF method is recommended for substances with limited ecotoxicity data, where the dataset is not suitable for constructing an SSD. The SSD method is preferred for data-rich substances and typically requires chronic toxicity data for 7 or more species from at least three trophic levels (primary producers, invertebrates, and vertebrates) [48]. The AF method provides a conservative, precautionary estimate, while the SSD uses statistical analysis to model the variation in sensitivity among species, often providing a more refined PNEC.
FAQ 2: I only have acute (short-term) ecotoxicity data. Can I still derive a PNEC for long-term risk assessment?
- Answer: Yes, but you must account for the uncertainty. This is done by applying a larger Assessment Factor. For example, when extrapolating from an acute LC50 to a chronic no-effect level, an Assessment Factor of 1000 is often applied if only one acute LC50 is available [46]. The Endpoint Standardization Factor (FES) in the modernized AF approach specifically handles this by applying a factor of 10 to standardize an acute, severe-effect endpoint to a chronic, low-effect estimate [48].
FAQ 3: My calculated Risk Quotient (RQ) is greater than 1 (or the Level of Concern). What does this mean, and what are the next steps?
- Answer: An RQ > 1 indicates that the predicted exposure concentration exceeds the predicted no-effect concentration. This suggests a potential risk to the ecosystem. The next steps involve:
- Data Refinement: Re-evaluate your PEC and PNEC inputs. Can you obtain more accurate, site-specific monitoring data for the PEC? Can you gather more ecotoxicity data to refine your PNEC, perhaps allowing you to use a smaller assessment factor or an SSD approach?
- Weight of Evidence: The RQ is one line of evidence. Consider other factors such as the substance's persistence, bioaccumulation potential, and real-world field study data [45].
- Risk Management: If the risk is confirmed after refinement, risk management actions (e.g., use restrictions, emission controls) may need to be considered [45].
FAQ 4: How do I derive a PNEC for soil or sediment if I only have aquatic toxicity data?
- Answer: In the absence of direct toxicity data for soil or sediment organisms, you can use the Equilibrium Partitioning Method (EPM) to provisionally calculate a PNEC for these compartments based on the PNEC for water [46]. This method uses the substance's affinity for organic carbon (Koc) to estimate a protective concentration in soil or sediment.
- PNECsoil = PNECwater × Koc × (1/1000) (assuming default soil properties)
- PNECsediment = PNECwater × Koc × (1/1000) (assuming default sediment properties)
- Important Note: The EPM is a screening tool and may not be suitable for substances with a specific mode of action or with a high log Kow (e.g., >5), for which testing with soil or sediment-dwelling organisms is recommended [46].
The Scientist's Toolkit: Essential Reagents and Materials
This table lists key materials and concepts essential for conducting ecological risk assessments and developing related indicators.
Table: Key Research Reagent Solutions for Risk Assessment Studies
| Item / Concept | Function in Risk Assessment |
|---|---|
| Standard Test Organisms | Representative species from different trophic levels used to generate ecotoxicity endpoints. Examples: Freshwater algae (Pseudokirchneriella subcapitata), Water flea (Daphnia magna), Fathead minnow (Pimephales promelas). |
| Activated Sludge | Used in respiration inhibition tests to derive a PNEC for sewage treatment plant (STP) microorganisms, crucial for assessing a chemical's potential impact on wastewater treatment processes [46]. |
| Organic Carbon-Water Partition Coefficient (Koc) | A critical parameter that describes a substance's tendency to adsorb to soil and sediment organic carbon. It is essential for applying the Equilibrium Partitioning Method to estimate PNECs for soil and sediment [46]. |
| Reference Concentration (RfC) | An estimate of a continuous inhalation exposure to the human population that is likely to be without an appreciable risk of deleterious effects during a lifetime. It is the key toxicity value used in calculating Hazard Quotients (HQs) for human health risk assessment [47]. |
| Assessment Factors (AFs) | Numerical factors applied to account for uncertainties when extrapolating from limited laboratory ecotoxicity data to a protective PNEC for the complex natural environment [48] [46]. |
This technical support center provides troubleshooting guides and frequently asked questions (FAQs) for researchers conducting ecological risk assessments of pharmaceutical pollutants (PPs) in river ecosystems, framed within the broader context of ecological indicator development and testing research.
Frequently Asked Questions (FAQs)
FAQ 1: My risk quotient (RQ) calculation exceeds 10. What does this mean for the river's ecological condition, and what are the immediate next steps?
An RQ greater than 10 indicates that the river's ecological condition is considered 'impaired' [49]. Adverse effects on aquatic life are not just probable but are likely already showing observable manifestations. Your immediate next steps should be:
- Verify Data: Confirm your Measured Environmental Concentration (MEC) and Predicted No-Effect Concentration (PNEC) values for accuracy.
- Identify Culprit Compounds: Determine which specific pharmaceutical pollutants are driving the high RQ values.
- Prioritize Corrective Measures: Immediately focus on source identification and explore treatment technologies, such as constructed wetlands, to reduce the load of the most impactful PPs entering the water system [49].
FAQ 2: When deriving a PNEC value, what assessment factor should I use and why?
A minimum assessment factor (AF) of 10 should be applied due to uncertainty in the data over the no observed effect level (NOEL) or lowest observed effect level (LOEL) [49]. This factor accounts for interspecies variability and intraspecies differences, providing a safety margin to protect aquatic populations.
FAQ 3: My experimental results show that algae are the most affected biotic indicator. Is this a common finding?
Yes, this is a common and consistently reported finding in ecological risk assessment research [49]. The analysis indicates that algae are the most frequently affected group of biotic indicators by pharmaceutical pollutants, followed by macroinvertebrates and then fish. Your results are therefore aligned with broader global research trends.
FAQ 4: What is the recommended treatment technology for reducing pharmaceutical pollutants, particularly for developing regions?
Based on current research, constructed wetlands (CWs) are considered the most suitable nature-based solution [49]. They are particularly recommended for developing economies because they can effectively reduce concentrations of pharmaceutical pollutants to limits that minimize ecological impacts on biotic indicators, thereby helping to restore river health, often at a lower cost and with less energy than advanced mechanical treatment systems [49].
Experimental Protocols & Methodologies
Protocol 1: Calculating the Risk Quotient (RQ) for a Single Pharmaceutical
This methodology determines the ecological risk of an individual pharmaceutical pollutant.
- Principle: The Risk Quotient is calculated by comparing the Measured Environmental Concentration (MEC) of a pharmaceutical in river water to its Predicted No-Effect Concentration (PNEC) [49].
- Formula:
RQ = MEC / PNEC - Procedure:
- Sample Collection: Collect representative water samples from the river study site.
- Chemical Analysis: Use appropriate analytical methods (e.g., LC-MS/MS) to determine the MEC of the target pharmaceutical (unit: µg/L or ng/L).
- Determine PNEC: Obtain the PNEC value from ecotoxicological literature. The PNEC is derived from the most sensitive endpoint (e.g., LC50, EC50) for the most sensitive aquatic species (e.g., algae, daphnid), divided by an assessment factor (AF) of at least 10 [49].
- Calculate RQ: Input the MEC and PNEC values into the formula.
Interpretation of the RQ value is provided in the table below.
This framework assesses river health by calculating an overall River Health Index (RHI) based on three groups of parameters [49].
- Principle: The overall RHI is developed by calculating separate Indicator Group Scores (IGS) for:
- DORPs: Dissolved Oxygen Related Parameters.
- NTs: Nutrients.
- EPs: Emerging Pollutants (e.g., PPs).
- Procedure:
- Data Collection: Monitor and collect data for key parameters within each group (DORPs, NTs, EPs).
- Calculate IGS: For each group, compute an Indicator Group Score based on the monitored parameters.
- Calculate RHI: Combine the individual IGS to produce a single, overall River Health Index.
- Visualize: Use color-coded hexagonal pictorial forms to represent the Indicator Group Condition (IGC) and the overall River Health Condition (RHC). This provides an immediate, visible perception of the aquatic environment and helps prioritize management actions [49].
The following workflow diagram illustrates the complete experimental process from field sampling to final assessment.
Data Presentation and Interpretation
Table 1: Ecological Risk Classification Based on Risk Quotient (RQ)
This table defines the risk categories for interpreting calculated RQ values [49].
| Risk Quotient (RQ) Value | Risk Category | Ecological Interpretation |
|---|---|---|
| RQ < 1 | Low Risk | No adverse ecological effects are expected. |
| RQ = 1 - 10 | High Risk | Condition varies from 'moderately high' to 'severely high' risk. Adverse effects are probable. |
| RQ > 10 | Impaired | The ecological condition is considered 'impaired'. Adverse effects are certain and observable. |
Table 2: Example PNEC Values and Risk Calculation for Common Pharmaceutical Pollutants
This table provides a hypothetical dataset for common pharmaceuticals to illustrate the risk calculation process. Note: PNEC values are illustrative; consult current literature for substance-specific values.
| Pharmaceutical | Example MEC (ng/L) | Example PNEC (ng/L) | Calculated RQ | Risk Category |
|---|---|---|---|---|
| Diclofenac | 500 | 100 | 5.0 | High Risk |
| Carbamazepine | 400 | 500 | 0.8 | Low Risk |
| Ethinylestradiol | 5 | 0.1 | 50.0 | Impaired |
| Ibuprofen | 1000 | 1000 | 1.0 | High Risk |
The Scientist's Toolkit: Essential Research Reagents & Materials
The following table details key reagents, materials, and tools essential for research in this field.
| Item | Function / Application |
|---|---|
| Solid Phase Extraction (SPE) Cartridges | To pre-concentrate and clean up water samples before analysis, improving the detection of trace-level pharmaceuticals. |
| LC-MS/MS System | (Liquid Chromatography with Tandem Mass Spectrometry) The core analytical instrument for identifying and quantifying specific pharmaceutical pollutants at very low concentrations (ng/L). |
| Multiparameter Water Quality Probe | For in-situ measurement of Dissolved Oxygen Related Parameters (DORPs) like dissolved oxygen, pH, temperature, and conductivity. |
| Toxicity Test Kits | Standardized kits containing test organisms (e.g., Daphnia magna, algae) or biochemical assays to determine ecotoxicological endpoints (LC50, EC50) for PNEC derivation. |
| Constructed Wetlands (Pilot-Scale) | A nature-based treatment technology used experimentally to test and optimize the removal efficiency of pharmaceutical pollutants from wastewater streams [49]. |
| Color-Coding System | A visual tool using hexagonal pictorial forms to represent Indicator Group Conditions (IGC) and the overall River Health Index (RHI), aiding in the communication of scientific findings [49]. |
For researchers in ecology and drug development, collecting field data is only the first step. The true challenge—and opportunity—lies in systematically transforming this raw information into actionable metrics that can guide hypothesis testing, experimental refinement, and project direction. Actionable insights are specific, data-driven conclusions that point toward a concrete next step to improve your research or process [50]. Unlike raw data, they answer the "why" behind an observation and directly inform your subsequent actions, turning complex data streams into a clear path for scientific decision-making.
Core Protocol: A Systematic Workflow for Data Transformation
Follow this structured, five-step methodology to convert raw field data into reliable, actionable metrics.
Step 1: Define Clear Research Objectives and Questions
Before analyzing any data, establish specific, measurable goals tied to your research outcomes.
- Action: Frame your analysis around clear questions (e.g., "Is this ecological indicator sensitive enough to detect the targeted pollutant at X concentration?" or "Does this biomarker correlate with drug efficacy at week 4?").
- Rationale: A goal-first approach ensures the metrics you develop are relevant and actionable for your specific research context, preventing wasted effort on interesting but ultimately irrelevant analyses [51].
Step 2: Implement a Data Quality and Governance Framework
The integrity of your insights depends entirely on the quality of your underlying data.
- Action:
- Conduct regular audits of data collection mechanisms and entry protocols.
- Establish clear standard operating procedures (SOPs) for data formatting, metadata annotation, and storage.
- Implement automated validation checks where possible to flag outliers or missing values at the point of collection [51].
- Troubleshooting Tip: If your final dataset seems noisy or unreliable, trace the issue back through the collection chain. Often, inconsistencies in field measurement techniques or uncalibrated instruments are the root cause.
Step 3: Analyze Data and Segment to Uncover Patterns
Organize your data into relevant, focused buckets to move from general observations to specific insights.
- Action: Segment your data by relevant variables. For ecological indicators, this could be by location, habitat type, species, or temporal phase. In drug development, segment by patient cohort, dosage group, or time point [51].
- Rationale: Segmentation helps isolate the signal from the noise, allowing you to see if an observed effect is universal or confined to a specific subgroup. This is critical for identifying root causes.
Step 4: Synthesize and Interpret for Actionable Insights
This is the transition from "what" to "so what."
- Action: Apply the "What, So What, Now What" framework [52]:
- What: Objectively state what the data shows. (e.g., "The density of Indicator Species A has decreased by 30% in the test plot over two quarters.")
- So What: Interpret the finding's significance. (e.g., "This species is a known bio-indicator for soil health; its decline suggests a potential negative impact from the tested compound.")
- Now What: Define the concrete next step. (e.g., "Initiate soil chemistry analysis in the test plot and begin a mesocosm trial to establish causation.")
Step 5: Act, Document, and Track the Impact
An insight only becomes actionable when it leads to an action whose impact is measured.
- Action:
- Execute the "Now What" action from Step 4.
- Document the entire process—from the initial data pattern to the action taken—in your research notes or lab information management system (LIMS).
- Track the results of your action against a key metric to determine its effectiveness [52].
- Rationale: Documentation creates an audit trail for your scientific reasoning, helps avoid past mistakes, and builds an institutional knowledge base for your team.
The following workflow summarizes this protocol:
Essential Analytical Views for Comprehensive Understanding
When analyzing your data, examine it from multiple perspectives to ensure no critical insight is missed. The framework below, adapted from field service management, is highly applicable to research settings [53].
| Analytical View | Core Research Question | Example Actionable Metric |
|---|---|---|
| Subject/Indicator View | Is the subject (e.g., species, biomarker) performing as expected? | Mean time between observed significant changes; rate of false positives/negatives. |
| Experimental Issue View | What is the specific problem or effect being measured? | Top issues ranked by prevalence/impact; emerging trends from pilot studies. |
| Researcher/Operator View | How effectively is the research protocol being executed? | Mean time to resolve experimental anomalies; rate of protocol deviations. |
| Project Leadership View | Is the research project on track and yielding quality data? | Trends in key output quality (e.g., data precision); rate of resource utilization. |
Troubleshooting Common Data Transformation Challenges
FAQ: My dataset is too large and complex. I can't see any clear patterns. What should I do?
- Solution: Adopt a "Start Broad, Then Drill Down" approach.
- Begin by aggregating your data at a high level (e.g., study-wide means, overall response rates).
- Then, systematically apply filters to segment the data by one variable at a time (e.g., by experimental group, by geographic block, by time interval) [52].
- This method helps you quickly identify which specific segment is driving an overall trend.
FAQ: How can I be sure I'm not just seeing noise in the data?
- Solution: Practice "Manage by Exception."
- Before analysis, pre-define performance benchmarks or thresholds for your key metrics based on historical data or scientific literature.
- During analysis, focus your deep-dive efforts primarily on the data points that fall outside these expected ranges [52]. This prevents you from wasting time on statistically insignificant fluctuations.
FAQ: My data is coming from different labs/field teams, and it doesn't seem consistent.
- Solution: This is a classic data silo and quality problem.
- Short-term: Perform a cross-system reconciliation to identify and understand the discrepancies. Use this to create standardized data entry guidelines.
- Long-term: Advocate for a unified data fabric or LIMS that uses shared SOPs and real-time data validation to ensure consistency across all sources [51].
FAQ: I have a hypothesis about why a result is occurring, but how do I prove it with data?
- Solution: Use your actionable insight to design a targeted follow-up experiment or analysis.
- This is the "Now What" in action. If you hypothesize that a specific variable is the root cause, use your segmented data to test that. If the data is insufficient, you have just defined the objective of your next, highly focused experimental run [50].
The Researcher's Toolkit: Key Reagents & Materials for Ecological Indicator Development
The following table details essential materials and their functions in the development and testing of ecological indicators, providing a foundation for robust experimental design.
| Research Reagent / Material | Primary Function in Development & Testing |
|---|---|
| Benthic Macroinvertebrates | Serve as bio-indicators for assessing water quality and ecosystem health over time due to their varying pollution tolerances [11]. |
| Remote Sensing Data (Satellite/Drone) | Provides large-scale, temporal data on landscape-level indicators like vegetation indices (NDVI), land use change, and habitat fragmentation [11]. |
| Multivariate Statistical Software | Enables the development and modeling of composite indices by integrating multiple biological, chemical, and physical parameters into a single metric [54]. |
| Environmental DNA (eDNA) | Allows for non-invasive monitoring of biodiversity and the presence of specific, often rare, species through genetic material found in soil or water samples. |
| Stable Isotopes | Used as tracers to study nutrient cycling, food web structures, and the movement of pollutants through an ecosystem. |
Overcoming Implementation Challenges: Optimization Strategies and Limitations
Common Pitfalls in Indicator Selection and Application
Troubleshooting Guides
Issue 1: Ineffective Indicator Selection Leading to Poor Environmental Assessment
Problem Statement Researchers find that the selected ecological indicators fail to accurately reflect the condition of the ecosystem or provide early warning of environmental changes, leading to poorly informed management decisions [55].
Diagnosis and Solution
| Pitfall | Diagnostic Clues | Recommended Solution |
|---|---|---|
| Indicators not linked to program activities or policy objectives [56] [57] | Vague long-term goals; indicators measure irrelevant variables [55]. | Clearly define policy objectives and goals first. Ensure each indicator is directly relevant to a specific management outcome [57]. |
| Reliance on a small number of indicators [55] | Monitoring program fails to capture the full complexity of the ecological system [55]. | Use a suite of indicators that represent key information about the structure, function, and composition of the ecological system [55]. |
| Indicators are poorly defined [56] | Inconsistent data collection; inability to compare results over time or between studies. | Apply the SMART criteria: ensure indicators are Specific, Measurable, Achievable, Relevant, and Time-bound [57]. |
| Indicator overload and complexity [57] | Decision-makers are overwhelmed by data; difficulty identifying key trends. | Prioritize a limited set of key indicators. Use a tiered approach with a few headline indicators and more detailed supporting indicators [57]. |
| Use of indicators that are not sensitive to change [56] | No detectable response in the indicator despite changes in environmental conditions. | Select indicators that are highly responsive to specific ecological stresses and that can serve as anticipatory signals [55]. |
Issue 2: Flawed Sampling and Data Integrity
Problem Statement Data collected from the field is biased, inconsistent, or fails to accurately represent the population or environmental condition being studied.
Diagnosis and Solution
| Pitfall | Diagnostic Clues | Recommended Solution |
|---|---|---|
| Selection of inappropriate sampling methods [58] | Different methods (e.g., pitfall traps vs. Winkler samples) yield different results for the same taxon, such as ant species richness and size distribution [58]. | Select a sampling method based on the target bioindicator organism and habitat. Use complementary methods for a more complete inventory [58]. |
| Inadequate data quality and availability [57] | Data is unreliable, inaccurate, or not available at required scales. | Invest in data collection infrastructure. Use standardized data collection methods and validate data through quality control processes [57]. |
| Data leakage during preprocessing [59] | Overly optimistic performance estimates during model development; poor model performance in production. | Always split data into train and test subsets first. Never use test data for feature selection, normalization, or any step of the model training process [59]. |
Frequently Asked Questions (FAQs)
Q1: What are the key characteristics of an effective ecological indicator? Effective ecological indicators should be easily measured, sensitive to stresses on the system, respond to stress in a predictable manner, be anticipatory, predict changes that can be averted by management actions, be integrative, have a known response to disturbances and anthropogenic stresses, and have low variability in response [55].
Q2: Why is a suite of indicators preferred over a single indicator? Relying on a single indicator can produce poorly informed management decisions because it neglects the complexity of the ecosystem. Using multiple indicators allows for a comprehensive assessment of ecological systems, capturing key information about structure, function, and composition [55].
Q3: How can I avoid 'indicator overload' in my monitoring program? To avoid indicator overload, which can lead to complexity and confusion, you should:
- Prioritize a limited set of key indicators.
- Use a tiered approach with a smaller set of headline indicators and a larger set of supporting indicators.
- Use visualization tools, such as dashboards, to simplify complex data [57].
Q4: What is the role of stakeholder engagement in indicator selection? Stakeholder engagement is critical to ensure that indicators are relevant, acceptable, and useful to decision-makers. It helps identify key environmental concerns and priorities, ensures cultural and social relevance, and fosters ownership and commitment to the use of the indicators [57].
Experimental Protocols and Methodologies
Protocol 1: Comparative Sampling of Ground-Dwelling Ants Using Pitfall Traps and Winkler Extraction
Objective: To efficiently inventory epigaeic (ground-dwelling) ant species richness and abundance in a savanna habitat, comparing the efficacy of two common methods [58].
Methodology Details
| Step | Action | Specification & Rationale |
|---|---|---|
| 1. Site Selection | Select representative sampling locations within the savanna habitat. | Ensure sites are spaced sufficiently to avoid interference, following a standardized grid or random placement protocol. |
| 2. Pitfall Trap Installation | Sink cups or containers into the ground flush with the soil surface. | Use traps with a diameter of at least 4cm; partially fill with a preservative (e.g., ethylene glycol) to kill and preserve specimens. Leave in place for a standard period (e.g., 5-7 days) [58]. |
| 3. Winkler Litter Sampling | Collect leaf litter from a defined area on the forest floor. | Use a quadrat; combining two 0.5 m² quadrats is more effective than a single 1 m² quadrat. Place litter into fine-mesh bags [58]. |
| 4. Winkler Extraction | Transfer the litter to Winkler extractors. | Hang the bags inside the extractors for a standard period (e.g., 48-72 hours). Ants and other arthropods descend into a collection container filled with ethanol [58]. |
| 5. Specimen Processing | Collect specimens from both methods. | Sort and identify ants to species or morphospecies level in the lab. Record abundance and species identity for each sample. |
Expected Outcomes: Pitfall traps are generally more efficient and productive for epigaeic ants, capturing greater total species richness and abundance, particularly of larger ants. Winkler sampling will contribute additional, often smaller, species, but fewer in number in savanna environments [58].
Protocol 2: Assessing Water Quality Using Physicochemical and Biological Indicators
Objective: To provide a multi-faceted assessment of aquatic ecosystem health by measuring key water parameters and using macroinvertebrates as bioindicators [2].
Key Parameters and Indicators
| Parameter | Measurement Method | Indicator Function & Interpretation |
|---|---|---|
| Dissolved Oxygen (DO) | Meter measurement in mg/L. | Measure of oxygen available to aquatic life. DO ≥ 1mg/L = aerobic conditions; DO < 1mg/L = anaerobic conditions. Low DO can cause death of adults and juveniles [2]. |
| pH | Meter measurement on logarithmic scale. | Determines solubility & biological availability of chemicals. Safe range: 6.5-8.5. Increased metals solubility occurs at lower pH [2]. |
| Turbidity | Measured using a turbidity meter (NTU). | Measure of water clarity; high turbidity indicates suspended sediments, reduces light for photosynthesis, and can be an indicator of erosion [2]. |
| Macroinvertebrate Index | Collection via kick nets; identification and counting. | Rat-tailed maggot/Sludge worm: indicate very high pollution. Water louse: indicates high pollution. Freshwater shrimp: indicates low pollution. Mayfly/Stonefly larvae: indicate clean water [2]. |
Research Reagent Solutions and Essential Materials
| Item | Function / Application |
|---|---|
| Pitfall Traps | Cups or containers sunk into the ground to capture active ground-dwelling arthropods like ants and beetles for biodiversity and bioindicator studies [58]. |
| Winkler Extractors | Portable devices used to extract arthropods from leaf litter samples over 48-72 hours, providing a complementary method to pitfall trapping for inventorying litter fauna [58]. |
| Ethylene Glycol | A preservative solution used in pitfall traps to kill and preserve collected arthropod specimens, preventing decay and predation before collection [58]. |
| Ethanol (70-95%) | A preservative and killing agent used in Winkler extractor collection cups and for long-term storage of collected arthropod specimens in vials [58]. |
| Water Quality Testing Meter (Multi-parameter) | Electronic device capable of measuring key physicochemical parameters like Dissolved Oxygen (DO), pH, conductivity, and temperature in situ for water quality assessment [2]. |
| Secchi Disk | A simple, black-and-white disk lowered into the water to provide a basic measure of water transparency or turbidity [2]. |
| D-frame Kick Net | A net used by aquatic ecologists to sample benthic macroinvertebrates from streams and rivers by disturbing the substrate upstream of the net [2]. |
Workflow and Relationship Diagrams
Indicator Selection and Validation Workflow
Experimental Design for Bioindicator Sampling
Ecological indicators are measurable parameters that reflect the health, quality, or status of an ecosystem [10]. A significant challenge in their development lies in the fundamental complexity of natural systems, where species do not exist in isolation. Research demonstrates that species interactions can limit the predictability of community responses to environmental change [60]. While single-species studies provide valuable foundational data, their predictive power often fails when these species are embedded within complex community networks. This technical support article addresses these methodological challenges through troubleshooting guides and experimental protocols designed to enhance the accuracy and reliability of ecological indicator research.
Key Concepts: From Single-Species to Community-Level Indicators
The Limitation of Single-Species Models
Population viability analysis (PVA) and other single-species models are cornerstone applications in conservation ecology, used to predict future population abundances and extinction risk [61]. These models typically incorporate factors such as:
- Stochastic population growth
- Density dependence
- Demographic and environmental variance
However, a critical limitation emerges because these models often fail to account for the stochastic effects of community interactions [61]. In monoculture experiments, species abundances tend to be predictable based on current environmental conditions. In contrast, in polyculture, abundances depend significantly on the history of environmental conditions experienced, making predictions less reliable [60].
The Community Interaction Effect
Interspecific interactions—including competition, predation, and facilitation—introduce structured variation and autocorrelation into population dynamics [61]. Theoretical work shows that the dynamics of a species within a community of n species will follow an ARMA(n, n−1) model, which is far more complex than the models typically used in single-species PVA [61]. This explains why predictions based on current spatial relationships between species and their environment often fail to forecast how communities will respond to temporal environmental changes.
Troubleshooting Guides & FAQs
Common Experimental Challenges and Solutions
FAQ: Why do my laboratory-derived ecological indicators fail to predict responses in natural field settings?
- Problem: This is a frequent challenge when indicators are developed using simplified single-species experiments.
- Solution:
- Identify the Problem: The predictive model fails when applied to complex field data.
- List Possible Explanations:
- The model omits key biotic interactions (competition, predation).
- Environmental gradients in the field are more heterogeneous than in the lab.
- The indicator species' behavior changes in a community context.
- Collect Data: Compare the species' growth curves in monoculture versus polyculture under controlled conditions [60].
- Eliminate Explanations: Design experiments to test each hypothesis.
- Check with Experimentation: Use microcosm experiments that manipulate community complexity (e.g., simple vs. complex communities [61]).
- Identify the Cause: If polyculture experiments show significantly different dynamics, species interactions are a primary cause. Incorporate interaction terms into your models.
FAQ: How can I account for species interactions when I only have single-species time series data?
- Problem: It is difficult to parameterize community models with limited data.
- Solution: Research indicates that the effects of interspecific interactions can manifest as autocorrelation structures within single-species time series [61]. You can:
- Analyze your single-species data for significant autocorrelation.
- Use statistical models like ARMA (AutoRegressive-Moving-Average) that can incorporate this structure. For a species in a community with
nother species, its dynamics may follow an ARMA(n, n-1) model [61]. - This approach allows you to implicitly account for the "ghost" of community interactions within a univariate model.
A General Troubleshooting Methodology for Ecological Experiments
Adapted from general scientific troubleshooting principles [62] and Google's SRE framework [63], the following workflow provides a structured approach to diagnosing issues in ecological experiments. This method is particularly useful for complex, multi-factorial problems involving ecological complexity.
Step-by-Step Guide:
Problem Report & Triage: Clearly define the problem. What was the expected versus the actual behavior of your ecological indicator? In a major issue, your first priority is to "stop the bleeding"—this may mean reverting to a previous model or acknowledging the limitation—while preserving evidence (e.g., raw data) for analysis [63].
Examine: Systematically investigate all components. This involves:
- Telemetry/Monitoring: Analyze time-series data on population sizes, environmental conditions, and diversity metrics [63].
- Logs: Review experimental protocols and handling procedures for inconsistencies [60].
- Current State: Check the state of reagents, model organisms, and environmental chambers [62].
Hypothesize: Formulate data-driven hypotheses for the failure. Common hypotheses in this context include:
- "The model fails because it does not incorporate competition with Species X."
- "The indicator's response is altered by predation pressure in the field."
- "Abiotic factors interact with biotic factors in a non-additive way."
Test: Use a strategic approach to test your hypotheses.
- Simplify and Reduce: Try to reproduce the problem in a controlled microcosm experiment. Test species in isolation and in combination to isolate interaction effects [60].
- Divide and Conquer: In a complex model with many parameters, systematically test subsets of parameters or interactions to isolate the faulty component [63].
- Ask "What, Where, and Why": Determine what the system is actually doing, where resources are being used, and why it is making that choice [63].
Diagnose and Treat: Once the root cause is identified (e.g., a specific competitive interaction), correct the model or experimental design. The final, crucial step is to document the process and the solution to prevent future issues and aid other researchers [63].
Experimental Protocols for Addressing Ecological Complexity
Protocol: Testing Indicator Performance Across Community Contexts
This protocol is adapted from experimental designs used to investigate how species interactions limit predictability [60].
Objective: To determine if and how a proposed ecological indicator's response to an environmental gradient is affected by the presence of other species.
Workflow Diagram:
Detailed Methodology:
Preparation:
- Organisms: Use the indicator species and a suite of known interacting species (e.g., competitors, predators). The example below uses freshwater protists [60].
- Replication: Set up a minimum of 3-6 replicates per treatment combination [60].
- Environment: Use a well-controlled environment like multi-well plates incubated at a constant temperature (e.g., 20°C) [60].
Community Context Treatment:
- Monoculture: Grow the indicator species in isolation.
- Polyculture: Grow the indicator species with the full community of interacting species.
Environmental Gradient: Apply the relevant environmental factor (e.g., a light vs. dark treatment for photosynthetic protists [60]). For temporal tracking, this condition can be reversed halfway through the experiment.
Dispersal (Optional): To test meta-community effects, include a treatment where a small fraction (e.g., 5%) of the population is dispersed between patches with different environmental conditions [60].
Measurement:
- Sample each community at regular intervals (e.g., weekly).
- Use high-resolution video analysis (e.g., 5-second videos at 25 fps) [60].
- Identify and quantify species using automated image analysis software (e.g., the BEMOVI R package which uses morphological and movement features in a random forest algorithm for classification) [60].
Analysis:
- Calculate the degree to which the community tracks the environmental change.
- Compare the "tracking fidelity" of the indicator species in monoculture versus its tracking in polyculture. A significant reduction in polyculture indicates that species interactions are impairing predictability.
Quantitative Data from Key Experiments
The following table summarizes empirical findings that highlight the core problem and potential solutions.
Table 1: Experimental Evidence on Single-Species vs. Community Responses
| Experimental Factor | System | Key Finding in Monoculture/Single-Species Models | Key Finding in Polyculture/Community Models | Source |
|---|---|---|---|---|
| Environmental Tracking | Protist microcosms (light vs. dark) | Abundances were predictable based on current environmental conditions, regardless of history. | Abundances depended on the history of environmental conditions, making responses less predictable. | [60] |
| Extinction Prediction | Daphnia pulicaria microcosms (simple vs. complex communities) | Standard single-species PVA models may be used. | Interspecific interactions induce autocorrelation; accounting for it with ARMA models improves predictions. | [61] |
| Community Structure | Two-patch protist metacommunities | (Not applicable - baseline) | Dispersal can mitigate, but not eliminate, the reduction in tracking fidelity caused by species interactions. | [60] |
The Scientist's Toolkit: Essential Research Reagents & Materials
Table 2: Key Reagents and Materials for Community-Level Indicator Research
| Item | Function/Application | Example/Specification |
|---|---|---|
| Model Organisms | Serve as the indicator and interacting species in controlled experiments. | Freshwater protists (e.g., Colpidium striatum, Euglena gracilis), rotifers, or microarthropods. Chosen for short generation times and ease of culturing. |
| Culture Medium | Provides a nutrient base for sustaining microbial communities and their food sources. | Protist pellet medium (e.g., from Carolina Biological Supply) inoculated with bacteria like Serratia fonticola [60]. |
| Experimental Vessels | Provide a controlled and replicable physical environment for microcosms. | 6-well polystyrene multi-well plates, with a typical working volume of 8 mL per patch [60]. |
| Environmental Chamber | Maintains constant abiotic conditions (e.g., temperature) to isolate experimental variables. | Incubators set to a standard temperature like 20°C [60]. |
| Video Analysis System | Allows for non-invasive, high-resolution monitoring of species abundance and identity. | Digital camera (e.g., Orca Flash 4.0) mounted on a microscope, paired with analysis software (e.g., BEMOVI R package) [60]. |
| Image Analysis Software | Automates the identification and counting of individuals from video data using machine learning. | R package BEMOVI, which uses a random forest algorithm trained on monoculture data to classify individuals in polyculture [60]. |
Frequently Asked Questions (FAQs)
FAQ 1: What are the most common sources of uncertainty in measurements for ecological indicator research? All measurements contain uncertainty, which is the statistical dispersion of values attributed to a measured quantity [64]. The most common sources can be grouped into two categories evaluated by the "Guide to the Expression of Uncertainty in Measurement" (GUM) [64] [65]:
- Random effects (Imprecision): The dispersion of results obtained from repeated measurements on the same sample under specified conditions. This is quantified as standard deviation (SD) or relative standard deviation (RSD) [66] [65].
- Systematic effects (Bias): The difference between the average of many replicate measured values and a reference quantity value. An example is a scale that is not zeroed correctly [64] [65]. The uncertainty associated with correcting for bias ((u{Bias})) combines the uncertainty of the reference material used ((u{Ref})) and the uncertainty in its replicate measurement by your procedure ((u{Rep})) [65]: (u{Bias} = \sqrt{u{Ref}^2 + u{Rep}^2}).
FAQ 2: How can I determine if my measurement method is suitable ("fit for purpose") for my research? Assessment of uncertainty is vital for determining if data is "fit for purpose" [66]. This involves comparing your method's total measurement uncertainty with clinically acceptable limits, which may be based on biological variation, expert group recommendations, or professional opinion [65]. A practical top-down approach uses quality control (QC) data to estimate the procedure's imprecision ((u{Imp})) [65]. If the procedure has not been adjusted for a significant bias, the combined standard uncertainty of the whole procedure ((u{Proc})) is equal to (u{Imp}) [65]. The expanded uncertainty ((U)) at 95% confidence is then calculated as (U = 2 \times u{Proc}) [66]. If this interval of values falls within your predefined, clinically or ecologically acceptable limits, the method can be considered suitable [65].
FAQ 3: What are the key differences between using microbial indicators versus plant or animal indicators? Microbial indicators offer distinct advantages and are increasingly used alongside traditional animal and plant indicators [67].
Table: Comparison of Ecological Bioindicators
| Feature | Microbial Indicators | Animal & Plant Indicators |
|---|---|---|
| Sensitivity | Highly sensitive to environmental changes [67]. | Sensitivity varies by species (e.g., insects are highly sensitive) [67]. |
| Distribution | Almost all ecological environments [67]. | Specific to their habitats (e.g., chironomids in aquatic systems, ants in forests) [67]. |
| Ease of Detection | Relatively easy via pure culture isolation or amplicon sequencing [67]. | Macroscopically easy to observe, but can be time-consuming to survey [67]. |
| Response Time | Rapid response due to short life cycles. | Generally slower response due to longer life cycles. |
FAQ 4: My results show high imprecision. What steps can I take to troubleshoot this? High imprecision (random error) can originate from multiple sources in your experimental workflow. A systematic troubleshooting approach is recommended. Table: Troubleshooting Guide for High Imprecision
| Observation | Potential Cause | Corrective Action |
|---|---|---|
| High variation between replicate samples | Inconsistent sample preparation or handling. | Standardize and rigorously document all sample collection, preservation, and preparation protocols. Train all personnel on these standards. |
| Increasing variation over a long time series | Instrument drift or calibration decay [66]. | Implement a systematic program of drift measurement and correction using drift monitors [66]. Regularly maintain and calibrate equipment. |
| High variation across all analyte concentrations | General method instability or unaccounted variables. | Use Quality Control (QC) materials to estimate and monitor whole procedure imprecision over time, including variables like reagent batch changes and different operators (intermediate imprecision) [65]. |
| High variation only at specific concentration ranges | Method performance limitations at certain levels. | Estimate imprecision ((u_{Imp})) at more than one analyte level across the reportable range [65]. |
Experimental Protocols
Protocol 1: Evaluation of Measurement Uncertainty via the Nordtest Method
This protocol provides a top-down approach for estimating the total measurement uncertainty for analytical methods, adapted from the Nordtest technical report [66].
1. Objective: To estimate the expanded measurement uncertainty at 95% confidence for an analytical procedure.
2. Principal Components: The Nordtest method relies on an uncertainty assessment of the overall method, with four key components [66]:
- Measurement Precision ((Prec)): The relative standard deviation (% rsd) from replicate analyses.
- Uncertainty in RM Determination ((Val)): The % difference from measuring certified reference materials (RMs) as unknowns.
- Uncertainty in RM Values ((RM_u)): The inherent uncertainty of the certified reference materials.
- Uncertainty due to Drift ((Drift)): Changes in instrument response over time.
3. Procedure:
- Measurement Precision: Prepare and analyze at least 11 replicate samples from a diverse set of standards or samples. Calculate the % rsd for each analyte at different concentrations and fit a power function to model precision across the concentration range [66].
- Validation Uncertainty: Analyze a diverse set of certified RMs as unknowns. Calculate the % difference between your measured values and the certified values. Fit these data with a power function to determine average uncertainty [66].
- RM Uncertainty: Compile the reported uncertainties (at 2 sigma) for the RMs used from their certificates [66].
- Drift Uncertainty: Monitor and correct for instrument drift using appropriate standards over time [66]. If the instrument is stable, this component can be negligible.
- Calculation: The combined standard uncertainty ((u)) is calculated by taking the square root of the sum of the squared one sigma uncertainties [66]. (u = \sqrt{Prec^2 + Val^2 + RM_u^2 + Drift^2}) The expanded uncertainty ((U)) at 95% confidence is then [66]: (U = 2 \times u)
Protocol 2: Sampling and Using Microbial Bioindicators in Forest Ecosystems
This protocol outlines the steps for using soil microorganisms as bioindicators to assess environmental changes, such as those caused by different plantation types or pollution [67].
1. Objective: To monitor soil quality and environmental changes in a forest ecosystem by analyzing microbial community structure and diversity.
2. Key Indicators:
- Bacterial Phyla: Acidobacteria, Proteobacteria, Chloroflexi [67].
- Fungal Phyla: Basidiomycota, Ascomycota, Zygomycota, and arbuscular mycorrhizal fungi (AMF) [67].
- Specific Sensitive Taxa: Ectomycorrhizal fungi, ascomycetes, and actinomycetes can be sensitive to forest harvesting [67].
3. Procedure:
- Site Selection: Select sampling sites representing the conditions to be compared (e.g., different plantation areas like Eucalyptus vs. native Atlantic forest, or polluted vs. unpolluted mangrove forests) [67].
- Soil Sampling: Collect soil samples from a standardized depth (e.g., top 10 cm) using a sterile corer. Collect multiple samples per site to account for spatial heterogeneity.
- Microbial Analysis:
- DNA Extraction: Extract total genomic DNA from the soil samples.
- Amplicon Sequencing: Use high-throughput amplicon sequencing (e.g., of the 16S rRNA gene for bacteria and the ITS region for fungi) to characterize the microbial community composition and diversity [67].
- Data Analysis: Compare the community composition, richness, and diversity of key microbial taxa between the different sites. Significant changes in these parameters serve as an indicator of soil quality change and environmental impact [67].
The Scientist's Toolkit: Research Reagent Solutions
Table: Essential Materials for Ecological Indicator Research
| Item | Function |
|---|---|
| Certified Reference Materials (CRMs) | Provides a known quantity of an analyte with a stated uncertainty. Used to evaluate measurement bias ((u_{Bias})) and validate analytical methods [65]. |
| Quality Control (QC) Materials | A stable material run at regular intervals to estimate and monitor the imprecision ((u_{Imp})) of the entire measurement procedure over time [65]. |
| DNA Extraction Kits (for soil/microbes) | To isolate high-quality genomic DNA from complex environmental samples for subsequent microbial community analysis via amplicon sequencing [67]. |
| Primers for 16S rRNA & ITS Gene Regions | Specific primers used in PCR to amplify bacterial (16S) and fungal (ITS) DNA from environmental samples, enabling identification and classification [67]. |
| Drift Monitors | Stable reference materials used to track and correct for changes in instrument response (drift) over time, a potential source of measurement uncertainty [66]. |
Workflow Diagrams
Uncertainty Evaluation Workflow
Microbial Bioindicator Sampling
Technical Support Center: Troubleshooting Guides and FAQs
This technical support center provides targeted assistance for researchers integrating AI-powered analytics and rapid testing technologies into ecological indicator development and drug safety research. The following guides address common experimental and technical challenges.
Troubleshooting AI-Powered Ecological Data Analysis
Q1: Our AI model for species identification from image data is overfitting to the training set and failing on new field images. How can we improve generalization?
- A: Implement real-time data augmentation and leverage pre-trained models. Retrain your model using a diversified dataset that includes images from multiple geographic locations, times of day, and seasonal conditions [68]. Incorporate tools like BioCLIP, an AI-powered image-recognition tool designed to leverage biological information from images and detect highly-detailed species traits, which can improve feature detection [69]. Furthermore, use a hold-out validation set from a completely different geographic region to test model performance before final deployment.
Q2: Satellite and drone imagery inputs for habitat mapping are producing noisy and inconsistent classifications. What steps can we take?
- A: Fuse multi-spectral data sources and establish a rigorous validation protocol. Combine satellite imagery (for large-scale patterns) with higher-resolution drone-based sensing (for fine-scale detail) to cross-verify results [68]. Utilize AI models specifically trained on multispectral and hyperspectral data to analyze plant health and stress factors beyond the visible spectrum [68]. Manually validate AI-generated habitat maps with ground-truthed data from a subset of the study area to quantify accuracy and identify common error types [69].
Q3: Our predictive model for ecosystem change is generating implausible long-term forecasts. How can we enhance model reliability?
- A: Review feature selection and incorporate domain expertise. Ensure the model is trained on high-quality, relevant environmental variables like soil moisture, temperature, and historical land-use data from IoT devices and satellite feeds [68]. Collaborate with ecologists to set realistic constraints and boundaries for the model's predictions, ensuring they align with established biological principles [69]. Use ensemble modeling techniques that run multiple simulations to provide a range of possible outcomes, rather than a single, potentially unreliable, forecast.
Troubleshooting Rapid Testing Technologies
Q4: We are encountering high rates of false positives/negatives with our rapid indicator tests for microbial contamination. What could be the cause?
- A: Meticulously control sample collection and handling. Even minor deviations can compromise results. Adhere strictly to pre-test guidelines, such as avoiding certain foods, medications, or substances that might interfere with the test reagents [70]. During sample collection, use only the provided tools, ensure they are clean and uncontaminated, and follow the directions step-by-step without deviation [70]. Immediately after collection, label samples correctly and submit them for analysis within the specified timeframe to prevent sample degradation [70].
Q5: The results from our rapid environmental water quality tests are inconsistent between technicians. How can we standardize our process?
- A: Automate readouts and implement centralized data management. Transition from subjective, visual interpretation of results to using automated detection instruments, such as a luminometer, which provides a precise, numerical result (e.g., in Relative Light Units) [71]. This eliminates human error and subjective judgment. Integrate these instruments with data analytics software to automatically collect, analyze, and track results over time, making it easier to spot trends and anomalies [71].
Q6: Data from our rapid drug safety tests is difficult to interpret for assessing long-term risk. What are the limitations of these tests?
- A: Understand that rapid tests are often insufficient for detecting rare or long-latency adverse events. Premarketing studies typically involving 500 to 3,000 participants are underpowered to reliably detect rare adverse events [72]. For example, to have an 80% chance of detecting an event that increases from a 0.1% to 0.2% rate, a study would need at least 50,000 participants [72]. Therefore, rapid testing must be part of a broader safety strategy that includes post-marketing surveillance, spontaneous reporting systems, and analysis of automated healthcare databases to build a complete safety profile [72].
Quantitative Data Comparison: Traditional vs. AI-Powered Monitoring
The following table summarizes performance data for ecological monitoring, illustrating the transformative impact of AI technologies as projected for 2025.
Table 1: Performance Comparison of Traditional and AI-Powered Ecological Monitoring in 2025
| Survey/Monitoring Aspect | Traditional Method (Estimated Outcome) | AI-Powered Method (Estimated Outcome) | Estimated Improvement (%) in 2025 |
|---|---|---|---|
| Vegetation Analysis Accuracy | 72% (manual species identification) [68] | 92%+ (AI automated classification) [68] | +28% |
| Biodiversity Species Detected per Hectare | Up to 400 species (sampled) [68] | Up to 10,000 species (exhaustive scanning) [68] | +2400% |
| Time Required per Survey | Several days to weeks [68] | Real-time or within hours [68] | -99% |
| Resource (Manpower & Cost) Savings | High labor and operational costs [68] | Minimal manual intervention [68] | Up to 80% |
Experimental Protocols
Protocol 1: AI-Powered Ecological Survey for Biodiversity Baseline Establishment
This methodology uses AI to automate the creation of a comprehensive species inventory and habitat map.
Data Acquisition: Collect data from a multi-sensor platform.
- Satellite Imagery: Obtain high-resolution, multi-spectral images of the target area [68].
- Drone Transects: Perform automated drone flights equipped with high-resolution cameras and sensors over pre-defined transects for fine-detail imagery [68].
- Audio Sensors: Deploy passive acoustic monitors to capture animal vocalizations.
AI Data Processing and Model Application:
- Image Analysis: Process all imagery through a pre-trained convolutional neural network (CNN) model, such as BioCLIP, for species identification and habitat classification [69].
- Audio Analysis: Analyze audio recordings with a deep learning model trained to identify species-specific calls and songs.
- Data Fusion: Integrate the outputs from image and audio models into a unified geospatial database.
Validation and Ground-Truthing:
- Field Verification: Conduct targeted field surveys to physically verify the presence of species identified by the AI, with a focus on rare or unexpected findings [68].
- Accuracy Assessment: Calculate the precision and recall of the AI model by comparing its results against the ground-truthed data.
Protocol 2: Rapid Indicator Testing for Environmental Monitoring
This protocol details the use of rapid tests, like Hygiena's MicroSnap, for detecting microbial indicator organisms on surfaces [71].
Sample Collection:
- Use a sterile, pre-moistened swab to sample a standardized surface area (e.g., 10x10 cm).
- Employ a zigzag pattern while rotating the swab to ensure the entire surface is sampled.
Sample Enrichment and Incubation:
Detection and Quantification:
Data Interpretation and Action:
- Compare the RLU reading to pre-established action limits for the specific environment.
- If the count exceeds the limit, initiate immediate corrective actions, such as cleaning and re-sanitizing the area, followed by re-testing [71].
Workflow Visualization
AI-Powered Ecological Survey Workflow
The diagram below illustrates the integrated data flow for a comprehensive AI-powered ecological survey.
AI Ecological Survey Workflow
Rapid Testing and Risk Assessment Pathway
This diagram outlines the logical pathway from rapid testing to full risk assessment, particularly in a drug development context.
Rapid Test to Risk Assessment
The Scientist's Toolkit: Research Reagent Solutions
Table 2: Essential Research Reagents and Materials for Ecological and Drug Safety Research
| Item | Function |
|---|---|
| MicroSnap & Similar Rapid Swabs | Sample collection devices with integrated enrichment broth for rapid detection and enumeration of specific indicator microorganisms (e.g., coliforms) [71]. |
| Luminometer (e.g., EnSURE Touch) | An advanced monitoring system that collects, analyzes, and reports data from rapid test devices by measuring bioluminescence in Relative Light Units (RLUs) [71]. |
| Multispectral/Hyperspectral Sensors | Advanced imaging sensors deployed on satellites or drones that capture data beyond the visible spectrum, allowing AI models to assess plant health, stress, and soil conditions [68]. |
| IoT Environmental Sensors | Distributed devices that continuously monitor and stream real-time data on microclimates, including soil moisture, temperature, and water quality [68]. |
| Pre-trained AI Models (e.g., BioCLIP) | AI-powered image-recognition tools trained on vast biological image datasets to assist in detailed species taxonomic classification and trait detection [69]. |
| Data Analytics Platform (e.g., SureTrend) | Software that provides secure data integration from multiple testing sources and facilities, enabling trend analysis and actionable insights for continuous improvement of protocols [71]. |
Troubleshooting Common Experimental and Operational Issues
Q1: My constructed wetland (CW) system is showing a sudden drop in the removal efficiency of specific pharmaceutical compounds. What could be the cause and how can I address this?
A1: A sudden drop in removal efficiency can stem from several issues. Investigate the following areas:
- Hydraulic Overloading: Check if the inflow rate exceeds the system's design capacity, reducing the Hydraulic Retention Time (HRT) below critical levels. Solution: Measure and adjust the inflow to ensure the HRT matches the designed parameters for the target compounds [73].
- Clogging of Substrate: Subsurface flow systems are prone to clogging, which can cause preferential flow paths or surface flooding, reducing effective treatment. Solution: Inspect for surface water pooling. If clogging is detected, the substrate (e.g., gravel, sand) may need to be cleaned or replaced [74].
- Plant Health: Unhealthy or decaying plants cannot facilitate rhizosphere degradation or uptake. Solution: Inspect plants for disease or stress. Ensure optimal growing conditions and consider replanting with resilient species like Phragmites australis or Typha latifolia [75].
- Microbial Community Shift: Shock loads of contaminants or changes in water pH can disrupt the microbial community responsible for biodegradation. Solution: Monitor and stabilize influent pH and contaminant concentrations. A reinoculation with specialized microbial consortia may be necessary in severe cases [76].
- Seasonal Temperature Effects: Microbial activity and plant metabolism slow down in colder seasons. Solution: If possible, insulate the wetland or implement a hybrid system where a vertical flow CW, which is less susceptible to temperature drops, is used as a first stage [73].
Q2: I am detecting variable removal rates for different pharmaceutical compounds in my pilot-scale CW. Is this normal, and what does it indicate about the removal mechanisms?
A2: Yes, variable removal is expected and highly informative for ecological indicator development. The removal efficiency is contingent on the physicochemical properties of each compound and the dominant mechanisms at play [76].
- Hydrophobicity Dictates Mechanism: The log Kow (octanol-water partition coefficient) is a key indicator.
- Compounds with low to moderate hydrophobicity (log Dow -2.3 to 3): Are more susceptible to photodegradation and microbial degradation in surface flow systems [76].
- Compounds with higher hydrophobicity (log Kow 1 to 4): Are more likely removed via plant uptake and adsorption to the substrate or plant roots [76].
- Very high hydrophobicity (log Kow > 4): Primarily removed through adsorption onto organic matter or substrate media [76].
- Action: Characterize the log Kow of your target pharmaceuticals. Correlate high removal for hydrophobic compounds with adsorption and plant uptake mechanisms, and for hydrophilic compounds with microbial and photolytic pathways. This variability is not a system failure but a reflection of the complex, multi-mechanism nature of CWs, which is crucial for developing specific ecological indicators [73] [76].
Q3: The nutrient levels (e.g., Ammonia, Phosphate) in my experimental CW are not decreasing as expected. What are the potential reasons?
A3: Poor nutrient removal often points to issues within the biological components of the system.
- Insufficient Microbial Establishment: Nitrifying bacteria (for ammonia removal) require time to establish. Solution: Ensure the system has been properly acclimated for at least 1-2 weeks with a nutrient solution to build up the necessary microbial biomass [75].
- Inadequate Plant Growth or Root Depth: Plants are responsible for direct nutrient uptake. Solution: Use established, fast-growing wetland plants with dense root systems. Ensure they are not nutrient-saturated and are actively growing [75].
- Low Oxygen Levels: Nitrification, the process of converting ammonia to nitrate, is an aerobic process. Solution: For subsurface flow systems, consider introducing passive aeration or switching to a vertical flow configuration, which has better oxygen transfer [73].
- Saturated Adsorption Sites: The substrate's capacity to adsorb phosphate may be exhausted. Solution: In long-term experiments, the substrate (e.g., clay, specific sands) may need to be replaced or amended with phosphate-binding materials [75].
Frequently Asked Questions (FAQs) on CW Fundamentals
Q4: What are the primary removal mechanisms for pharmaceuticals in constructed wetlands, and how can I quantify their individual contributions?
A4: The removal is a synergy of physical, chemical, and biological processes [73] [76]. The table below summarizes the key mechanisms and methods for their investigation.
Table: Key Pharmaceutical Removal Mechanisms in Constructed Wetlands
| Mechanism | Process Description | Experimental Method for Investigation |
|---|---|---|
| Photodegradation | Breakdown of compounds by sunlight, particularly in surface flow wetlands [76]. | Use light-blocking controls (e.g., shaded mesocosms) and compare removal rates with unshaded systems. |
| Adsorption | Binding of compounds to the substrate (e.g., gravel, clay), soil, or plant roots [77] [76]. | Conduct batch sorption experiments with different media. Analyze contaminant concentration in the substrate media after a treatment cycle. |
| Microbial Degradation | Breakdown by bacteria and fungi in the water, substrate, and plant root zone [73] [76]. | Use molecular techniques (e.g., DNA sequencing) to characterize the microbial community. Employ metabolic inhibitors to selectively halt microbial activity. |
| Plant Uptake | Absorption of compounds by plants and potentially their subsequent transformation (phytodegradation) [76]. | Measure the concentration of parent compounds and metabolites in plant tissues (roots, shoots). Compare removal in planted vs. unplanted systems. |
Quantifying the exact contribution of each mechanism is complex and requires controlled lab-scale experiments that isolate these pathways (e.g., unplanted systems, sterile controls, dark conditions) [76].
Q5: How effective are CWs at removing persistent "forever chemicals" like PFAS?
A5: Early evidence suggests CWs have promise, but removal efficiency is highly variable and depends on the system design. A review of available data showed a median removal of 64% in Free Water Surface (FWS) wetlands and 46% in Horizontal Subsurface Flow (HF) wetlands [77]. Notably, Vertical Flow (VF) wetlands in the same study showed a 0% median removal, indicating the importance of selecting the correct wetland type [77]. The primary removal mechanism for PFAS in CWs is believed to be adsorption by the substrate or plant roots/rhizosphere, rather than complete degradation [77]. More long-term research on full-scale systems is needed to optimize CWs for PFAS mitigation.
Q6: What is the typical removal efficiency of CWs for common pharmaceuticals, and how does the wetland design influence this?
A6: Constructed wetlands are effective for many pharmaceuticals, but performance varies. The table below summarizes documented removal efficiencies based on system type.
Table: Pharmaceutical Removal Efficiency by Constructed Wetland Type
| Wetland Type | Typical Removal Efficiency Range | Key Influencing Factors |
|---|---|---|
| Free Water Surface (FWS) | Moderate to High | Exposure to sunlight enables photodegradation. High biological activity [73]. |
| Horizontal Subsurface Flow (HSSF) | Moderate | Longer hydraulic retention time. Removal relies on adsorption and microbial processes in the substrate [73] [77]. |
| Vertical Flow (VF) | Variable (Low to High) | Good oxygen transfer aids aerobic microbial degradation. Efficiency can be high for compounds degraded by such microbes [73] [77]. |
The design must be matched to the target contaminants; for example, a FWS wetland is better for photodegradable compounds, while a VF wetland might be superior for compounds requiring aerobic biodegradation [73].
Experimental Protocols for Research-Scale Constructed Wetlands
Protocol 1: Assembling a Lab-Scale CW for Contaminant Removal Testing
This protocol is adapted from a hands-on educational activity that mirrors research-grade microcosm construction [75].
Objective: To build a lab-scale vertical flow constructed wetland for studying the removal of pharmaceuticals and nutrients from synthetic wastewater.
Materials (The Scientist's Toolkit):
Table: Essential Research Reagents and Materials for Lab-Scale CWs
| Item | Function/Justification |
|---|---|
| Transparent Container (10-20 L) | Serves as the wetland vessel; transparency allows for visual monitoring of water level and plant root growth [75]. |
| Gravel (~2-5 cm diameter) | Forms the bottom drainage layer; provides structural support and harbors microbial biofilms [75]. |
| Porous Substrate (e.g., Expanded Clay, Lava Rock) | The primary treatment medium; high surface area for microbial attachment and adsorption of contaminants [75]. |
| Sand | Top layer to support plant roots and filter suspended solids. |
| Wetland Plants (e.g., Phragmites australis, Typha latifolia) | The biological engine; facilitates uptake, provides root surface for microbes, and transports oxygen [75]. |
| Perforated Silicone Tube & Faucet | Allows for controlled collection of effluent from the bottom of the system [75]. |
| Synthetic Wastewater | A defined solution of nutrients (e.g., NH₄Cl, K₂HPO₄) and target pharmaceutical compounds at environmentally relevant concentrations. |
| Water Testing Kits/Probes | For quantifying key parameters like pH, ammonia, nitrites, and phosphates in the influent and effluent [75]. |
Methodology:
- Assembly: Place the container securely. Install the faucet and perforated tube at the bottom. Add layers sequentially: a deep layer of gravel, followed by a layer of porous substrate (e.g., expanded clay), and finally a layer of sand.
- Planting: Plant the wetland species (e.g., Phragmites australis) into the sand layer. Ensure the roots are well-established within the substrate.
- Acclimation: Saturate the system with clean water and then acclimate it for 1-2 weeks by adding a dilute nutrient solution. This promotes plant establishment and growth of the microbial community [75].
- Dosing: Replace the water with synthetic wastewater doped with the target pharmaceuticals and nutrients.
- Sampling & Analysis: Collect effluent samples via the faucet at time zero and at regular intervals (e.g., 2 hours, 24 hours, 1 week). Analyze samples for contaminant concentration using appropriate analytical methods (e.g., HPLC, LC-MS) and standard test kits for nutrients [75].
- Data Processing: Calculate removal efficiency as
% Removal = [(C_in - C_out) / C_in] * 100, where Cin and Cout are the influent and effluent concentrations.
Protocol 2: Differentiating Removal Mechanisms
Objective: To quantify the contribution of different removal pathways (e.g., adsorption vs. biodegradation) for a specific pharmaceutical.
Methodology:
- Set up Multiple Microcosms: Establish several identical lab-scale CWs as in Protocol 1. Include the following treatments:
- Planted, active system: The complete, functioning CW.
- Unplanted system: Controls for the role of plants.
- Sterile control: The substrate is sterilized and microbial activity is inhibited (e.g., by adding sodium azide). This controls for adsorption and abiotic processes.
- Dark control (for photodegradable compounds): The CW is wrapped in aluminum foil to block light.
- Dosing and Sampling: Dose all systems with the same contaminated water and monitor the effluent concentration over time.
- Data Analysis:
- Total Removal: Calculated from the planted, active system.
- Adsorption Contribution: Estimated from the concentration reduction in the sterile control.
- Plant Uptake Contribution: Estimated by the difference between the planted and unplanted systems.
- Photodegradation Contribution: Estimated by the difference between the light-exposed and dark controls.
- Microbial Degradation: Estimated by the difference between the unplanted system and the sterile control.
Workflow and Conceptual Diagrams
Diagram 1: Pharmaceutical Removal Pathways in a Constructed Wetland. Key mechanisms are influenced by compound properties and system design.
Diagram 2: Experimental Workflow for a Lab-Scale Constructed Wetland. This protocol outlines the key steps for setting up and conducting a contaminant removal experiment [75].
Ensuring Scientific Rigor: Validation Protocols and Comparative Assessment Frameworks
Troubleshooting Guides
High Response Variability in Indicator Measurements
Problem: Collected data for a developed ecological indicator shows unacceptably high variability between replicate measurements or across similar sampling sites, making reliable interpretation difficult.
Solution: A systematic approach to identify and control the sources of variability.
- 1.1.1. Action: Verify sample homogeneity and stability.
- Methodology: If possible, subdivide a single, well-mixed sample and analyze the portions across different batches or days. The results should be consistent. For stability, analyze the same sample over a defined period under standard storage conditions. [78]
- 1.1.2. Action: Re-calibrate instrumentation.
- Methodology: Follow a standard operating procedure (SOP) for instrument calibration using certified reference materials. Perform a calibration verification with a separate standard to confirm accuracy. [78]
- 1.1.3. Action: Re-train and qualify personnel.
- Methodology: Implement a blinded re-reading exercise where the same set of samples (e.g., images for landscape analysis, water samples for benthic indicators) is assessed multiple times by the same analyst and by different analysts. Calculate the within-observer and between-observer coefficient of variation to quantify variability. [78] [79]
- 1.1.4. Action: Re-evaluate the experimental design.
- Methodology: Incorporate principles of randomization and replication. Use a Randomized Complete Block (RCB) Design if sampling across heterogeneous areas (e.g., different slopes, soil types) to group similar sampling units and reduce variability from these known factors. [78]
Indicator Shows Poor Correlation with Management Outcomes
Problem: The ecological indicator passes technical validation but fails to correlate with, or predict, the management outcome or ecosystem state it was intended to reflect.
Solution: Re-assess the indicator's conceptual soundness and its integration with social or valuation metrics.
- 1.2.1. Action: Revisit the indicator's conceptual foundation.
- 1.2.2. Action: Integrate with complementary metrics.
- Methodology: Develop a suite of indicators rather than relying on a single measure. Use statistical methods (e.g., multivariate analysis) to model the application of indicator suites across multiple scales and resources. Integrate social valuation metrics to produce scientifically rigorous and politically relevant assessments. [54]
- 1.2.3. Action: Validate against a known gradient.
- Methodology: Apply the indicator across a site where the environmental pressure (e.g., pollution gradient, land-use intensity) is already well-characterized. The indicator's response should show a clear and interpretable relationship with this known gradient. [80]
Difficulty in Establishing Thresholds for Interpretation
Problem: It is challenging to define clear thresholds (e.g., good vs. poor ecological condition) for the indicator, limiting its utility for decision-makers.
Solution: Use statistical and empirical approaches to define ecologically meaningful thresholds.
- 1.3.1. Action: Analyze historical or reference site data.
- Methodology: Collect data from pristine or minimally disturbed "reference" sites to establish a baseline. Statistical distributions (e.g., 5th or 25th percentiles) of the indicator values from these reference conditions can be used to set thresholds for degradation. [80]
- 1.3.2. Action: Model response to stress.
- Methodology: Use regression trees or change-point analysis (e.g., TITAN) on a dataset that includes both the indicator and stressor variables. This identifies the value of the stressor at which a significant change in the indicator occurs. [81]
- 1.3.3. Action: Simulate the impact of variability on categorization.
- Methodology: Adapt algorithms from other fields, such as oncology. Use a hierarchical model to estimate measurement variability and then simulate how this variability affects the categorization of sites (e.g., as "healthy" or "degraded") based on proposed thresholds. This evaluates the reliability of your categorization. [79]
Frequently Asked Questions (FAQs)
Q1: What are the key parameters to evaluate when validating a new ecological indicator? A: The key parameters, adapted from analytical method validation and ecological guidance, are summarized in the table below. [78] [80]
| Parameter | Description | Interpretation & Ecological Context |
|---|---|---|
| Accuracy | Closeness of agreement between the measured indicator value and a known reference or true value. | High accuracy indicates the indicator reliably reflects the actual ecological condition. Often assessed using certified reference materials or spiked samples. [78] |
| Precision | Closeness of agreement between independent measurement results obtained under stipulated conditions. | High precision indicates consistent and repeatable results. Evaluated as repeatability (same conditions) and reproducibility (different conditions). [78] |
| Linearity | The ability of the indicator method to produce results that are directly proportional to the concentration or intensity of the ecological parameter. | Indicates the method is reliable across the expected range of conditions. [78] |
| Sensitivity (LOD/LOQ) | The lowest value of the ecological parameter that can be detected (LOD) or quantified with acceptable precision (LOQ). | A low LOD/LOQ allows for early detection of environmental change. [78] |
| Response Variability | The inherent fluctuation in the indicator's value due to measurement error and natural temporal/spatial heterogeneity. | Must be quantified to set minimum detectable effect sizes and to understand the uncertainty in management recommendations. [80] [79] |
| Interpretation Utility | The ease and confidence with which indicator results can be linked to management decisions and ecosystem status. | Assessed by establishing clear, ecologically relevant thresholds and ensuring the indicator is responsive to management actions. [54] [80] |
Q2: How can I design an experiment to minimize bias and variability during indicator development? A: A robust experimental design is crucial. Follow these principles and a structured workflow. [78]
- Randomization: Analyze samples in a random order to minimize the confounding effects of time-sensitive factors (e.g., instrument drift, analyst fatigue). [78]
- Replication: Include a sufficient number of independent replicate measurements at each sampling unit to reliably estimate variability and improve precision. [78]
- Blocking: Group similar sampling units together (e.g., plots within the same habitat type) to reduce variability from known sources and increase the power to detect the effect of interest. [78]
Q3: Our indicator validation shows high reader-to-reader variability. How can we address this? A: This is a common issue in visual assessments (e.g., habitat classification, species identification).
- Standardized Training: Develop and implement detailed, step-by-step SOPs with visual aids.
- Blinded Re-reading: A portion of samples should be re-analyzed by the same reader and different readers without them knowing it. Calculate agreement statistics (e.g., Cohen's Kappa) to quantify consistency. [79]
- Hierarchical Modeling: Use a statistical model that accounts for variability from lesions (or sampling units), readers, and their interaction. This helps isolate the source of variability, as demonstrated in radiologic assessments. [79]
Q4: How do I ensure my ecological indicator is not just scientifically sound, but also useful for environmental managers and policymakers? A: This is a core aim of modern indicator development. [54]
- Early Engagement: Interact with potential users (e.g., state agencies, program offices) during the development phase to understand their priorities and constraints. [80]
- Focus on Interpretation: Actively research "how research indicators can be transformed into direct application for management purposes." Ensure the indicator provides clear answers to "so what?" for a manager. [54]
- Use Relevant Metrics: Integrate social and economic valuation metrics where appropriate to produce assessments that are both scientifically rigorous and politically relevant. [54]
The Scientist's Toolkit: Research Reagent Solutions
| Essential Material / Solution | Function in Ecological Indicator Development & Validation |
|---|---|
| Certified Reference Materials (CRMs) | Used to validate the accuracy and precision of analytical methods. Provides a known quantity of a substance (e.g., a specific pollutant) to calibrate instruments and verify method performance. [78] |
| Standard Operating Procedures (SOPs) | Detailed, written instructions to achieve uniformity in the performance of a specific function (e.g., sample collection, laboratory analysis). Critical for minimizing operator-induced variability and ensuring reproducibility. [78] |
| Statistical Software (e.g., R, Python with libraries) | Used for data analysis, including calculating variability (ANOVA), modeling indicator responses, establishing thresholds, and creating reproducible workflows for data interpretation. [78] [79] |
| Hierarchical Linear Mixed-Effects Models | A statistical approach to estimate the distribution of measurement errors from different sources (e.g., site, reader, time). Essential for quantifying and understanding the components of response variability. [79] |
| Field Sampling Kits (standardized) | Pre-assembled kits containing all equipment for sample collection (bottles, filters, preservatives) ensure consistency and prevent contamination across different field teams and sampling events. |
Welcome to the Technical Support Center for Ecological Indicator Research. This resource is designed for researchers and scientists developing and testing ecological indicators, providing direct, practical guidance on selecting and applying the Coefficient of Variation (CV) method and Machine Learning (ML) approaches. These methodologies are central to constructing robust composite indicators and predictive models, which are vital for monitoring ecosystem health, assessing environmental impacts, and informing policy decisions [82] [83]. The following FAQs, troubleshooting guides, and protocols will help you navigate the specific challenges associated with these techniques within the context of ecological research.
Frequently Asked Questions (FAQs)
FAQ 1: In what scenarios should I prefer the Coefficient of Variation method over Machine Learning for indicator development?
- Answer: The CV method is ideal when your study requires a transparent, reproducible, and computationally straightforward approach for constructing composite ecological indicators. It is particularly useful for:
- Weight Assignment: Objectively determining the weight of individual indicators based on their relative variability in a dataset. Indicators with higher variation are assumed to convey more information and are assigned greater weight [83].
- Resource-Limited Settings: When working with smaller datasets or without access to advanced computational resources.
- Baseline Assessments: Establishing an initial, interpretable composite index from a set of normalized variables, such as combining rainfall, temperature, and vegetation cover into a single sensitivity score [84].
FAQ 2: My ML model for forecasting vegetation indices has high overall accuracy but fails to predict sudden mid-year drops. What could be wrong?
- Answer: This is a known challenge. As noted in a study forecasting NDVI and EVI, models like Support Vector Regression or Random Forest can achieve high accuracy (e.g., ~98%) but may miss abrupt, short-term ecological events [85].
- Potential Cause: The model may be capturing the dominant seasonal or linear trends well but is insensitive to the drivers of these sudden changes, such as pest outbreaks, short-term droughts, or human activities like logging.
- Solution: Incorporate additional data layers that act as proxies for these disturbances. Use high-temporal-resolution satellite data (e.g., Sentinel-2) and integrate ancillary data on weather extremes, soil moisture, or human disturbance indices as new features in your model.
FAQ 3: How can I objectively screen out redundant indicators before building a composite index?
- Answer: To enhance the representativeness of your indicator set and avoid information redundancy, you can employ a two-step statistical screening process:
- Identify Weak Indicators: Use the Coefficient of Variation to remove indicators with weak interpretation strength (low variability) [86].
- Remove Redundancy: Apply methods like the Ill-conditioned Index Cycle, Pearson correlation, or Principal Component Analysis (PCA) to identify and eliminate highly correlated indicators, thus reducing dimensionality and redundancy [87] [86]. This ensures your final indicator set is both parsimonious and informative.
FAQ 4: My Random Forest model for forest health classification is accurate but acts as a "black box." How can I identify which ecological drivers are most important?
- Answer: Random Forest models provide a powerful feature importance analysis. After training your model, you can extract metrics that show the relative contribution of each input variable (e.g., tree DBH, regeneration rate, soil erosion) to the model's predictive accuracy [87]. This allows you to interpret the model and identify key drivers, transforming a "black box" into a tool for generating ecological insights.
Troubleshooting Guides
Issue: Poor Performance or High Bias in Machine Learning Models
| Symptom | Possible Cause | Solution |
|---|---|---|
| Low accuracy and poor generalization on new data. | Insufficient or low-quality training data. | Increase dataset size through data augmentation or collect more field samples. Ensure data is clean and properly preprocessed. |
| Model fails to capture complex nonlinear relationships (e.g., between climate and species distribution). | Algorithm mismatch. The chosen model is too simple. | Switch to more powerful algorithms like Random Forest, Support Vector Machines (SVM), or neural networks that can handle complex, nonlinear ecological data [88] [87]. |
| Model performance is inconsistent across different validation splits. | Overfitting - the model has learned the noise in the training data. | Implement cross-validation (e.g., 5-fold cross-validation) and hyperparameter tuning to ensure robustness [87]. For Random Forest, adjust parameters like tree depth and the number of features considered per split. |
Issue: Uninterpretable or Misleading Composite Indicator from CV Method
| Symptom | Possible Cause | Solution |
|---|---|---|
| The final composite index is heavily dominated by one or two indicators. | Incorrect weight assignment. Indicators on different scales were not properly normalized before applying the CV. | Always normalize all indicators (e.g., using Min-Max scaling or Z-scores) to a common scale before calculating their coefficients of variation and weights [83]. |
| The composite index does not align with ecological theory or field observations. | Inappropriate indicator selection. The initial pool of indicators may include irrelevant or counter-productive metrics. | Revisit the theoretical framework for your study. Use the screening process described in FAQ 3 to remove redundant or weak indicators and validate your selection with domain experts [86]. |
Experimental Protocols
Protocol 1: Constructing a Composite Ecological Indicator Using the Coefficient of Variation
This protocol outlines the steps to create a transparent and statistically weighted composite index, as applied in studies on ecological sensitivity and sustainable supply chains [84] [83] [86].
1. Define the Framework and Select Indicators: * Based on your research question (e.g., assessing forest health or ecological sensitivity), select a theoretical framework (e.g., Triple Bottom Line theory) and an initial pool of relevant indicators from ecological, geological, and human domains [84] [86].
2. Normalize the Data:
* Normalize all indicator values to make them unitless and comparable. A common method is Min-Max normalization:
Indicator_norm = (Indicator_value - Min_value) / (Max_value - Min_value)
3. Calculate Weights using the Coefficient of Variation:
* For each normalized indicator, calculate its CV, which is the ratio of the standard deviation to the mean: CV = σ / μ.
* The weight (w_i) for each indicator is then calculated as: w_i = CV_i / Σ(CV_i).
* This assigns higher weight to indicators with greater relative variability [83].
4. Construct the Composite Indicator:
* Aggregate the weighted indicators to compute the final composite index (E) for each observation using the formula:
E = Σ(w_i * x_i) / Σ(w_i) where x_i is the normalized value of each indicator [82].
Visual Workflow: Composite Indicator Construction
Protocol 2: Classifying Ecological States with Machine Learning
This protocol details the process for using ML models, like Random Forest, to classify ecosystem health, as demonstrated in forest health assessments [87].
1. Data Collection and Preparation: * Collect field-based and remote-sensing-derived ecological indicators. Example indicators for forest health include: Tree Density, Tree DBH (Diameter at Breast Height), Regeneration Rate, Soil Erosion Level, and Deforestation Intensity [87]. * Label your data based on a predefined classification (e.g., Healthy, Moderate, Unhealthy forest) using an objective method like K-means clustering on principal components.
2. Model Training and Validation: * Split the dataset into a training set (e.g., 80%) and a test set (e.g., 20%). * Train multiple ML models (e.g., Decision Tree, Random Forest, SVM) on the training set. * Use 5-fold cross-validation on the training set to tune model hyperparameters and prevent overfitting.
3. Model Evaluation and Interpretation: * Evaluate the trained models on the held-out test set using metrics like Accuracy, Kappa, and Balanced Accuracy. * Use the best-performing model (e.g., Random Forest) to calculate feature importance to identify the key ecological drivers of the classified states [87].
Visual Workflow: Machine Learning Classification
Performance Comparison & Research Reagent Solutions
Quantitative Comparison of Methodologies
The table below summarizes the performance of different methodologies as reported in ecological studies, providing a benchmark for your research.
| Methodology / Model | Application Context | Reported Performance | Key Advantage |
|---|---|---|---|
| Coefficient of Variation | Constructing composite indicators for ecological sensitivity [84] | N/A (Used for zoning; 41.9% of area as high/very high sensitivity) | Objective weight assignment; High transparency [83]. |
| Random Forest (RF) | Forest health classification [87] | Accuracy: 90.3% (CV), Kappa: 0.87 | High accuracy and robustness; Provides feature importance. |
| Support Vector Machine (SVM) | Forest health classification [87] | Accuracy: 88.1% (CV) | Effective in high-dimensional spaces. |
| Decision Tree (DT) | Forest health classification [87] | Accuracy: 65.1% (CV) | Simple and interpretable; prone to overfitting. |
| Random Forest | Forecasting Vegetation Indices (NDVI) [85] | Accuracy: 98.4% | Effectively captures seasonal trends. |
The Scientist's Toolkit: Essential Research Reagents & Materials
This table lists key "reagents" – essential data types and tools – for experiments in ecological indicator development.
| Research Reagent | Function / Explanation |
|---|---|
| MODIS NDVI/EVI Data | Satellite-derived vegetation indices used as key indicators of vegetation health, density, and productivity for time-series forecasting [85]. |
| Field-Measured Structural Indicators | Direct measurements like Tree DBH (Diameter at Breast Height), tree height, and tree density, which serve as fundamental ground-truthed indicators of forest structure and health [87]. |
| Disturbance Proxies | Metrics such as stump density (for deforestation) and visual assessments of grazing intensity and soil erosion, which quantify anthropogenic and natural pressures on ecosystems [87]. |
| Principal Component Analysis (PCA) | A statistical technique used to reduce the dimensionality of a dataset, revealing the major ecological gradients (e.g., elevation-disturbance-regeneration) that explain the most variance [87]. |
| K-means Clustering | An unsupervised learning algorithm used to group study sites (e.g., forests) into distinct health classes (Healthy, Moderate, Unhealthy) based on multivariate ecological data, providing labeled data for classification models [87]. |
Technical Support Center
Troubleshooting Guides
Issue 1: Inconsistent Results Between Different Assessment Methods
Problem Description: Researchers report conflicting results when applying Water Quality Index (WQI), Qualitative Habitat Evaluation Index (QHEI), and biological indicators like the Shannon-Wiener index (H') to the same river stretch.
Diagnosis: This is a common challenge due to the different aspects of river health each method captures. WQI focuses on physicochemical parameters, QHEI assesses physical habitat structure, and H' measures biodiversity. A recent study in Ningbo's urban rivers found high congruency between H' and QHEI, but WQI showed only moderate or weak correlation with both QHEI and H' [89].
Solution:
- Step 1: Recognize that discrepancies are expected and valuable - they reveal different dimensions of river health
- Step 2: Apply all three methods systematically at the same sampling locations and time
- Step 3: Use the Earth5R weightage system that assigns values based on ecological importance [90]
- Step 4: Create an integrated scoring model that combines findings from all methods
- Step 5: Map final scores to a color-coded band system (Excellent/Critical) for clear interpretation
Prevention: Establish standardized protocols for simultaneous data collection across all methods and train field staff in consistent application.
Issue 2: Data Quality Concerns in Community-Based Monitoring
Problem Description: Concerns about accuracy and reliability of data collected by citizen scientists versus professional researchers.
Diagnosis: This limitation is acknowledged in community-based monitoring programs. Volunteers may make observational or technical errors, especially during early engagement stages [90].
Solution:
- Step 1: Implement structured training using standardized protocols
- Step 2: Conduct periodic cross-verification by environmental experts
- Step 3: Use mobile apps with built-in anomaly detection that flag outliers
- Step 4: Establish duplicate sampling with professional teams for validation
- Step 5: Apply statistical quality control measures to identify systematic errors
Validation: Studies confirm that data from properly trained volunteers can achieve reliability comparable to professional collection [90].
Experimental Protocols and Methodologies
Protocol 1: Comprehensive River Health Assessment Framework
Purpose: To systematically evaluate river health using integrated physical, chemical, biological, and social indicators [90].
Materials:
- Water testing kits (pH, dissolved oxygen, turbidity, etc.)
- GPS-enabled mobile devices with data collection app
- Habitat assessment forms
- Biological sampling equipment (dip nets, trays, identification guides)
- Water sampling bottles and preservation chemicals
Procedure:
- Site Selection: Choose representative river stretches considering accessibility, habitat types, and potential pollution sources
- Water Quality Sampling:
- Collect water samples in clean, sterile bottles
- Measure temperature, pH, dissolved oxygen, and conductivity in situ
- Preserve samples for laboratory analysis of BOD, nutrients, and contaminants
- Habitat Assessment:
- Complete QHEI evaluation covering substrate, channel morphology, riparian zone
- Document physical habitat quality and structural diversity
- Biological Monitoring:
- Collect macroinvertebrates using standardized kick-net methods
- Identify and count species for biodiversity calculations
- Apply Shannon-Wiener index formula: H' = -Σ(pi × ln(pi))
- Data Integration:
- Input all parameters into weighted scoring model
- Calculate composite River Health Index score
- Assign color-coded classification (Blue: Excellent → Red: Critical)
Protocol 2: Multi-Method Validation Procedure
Purpose: To compare and validate results from different assessment approaches [89].
Experimental Design:
- Apply WQI, QHEI, and Shannon-Wiener index simultaneously at 15+ river locations
- Ensure spatial and temporal synchronization of data collection
- Employ statistical correlation analysis (Pearson correlation coefficients)
- Conduct ANOVA to test method-dependent variations
Analysis Method:
- Calculate correlation matrix between assessment methods
- Perform spatial analysis of method agreement/disagreement
- Identify environmental factors explaining methodological discrepancies
- Develop integrated assessment framework leveraging complementary strengths
Quantitative Data Tables
Table 1: Correlation Between Assessment Methods in Urban Rivers
| Assessment Method Pair | Correlation Coefficient | Statistical Significance | Sample Size (Rivers) |
|---|---|---|---|
| H' vs QHEI | High congruence | p < 0.01 | 15 |
| WQI vs QHEI | Moderate correlation | p < 0.05 | 15 |
| WQI vs H' | Weak correlation | Not significant | 15 |
Data derived from Ningbo urban rivers study [89]
Table 2: Earth5R River Health Index Scoring Model
| Parameter Category | Specific Indicators | Weight (%) | Ecological Rationale |
|---|---|---|---|
| Physical Indicators | Substrate composition, Flow regime | 25% | Habitat structure and stability |
| Chemical Indicators | pH, Dissolved oxygen, BOD, Nutrients | 35% | Water quality and pollution status |
| Biological Indicators | Macroinvertebrate diversity, Fish presence | 30% | Ecosystem functioning and biodiversity |
| Social Indicators | Riparian land use, Community engagement | 10% | Human impact and stewardship |
Based on Earth5R's weighted parameter system [90]
Table 3: Color-Coded River Health Classification
| RHI Score Range | Color Code | Health Status | Management Implication |
|---|---|---|---|
| 85-100 | Blue | Excellent | Protection and maintenance |
| 70-84 | Green | Good | Minor restoration needed |
| 55-69 | Yellow | Moderate | Significant intervention required |
| 40-54 | Orange | Poor | Major restoration actions needed |
| <40 | Red | Critical | Immediate and intensive intervention |
Adapted from Earth5R's color-coded band system [90]
The Scientist's Toolkit: Research Reagent Solutions
Table 4: Essential Materials for River Health Assessment
| Item Category | Specific Items | Function | Application Context |
|---|---|---|---|
| Field Testing Equipment | Portable pH meters, DO meters, Turbidity tubes | In-situ measurement of basic water quality parameters | Initial rapid assessment |
| Laboratory Analysis Kits | BOD incubation kits, Nutrient test kits (Nitrate, Phosphate) | Quantitative analysis of key chemical parameters | Detailed water quality characterization |
| Biological Sampling Gear | D-frame nets, Kick nets, Sorting trays, Preservation solutions | Collection and processing of macroinvertebrate samples | Biodiversity and bioassessment studies |
| Habitat Assessment Tools | Riffle classification keys, Riparian zone evaluation forms | Standardized evaluation of physical habitat quality | Habitat quality quantification |
| Digital Data Collection | Mobile apps with GPS, Data management platforms | Real-time data recording, geo-tagging, and analysis | Community-based monitoring programs |
Frequently Asked Questions (FAQs)
Q1: What is the scientific basis for integrating multiple assessment parameters in river health evaluation?
A1: The integration is grounded in the understanding that rivers are complex ecosystems where physical, chemical, and biological components interact. Single-method approaches often miss critical aspects of ecosystem health. Research shows that while biological indices (H') and habitat assessments (QHEI) show high congruence, water quality indices (WQI) capture different dimensions, providing complementary information [89]. The Earth5R model uses a weighted multi-parameter system based on ecological importance to create a comprehensive assessment [90].
Q2: How can we ensure data reliability in community-based monitoring programs?
A2: Data reliability is ensured through multiple strategies: structured training using standardized protocols, periodic expert validation, mobile applications with built-in quality checks, duplicate sampling, and statistical quality control measures. Studies confirm that properly trained volunteers can produce data with reliability comparable to professional collection [90]. The Earth5R approach includes cross-verification mechanisms and anomaly detection in their digital platform.
Q3: What are the most common pitfalls in river health index development and how can we avoid them?
A3: Common pitfalls include:
- Over-reliance on single method: Avoid by using complementary approaches (WQI, QHEI, H') [89]
- Inadequate spatial coverage: Address through community-based monitoring expanding geographic reach [90]
- Poor data quality control: Mitigate with standardized protocols and validation procedures
- Ignoring social dimensions: Overcome by including community engagement metrics in assessment
- Failure to link assessment to management: Solve by using clear color-coded classifications that direct specific management actions
Q4: How does the River Health Index contribute to Sustainable Development Goals (SDGs)?
A4: The River Health Index directly supports multiple SDGs:
- SDG 6 (Clean Water and Sanitation): Through water quality monitoring and sustainable management practices [90]
- SDG 11 (Sustainable Cities and Communities): By engaging communities in environmental governance of urban rivers
- SDG 13 (Climate Action): Through data-driven advocacy and climate resilience assessment
- SDG 15 (Life on Land): By promoting conservation of aquatic and terrestrial ecosystems
Q5: What statistical methods are most appropriate for analyzing river health assessment data?
A5: Appropriate statistical methods include:
- Correlation analysis: To examine relationships between different assessment methods [89]
- Analysis of Variance (ANOVA): For comparing multiple sampling sites or temporal changes
- Spatial analysis: To identify geographic patterns in river health
- Multivariate statistics: For understanding complex interactions between multiple parameters
- Weighted scoring models: To integrate diverse parameters into a composite index [90]
Visual Workflows
River Health Assessment Methodology Integration Workflow
Multi-Parameter Weighted Integration Framework
Community-Based Monitoring Data Quality Assurance Framework
Pharmaceutical pollutants, classified as emerging contaminants (ECs), have become a critical focus in environmental risk assessment due to their biological activity, persistence, and widespread detection in global water systems [91]. These Active Pharmaceutical Ingredients (APIs) and their metabolites enter aquatic environments through multiple pathways including wastewater effluent, agricultural runoff, and direct disposal [91] [92]. Despite typically occurring at low concentrations (ng/L to µg/L), their continuous infusion into ecosystems and potential for chronic effects on non-target organisms makes them significant environmental threats [93] [91]. This technical support document provides a comprehensive framework for researchers conducting ecological risk assessments of pharmaceutical pollutants, with specific troubleshooting guidance for methodological challenges.
Table 1: Global Occurrence of Select Pharmaceutical Pollutants in Aquatic Environments
| Pharmaceutical Type | Specific Compound | Maximum Reported Concentration (ng/L) | Location | Primary Concerns |
|---|---|---|---|---|
| NSAIDs & Analgesics | Ibuprofen | 143,000 | Spain (Santos et al., 2007) [91] | Aquatic toxicity |
| NSAIDs & Analgesics | Acetaminophen | 12,430 | Nigeria (Ebele et al., 2020) [91] | Developmental abnormalities |
| NSAIDs & Analgesics | Diclofenac | 10,221 | Saudi Arabia (Ali et al., 2017) [91] | Vulture population collapse [94] |
| Antibiotics | Sulfamethoxazole | High detection frequency [95] | Vietnam (Hospital wastewater) | Antibiotic resistance |
| Various | Carbamazepine | Methodology provided [95] | Multiple regions | Persistence in environment |
Analytical Methodologies for Pharmaceutical Pollutant Detection
Standardized Protocol for Pharmaceutical Residue Analysis in Water Matrices
Application: Simultaneous determination of seven pharmaceutical residues (carbamazepine, ciprofloxacin, ofloxacin, ketoprofen, paracetamol, sulfamethoxazole, trimethoprim) in surface water and hospital wastewater [95].
Materials and Equipment:
- UPLC-ESI-MS/MS System: Ultra-Performance Liquid Chromatography with Electrospray Ionization Tandem Mass Spectrometry
- Solid Phase Extraction (SPE) Cartridges: Oasis mix-mode cation exchange (MCX) or hydrophilic lipophilic balance (HLB)
- Internal Standards: Isotopically labeled compounds (sulfamethoxazole-13C6, ofloxacin-D3, paracetamol-D4)
- Solvents: LC-MS grade acetonitrile and methanol, formic acid, ammonium hydroxide
- Filtration System: Glass microfiber filters (GF/F Whatman, ϕ ≤ 0.7 µm), prerinsed and baked at 450°C for 4 hours to eliminate contaminants
Experimental Workflow:
- Sample Collection and Preservation: Collect water samples in pre-rinsed 1L plastic bottles, maintain at 4°C during transport, and store at -20°C or -80°C until analysis [95].
- Sample Preparation: Filter samples to remove suspended matter, adjust pH to 3.0 with 2M formic acid, spike with internal standard mixture (50 ng/mL final concentration) [95].
- Solid Phase Extraction:
- Condition MCX cartridges with 3mL MeOH followed by 2×3mL acidified water (pH 3.0)
- Load 200mL sample at 12-15 mL/min flow rate
- Wash with 3mL water (pH 3.0) to remove interferences
- Elute with 5×1mL mixture of MeOH/2M NH₄OH (90/10; v/v)
- Sample Concentration: Evaporate extracts under gentle nitrogen stream to dryness, reconstitute in 1mL H₂O/MeCN (95/5; v/v), filter through 0.2µm syringe filter [95].
- UPLC-ESI-MS/MS Analysis:
- Separation: Reversed-phase column within 6 minutes runtime
- Detection: Multiple Reaction Monitoring (MRM) mode with optimized mass parameters
- Quantification: Internal standard method for compensation of matrix effects
Method Validation Essentials: Establishing Detection and Quantification Limits
Critical Parameters for Analytical Method Validation [96]:
- Limit of Blank (LOB): Highest measurement result likely observed for a blank sample
- Calculation: LOB = Meanblank + 1.645 × SDblank (one-sided 95%)
- Limit of Detection (LOD): Lowest amount detectable but not necessarily quantifiable as exact value
- Calculation: LOD = Meanblank + 3.3 × SDblank
- Signal-to-Noise Approach: LOD at S/N = 2:1
- Limit of Quantification (LOQ): Lowest amount quantifiable with acceptable precision and accuracy
- Calculation: LOQ = Meanblank + 10 × SDblank
- Signal-to-Noise Approach: LOQ at S/N = 3:1
Table 2: Method Performance Characteristics for Pharmaceutical Detection
| Validation Parameter | Acceptance Criteria | Troubleshooting Guidance |
|---|---|---|
| Linearity | R² ≥ 0.990, residuals random | Check for quadratic effect in residuals; dilute samples if outside range |
| Repeatability | ≤25% of specification tolerance for chemical assays [97] | Increase homogenization; control temperature variations |
| Bias/Accuracy | ≤10% of specification tolerance [97] | Verify reference standard purity; check calibration curve |
| LOD/LOQ | LOD ≤5-10%, LOQ ≤15-20% of tolerance [97] | Increase sample enrichment; optimize detector parameters |
| Specificity | 100% detection rate for identification [97] | Improve sample cleanup; use selective detection (MRM) |
Ecological Risk Assessment Framework
Risk Quantification Methodologies
Risk Quotient (RQ) Calculation [49]:
- Measured Environmental Concentration (MEC): Actual field-measured or literature-derived concentration
- Predicted No-Effect Concentration (PNEC): Derived from laboratory ecotoxicity data
- Risk Quotient: RQ = MEC / PNEC
- RQ < 1: Low risk
- RQ = 1-10: 'High risk' (graded from moderately high to severely high)
- RQ > 10: 'Impaired' ecological condition
PNEC Determination [49]:
- Start with NOEL (No Observed Effect Level) or LOEL (Lowest Observed Effect Level)
- Apply Assessment Factor (AF) of ≥10 to account for uncertainty
- PNEC = NOEL / AF
Biotic Indicator Groups for River Health Assessment [49]:
- Algae: Most frequently affected group, sensitive to photosynthetic inhibitors
- Macroinvertebrates (MI): Intermediate sensitivity, community structure changes
- Fish: Higher trophic level, biomagnification potential
Regional Risk Comparison Framework
Key Factors Influencing Regional Risk Profiles [94]:
- Population Demographics: Age structure affects pharmaceutical usage patterns
- Wastewater Infrastructure: Sewer connectivity ranges from >90% (high-income) to <30% (low-income)
- Regulatory Frameworks: Variance in environmental protection regulations
- Manufacturing Intensity: Geographic shifts in API production to lower-income countries
- Healthcare Access: Affects consumption patterns of pharmaceuticals
Table 3: Regional Risk Factor Comparison for Pharmaceutical Pollutants
| Risk Factor | High-Income Countries | Low-Middle-Income Countries |
|---|---|---|
| Primary Exposure Pathway | Point-source (WWTP effluents) [94] | Diffuse-source (septic systems, raw sewage) [94] |
| Monitoring Capability | Advanced (LC-MS/MS common) [95] | Limited (methodology access constraints) |
| Treatment Infrastructure | High technology, variable API removal [91] | Limited, often inefficient API removal [91] |
| Population Impact | Aging population, specific drug classes [94] | Younger population, different disease burdens [94] |
| Regulatory Attention | Increasing environmental assessment [94] | Limited regulatory frameworks for APIs [94] |
Remediation Strategies and Technology Selection
Bioremediation Approaches for Pharmaceutical Removal
Mycoremediation: Fungal technologies using lignin-modifying enzymes (laccases, peroxidases) show particular promise for structural breakdown of complex pharmaceuticals [91].
Constructed Wetlands (CWs): Nature-based solutions particularly suitable for developing economies [49].
- Mechanisms: Microbial degradation, plant uptake, sorption, photolysis
- Design Considerations: Hydraulic retention time, plant selection, matrix composition
- Advantages: Low energy requirements, operational simplicity, multiple contaminant removal
Advanced Treatment Options:
- Membrane Technologies: Nanofiltration, reverse osmosis
- Advanced Oxidation Processes: Ozonation, photocatalysis
- Activated Carbon Adsorption: Powdered or granular forms
Frequently Asked Questions: Troubleshooting Guide
Analytical Methodology Challenges
Q: We are experiencing low recovery rates (<70%) during SPE extraction of pharmaceuticals from wastewater. What are potential causes and solutions?
A: Low recovery can result from several factors:
- pH Optimization: Ensure sample pH adjusted to 3.0 before MCX extraction for basic compounds [95]
- Cartridge Selection: Use mixed-mode cation exchange (MCX) instead of reversed-phase for better retention of ionizable pharmaceuticals [95]
- Elution Solvent Strength: Increase ammonium hydroxide concentration (up to 10%) in methanol eluent [95]
- Matrix Effects: Implement post-extraction standard addition to quantify and compensate for suppression/enhancement [95]
Q: Our method validation shows high variability in LOD/LOQ determinations. How can we improve reproducibility?
A: Method variability in limit determinations often stems from:
- Statistical Approach: Use standard deviation of response and slope method (LOD = 3.3σ/slope) rather than visual evaluation [96]
- Sample Size: Increase determinations to ≥6 replicates at each concentration [96]
- Blank Management: Include sufficient blank samples (≥10) to properly characterize background [96]
- Curve Fitting: Apply appropriate regression models (4PL logistics for S/N methods) [96]
Ecological Assessment Challenges
Q: When calculating risk quotients (RQs), we have uncertainty in PNEC values due to limited species sensitivity data. How should we address this?
A: PNEC uncertainty is common, particularly for newer pharmaceuticals:
- Assessment Factors: Increase assessment factor (AF) to 50 or 100 when moving from chronic to acute data or when data is limited to one trophic level [49]
- Read-Across Approaches: Use data from structurally similar compounds with established PNECs
- Probabilistic Methods: Apply species sensitivity distributions (SSDs) when data for ≥5 species are available
- Weight-of-Evidence: Incorporate sublethal endpoints (reproduction, growth) beyond mortality [49]
Q: Our risk assessment shows high spatial variability in pharmaceutical concentrations. How should we design sampling campaigns to capture representative conditions?
A: Pharmaceutical pollution is often spatially heterogeneous:
- Source-Driven Sampling: Focus on points downstream of WWTP discharges, hospital outfalls, and agricultural drainage [91]
- Temporal Considerations: Include seasonal variation (dry vs. wet seasons) and time-of-day for hospital effluents
- Composite Sampling: Use 24-hour composite samples rather than grab samples to account for flow variations
- Matrix Diversity: Assess multiple compartments (water, sediment, biota) to understand fate and distribution [91]
Research Reagent Solutions for Pharmaceutical Pollutant Analysis
Table 4: Essential Research Materials for Pharmaceutical Pollutant Analysis
| Reagent/Material | Specification | Application Function |
|---|---|---|
| Mixed-Mode Cation Exchange SPE Cartridges | Oasis MCX, 3cc, 60mg [95] | Simultaneous retention of acidic, basic, and neutral pharmaceuticals |
| Isotopically Labeled Internal Standards | Sulfamethoxazole-13C6, Ofloxacin-D3 [95] | Compensation for matrix effects and extraction variability |
| UPLC-MS/MS Mobile Phase Additives | LC-MS grade formic acid, ammonium hydroxide [95] | Optimization of ionization efficiency and chromatographic separation |
| Ecotoxicity Test Organisms | Algae (Pseudokirchneriella), Daphnia, Fathead minnow embryos [49] | PNEC determination for different trophic levels |
| Lignin-Modifying Enzymes | Fungal laccases, peroxidases [91] | Bioremediation mechanism studies for pharmaceutical degradation |
FAQs: Core Concepts and Common Problems
Q1: What is the difference between statistical convergence and ecological validity in the context of performance metrics?
- A: Statistical Convergence refers to whether a sequence of measurements or estimates stabilizes or approaches a specific value as more data is collected. In ecological indicator research, this often involves testing if environmental metrics (e.g., per capita ecological footprints across countries) show a tendency to move towards a common level over the long term, indicating a mean-reverting process [98].
- Ecological Validity, a facet of external validity, concerns the degree to which your research findings and the metrics used can be generalized to real-world settings and contexts. It asks whether the experimental setup, stimuli, and measurement context accurately represent the actual environment or ecology being studied [99] [100]. A metric can be statistically robust in a controlled lab setting but fail to predict or reflect real-world phenomena.
Q2: Why is the convergent validity of environmental performance metrics a concern, and how can I test it?
- A: Different proprietary databases (e.g., MSCI ESG STATS, Thomson Reuters ASSET4) are often used extensively in research to assess corporate environmental performance. However, a study on their convergent validity—the extent to which different metrics measuring the same construct agree—shows that while they have common dimensions, their aggregate ratings frequently do not converge [101].
- Troubleshooting Guide: If your metrics from different sources disagree, do not assume they are interchangeable.
- Investigate Underlying Dimensions: Break down aggregate scores into their sub-components (e.g., emissions, resource use, policy strength). Convergence is often higher at the dimension level [101].
- Check for Industry Bias: Assess whether differences are driven by how various metrics account for industry-related risks. Some metrics may converge better for company-specific performance, while others reflect industry-level risk [101].
- Correlation Analysis: Statistically test the correlation between the specific dimensions of your metrics rather than relying on the overall score.
Q3: My data was collected "in the field" using real-time sensors. Does this automatically guarantee ecological validity?
- A: No. The use of ecological momentary assessment (EMA) methods, such as handheld devices and sensors, does not automatically confer high ecological validity [100]. While these methods improve the realism of the context, ecological validity also depends on:
- The representativeness of the stimuli used.
- The characteristics of the participant population.
- The time frames of investigation.
- A critical, reflective understanding of the boundary conditions of your study design is required to claim ecological validity [100].
Troubleshooting Guides for Experimental Issues
Problem: Suspected Lack of Stochastic Convergence in Longitudinal Environmental Data
Scenario: You are analyzing per capita ecological footprints for a group of countries over several decades and need to determine if their paths are converging.
Diagnostic Protocol:
Initial Stationarity Testing:
- Method: Use unit root tests (e.g., ADF, KPSS) or more advanced methods like the Local Whittle estimator to determine if the relative series is stationary [98].
- Interpretation: If the series is found to be stationary (a long-memory process that reverts to its mean/trend), this provides evidence for stochastic convergence. Non-stationarity suggests divergence.
Test for Structural Breaks:
- Method: Apply tests like those of Berkes et al. or Mayoral to check for structural changes in the deterministic components of your time series [98].
- Interpretation: A slow or lack of convergence can often be the result of a structural break (e.g., a major policy change, economic crisis). If a break is identified, the convergence analysis may need to be conducted separately for periods before and after the break.
Club Convergence Analysis:
- Method: Employ club convergence algorithms, such as the one developed by Phillips and Sul, to identify if groups of countries or units are converging within themselves, even if the entire dataset is not [98].
- Interpretation: This reveals subgroups ("clubs") with similar convergence paths, which is common in datasets with heterogeneous units (e.g., countries at different development stages).
*Stochastic Convergence Analysis Workflow*
Problem: Low Ecological Validity in Metric Testing
Scenario: A performance metric validated in a controlled laboratory setting fails to predict outcomes when deployed in a complex, real-world ecosystem.
Diagnostic Protocol:
Conduct a Representative Design Audit:
- Method: Critically compare your experimental conditions to the target real-world environment. Follow Brunswik's principle of assessing the overlap between experimental stimuli and the natural ecology [100].
- Action: Create a checklist comparing key factors (e.g., environmental variability, user state, presence of distractions, task complexity) between your lab and the field.
Enhance Experimental Realism:
- Method: Move beyond simplistic stimuli and tasks.
- Action: If testing in a lab, use high-fidelity simulations or props that mimic the real environment. A famous example is the Social Security Administration's "Model District Office," a full-scale, realistic replica of a typical office used for testing and training, which dramatically improved ecological validity [99].
Implement In-Situ Validation:
- Method: Conduct pilot testing of the metric in the actual environment where it will be used.
- Action: Use ambulatory assessment methods or structured field observations to collect data on how the metric behaves under true ecological conditions. This helps identify unforeseen contextual factors [100].
*Ecological Relevance Validation Workflow*
The Scientist's Toolkit: Key Research Reagent Solutions
Table 1: Essential Methodological and Data Resources for Metric Validation
| Research 'Reagent' | Function in Validation | Example Use-Case |
|---|---|---|
| Corporate Sustainability Databases (e.g., MSCI ESG STATS, ASSET4) [101] | Provides standardized, proprietary data on corporate environmental performance for testing convergent validity and constructing composite indicators. | Comparing a new metric for 'environmental opportunity' against the strengths scores from established databases [101]. |
| Ecological Footprint (EF) Data [98] | A comprehensive composite indicator measuring human demand on nature, used as a proxy for environmental pressure in convergence and sustainability studies. | Testing the stochastic convergence of ecological footprints across the BRICS nations to inform environmental policy [98]. |
| Unit Root & Stationarity Tests (e.g., Local Whittle, KPSS, ADF) [98] | Statistical tests to determine if a time series is stationary (mean-reverting), which is a fundamental test for stochastic convergence. | Analyzing whether relative per capita ecological footprints are long-memory processes that revert to a mean [98]. |
| Club Convergence Algorithms [98] | Statistical methods to identify sub-groups within a larger dataset that are converging to their own steady states, even if the whole group is not. | Discovering that EU countries form multiple convergence clubs for ecological footprints, rather than a single group [98]. |
| Structural Break Tests (e.g., Berkes et al., Mayoral) [98] | Identifies points in a time series where the underlying data-generating process changes fundamentally, which can explain a lack of convergence. | Determining if a policy shock (e.g., a carbon tax) permanently altered the path of a country's environmental performance metrics [98]. |
| Ambient Assessment Methods (e.g., sensors, smartphones) [100] | Enables data collection in real-time within real-life contexts, potentially increasing the ecological validity of measurements. | Tracking individuals' daily exposure to environmental disturbances and its real-time impact on cognitive performance [100]. |
Conclusion
The development and testing of ecological indicators represents a critical intersection of environmental science and practical risk management, particularly relevant for assessing impacts of pharmaceutical pollutants and synthetic drug production waste on aquatic ecosystems. By integrating foundational ecological theory with robust methodological approaches and validation protocols, researchers can create reliable monitoring systems that reflect true environmental conditions. Future directions should prioritize technological integration, including AI-powered analytics and rapid testing methods, while expanding assessment frameworks to address emerging contaminants. For biomedical and clinical research, these ecological assessment principles provide transferable methodologies for environmental risk evaluation of pharmaceutical compounds, emphasizing the growing importance of sustainable drug development practices that minimize ecological footprints. The continued refinement of indicator systems will enhance our ability to detect ecological changes early, inform regulatory decisions, and protect ecosystem integrity against evolving environmental threats.
References
- 1. Mean ecological values: which system and which weighting... indicator [https://blog.pensoft.net/2025/04/14/mean-ecological-indicator-values/]
- 2. ( Bio Ecological ) | PPTX indicator indicator [https://www.slideshare.net/slideshow/ecological-indicator-bio-indicator-87052046/87052046]
- 3. The Power of Ecological Indicators [https://www.numberanalytics.com/blog/power-ecological-indicators]
- 4. | Research Starters | EBSCO Research Indicator species [https://www.ebsco.com/research-starters/science/indicator-species]
- 5. - Types, Benefits, Disadvantages and FAQs Indicator Species [https://www.vedantu.com/geography/indicator-species]
- 6. On the Myths of Indicator Species: Issues and Further Consideration in the Use of Static Concepts for Ecological Applications | PLOS One [https://journals.plos.org/plosone/article?id=10.1371/journal.pone.0078219]
- 7. Understanding Indicator Species [https://www.numberanalytics.com/blog/ultimate-guide-indicator-species-environmental-biology]
- 8. Explained: 5 Indicator Examples - Species Indicator Species 2025 [https://www.masterclass.com/articles/indicator-species]
- 9. Biodiversity Monitoring: Tracking Nature for a Sustainable Future [https://flypix.ai/blog/biodiversity-monitoring/]
- 10. Papers - Academia.edu Ecological Indicator Research [https://www.academia.edu/Documents/in/Ecological_Indicator]
- 11. - Impact Factor & Score Ecological | Indicators .com 2025 Research [https://research.com/journal/ecological-indicators]
- 12. Guidelines for Designing and Evaluating Feasibility Pilot Studies - PMC [https://pmc.ncbi.nlm.nih.gov/articles/PMC8849521/]
- 13. How We Design Feasibility Studies - PMC [https://pmc.ncbi.nlm.nih.gov/articles/PMC2859314/]
- 14. Chapter 4 Macroinvertebrates and Habitat | Monitoring & Assessment | US EPA [https://archive.epa.gov/water/archive/web/html/vms40.html]
- 15. Frontiers | Benthic Macroinvertebrates as Ecological Indicators: Their Sensitivity to the Water Quality and Human Disturbances in a Tropical River [https://www.frontiersin.org/journals/water/articles/10.3389/frwa.2021.662765/full]
- 16. Perspectives on the Use of Algae as Biological Indicators for... [https://pmc.ncbi.nlm.nih.gov/articles/PMC3819078/]
- 17. Indicators: Benthic Macroinvertebrates | US EPA [https://www.epa.gov/national-aquatic-resource-surveys/indicators-benthic-macroinvertebrates]
- 18. An expanded fish-based index of biotic integrity for Great Lakes coastal wetlands - PMC [https://pmc.ncbi.nlm.nih.gov/articles/PMC6133009/]
- 19. as bioindicators | Limnology Class Notes | Fiveable Invertebrates [https://fiveable.me/limnology/unit-8/invertebrates-bioindicators/study-guide/ITUIZNPM1Ei9vYOO]
- 20. Terrestrial invertebrates as bioindicators: an overview of available... [https://link.springer.com/article/10.1007/s10841-013-9565-9]
- 21. macroinvertebrate monitoring program: Topics by Science.gov [https://www.science.gov/topicpages/m/macroinvertebrate+monitoring+program]
- 22. Pharmaceuticals and Microplastics in Aquatic Environments... [https://pmc.ncbi.nlm.nih.gov/articles/PMC12111788/]
- 23. Occurrence and detection of selected pharmaceuticals of emerging... [https://link.springer.com/article/10.1007/s42452-025-07716-5]
- 24. Frontiers | Evaluating the effects of pharmaceutical on... pollutants [https://www.frontiersin.org/journals/physiology/articles/10.3389/fphys.2025.1557647/full]
- 25. Detection of pharmaceuticals and their transformation products in... [https://www.explorationpub.com/Journals/eff/Article/101061]
- 26. Development and validation of a green/blue UHPLC-MS/MS method ... [https://www.nature.com/articles/s41598-025-15614-4?error=cookies_not_supported&code=740c940f-950a-42e7-8470-3519ba1b5ae0]
- 27. Analysis of Pharmaceutical | Measurlabs Residue Wastewater [https://measurlabs.com/blog/analysis-of-pharmaceutical-residues-eu-wastewater-treatment-directive/]
- 28. 25 Best Statistical Analysis Software 2025 [https://www.scijournal.org/articles/best-statistical-analysis-software]
- 29. Analysis Statistical | 17 Convenient Tools of Tools Analysis Statistical [https://www.educba.com/statistical-analysis-tools/]
- 30. 15 Most Common Data Science Techniques in 2025 | Scaler Blog [https://www.scaler.com/blog/data-science-techniques/]
- 31. Analysis Methods: 7 Essential Data for Techniques 2025 [https://atlan.com/data-analysis-methods/]
- 32. of a novel metric for evaluating diatom Development in... assemblages [https://colab.ws/articles/10.1016%2Fj.ecolind.2020.106725]
- 33. 8 Essential Data for 2025 Visualization Best Practices [https://pdf.ai/resources/data-visualization-best-practices]
- 34. for Accessibility in Best : Ensuring... Practices Data Visualization [https://gpttutorpro.com/best-practices-for-accessibility-in-data-visualization-ensuring-inclusivity/]
- 35. How to build accessible graph visualization tools [https://cambridge-intelligence.com/build-accessible-data-visualization-apps-with-keylines/]
- 36. Nonmetric Multidimensional Scaling ( NMDS ) - SlideServe [https://www.slideserve.com/ryanadan/nonmetric-multidimensional-scaling]
- 37. Non-metric multidimensional scaling ( NMDS ): What? How? [https://archetypalecology.wordpress.com/2018/02/18/non-metric-multidimensional-scaling-nmds-what-how/]
- 38. in the Geosciences Data Analysis [http://stratigrafia.org/8370/lecturenotes/clusterAnalysis.html]
- 39. Mastering Multivariate Analysis [https://www.numberanalytics.com/blog/advanced-multivariate-analysis-environmental-data]
- 40. Julius AI | AI for Data | What Is Analysis ? Cluster ... Analysis Methods [https://julius.ai/articles/cluster-analysis-guide]
- 41. Mastering Community Composition Analysis [https://www.numberanalytics.com/blog/community-composition-analysis-techniques]
- 42. [PDF] PCA – A Powerful Method for Analyze Ecological Niches [https://www.semanticscholar.org/paper/PCA-%E2%80%93-A-Powerful-Method-for-Analyze-Ecological-Jan%C5%BEekovi%C4%8D-Novak/6792d1eda50e2ab089339eeb7e400c607c04ead8]
- 43. Non-Metric Multidimensional Scaling ( NMDS ) in... - CD Genomics [https://www.cd-genomics.com/microbioseq/non-metric-multidimensional-scaling-nmds-in-microbial-sequencing-data-analysis-introduction-application-and-comparison.html]
- 44. Comprehensive Guide to Cluster : Analysis , Uses & Tools Methods [https://www.displayr.com/understanding-cluster-analysis-a-comprehensive-guide/]
- 45. Use of margins of exposure and risk in quotients ... - Canada.ca risk [https://www.canada.ca/en/health-canada/services/chemical-substances/fact-sheets/margins-risk-quotient-risk-assessment.html]
- 46. How to Calculate - Predicted ( No ) Effect Concentration PNEC [https://www.chemsafetypro.com/Topics/CRA/How_to_Calculate_Predicted_No-Effect_Concentration_(PNEC).html]
- 47. How to Calculate Hazard Quotient (HQ) and Risk (RQ) Quotient [https://www.chemsafetypro.com/Topics/CRA/How_to_Calculate_Hazard_Quotients_(HQ)_and_Risk_Quotients_(RQ).html]
- 48. Use of assessment factors in ecological risk ... - Canada.ca [https://www.canada.ca/en/health-canada/services/chemical-substances/fact-sheets/use-assessment-factors-ecological-risk-deriving-predicted-no-effect-concentrations.html]
- 49. Ecological impact of pharmaceutical and options of pollutants ... river [https://pubmed.ncbi.nlm.nih.gov/38614331/]
- 50. Insights: Your Data’s Superpower ( Actionable ) – Cogn-IQ.org 2025 [https://www.cogn-iq.org/blog/what-are-actionable-insights/]
- 51. Converting Data into Actionable Metrics: Research and Best Practices | Leed [https://leed.ai/blog/converting-data-into-actionable-metrics-research-and-best-practices/]
- 52. Transforming Learning Data Into Actionable Insights [https://www.explorance.com/blog/how-to-transform-your-employee-learning-data-into-effective-actionable-insights/]
- 53. Council Post: Transforming Field Service Data Into Actionable Insights: Traditional Analytics Meets LLMs [https://www.forbes.com/sites/forbestechcouncil/2024/01/23/transforming-field-service-data-into-actionable-insights-traditional-analytics-meets-llms/]
- 54. sciencedirect.com/journal/ ecological - indicators [https://www.sciencedirect.com/journal/ecological-indicators]
- 55. (PDF) Challenges in the development and use of ecological indicators [https://www.academia.edu/12230776/Challenges_in_the_development_and_use_of_ecological_indicators]
- 56. in Common | Global Health eLearning... pitfalls indicator selection [https://www.globalhealthlearning.org/taxonomy/term/1973]
- 57. Effective Indicator Selection [https://www.numberanalytics.com/blog/effective-indicator-selection]
- 58. Inventory and Bioindicator Sampling: Testing and Winkler... Pitfall [https://link.springer.com/article/10.1023/A:1011311418962]
- 59. 11 Common and recommended practices — scikit-learn... pitfalls [https://scikit-learn.org/stable/common_pitfalls.html]
- 60. the predictability of Species responses... interactions limit community [https://open.library.ubc.ca/collections/researchdata/items/1.0398325]
- 61. Predicting the process of extinction in experimental microcosms and... [https://pmc.ncbi.nlm.nih.gov/articles/PMC3912915/]
- 62. How to be a Better Troubleshooter in Your Laboratory | GoldBio [https://goldbio.com/articles/article/how-to-be-a-better-troubleshooter]
- 63. Google SRE - Troubleshooting Methodology: A Learning Path [https://sre.google/sre-book/effective-troubleshooting/]
- 64. Measurement uncertainty - Wikipedia [https://en.wikipedia.org/wiki/Measurement_uncertainty]
- 65. Basics of Estimating Measurement Uncertainty - PMC [https://pmc.ncbi.nlm.nih.gov/articles/PMC2556585/]
- 66. Hamilton Analytical Lab - Measurement Uncertainty - Hamilton College [https://www.hamilton.edu/academics/analytical-lab/measurement-uncertainty]
- 67. of Microbial Development in Indicators Systems - PMC Ecological [https://pmc.ncbi.nlm.nih.gov/articles/PMC9654993/]
- 68. - AI Surveys & Biodiversity Monitoring Powered Ecological 2025 [https://farmonaut.com/remote-sensing/ai-powered-ecological-surveys-biodiversity-monitoring-2025]
- 69. to the Rescue: How Artificial Intelligence is Helping Scientists... AI [https://imageomics.osu.edu/news/2025/02/ai-rescue-how-artificial-intelligence-helping-scientists-understand-biodiversity]
- 70. Common Mistakes to Avoid During Rapid Drug Testing — RSC Health [https://www.rschealth.com/blogs/news/rapid-drug-testing-mistakes-to-avoid]
- 71. | Hygiena Rapid Indicator Testing [https://www.hygiena.com/learning-center/technology-guide/rapid-indicator]
- 72. Adverse Event Detection in Drug Development: Recommendations and Obligations Beyond Phase 3 - PMC [https://pmc.ncbi.nlm.nih.gov/articles/PMC2446471/]
- 73. Removal of pharmaceutical contaminants from hospital wastewater... [https://pubmed.ncbi.nlm.nih.gov/38277099/]
- 74. problems and how to Common them for troubleshoot ... wetlands [https://stormwater.pca.state.mn.us/index.php?title=Common_problems_and_how_to_troubleshoot_them_for_wetlands]
- 75. as Constructed – hands-on... wetlands nature based solutions [https://link.springer.com/article/10.1007/s11852-024-01044-3]
- 76. Insights of the Removal Mechanisms of Pharmaceutical and Personal... [https://link.springer.com/article/10.1007/s40726-018-0086-8]
- 77. as Constructed - wetlands in managing... nature based solutions [https://pubmed.ncbi.nlm.nih.gov/38761940/]
- 78. Analytical Method Validation Best Practices [https://www.numberanalytics.com/blog/analytical-method-validation-best-practices]
- 79. Development of an algorithm for evaluating the impact of measurement... [https://bmcmedresmethodol.biomedcentral.com/articles/10.1186/s12874-019-0727-7]
- 80. Development and Validation of Ecological Indicators ... | SpringerLink [https://link.springer.com/chapter/10.1007/978-94-011-4976-1_3]
- 81. Ecological Indicators [https://www.scimagojr.com/journalsearch.php?q=20292&tip=sid&clean=0]
- 82. 101: A Beginner's Guide Ecological Indicators [https://www.numberanalytics.com/blog/ecological-indicators-guide]
- 83. (PDF) Construction of Composite Indicator using Coefficient ... of [https://www.academia.edu/34537615/Construction_of_Composite_Indicator_using_Coefficient_of_Variation_as_a_Measure_AD_Gotmare]
- 84. Comparative analysis of ecological sensitivity assessment using the... [https://link.springer.com/article/10.1007/s10661-024-13195-9]
- 85. Optimum machine algorithm selection for forecasting... | CoLab learning [https://colab.ws/articles/10.1016%2Fj.rsase.2021.100582]
- 86. Screening of sustainable supply chain performance evaluation... [https://pmc.ncbi.nlm.nih.gov/articles/PMC10911619/]
- 87. A data-driven approach to forest health assessment through... [https://bmcplantbiol.biomedcentral.com/articles/10.1186/s12870-025-06937-5]
- 88. Predicting the impacts of key development indices on the ecological ... [https://link.springer.com/article/10.1007/s13762-025-06371-y]
- 89. Comparing multiple methods based on water quality... assessment [https://link.springer.com/article/10.1007/s10661-025-14267-0]
- 90. Earth5R’s River : A Community-Based Monitoring Tool... Health Index [https://earth5r.org/earth5rs-river-health-index-a-community-based-monitoring-tool/]
- 91. Pharmaceutical Pollution in Aquatic Environments: A Concise Review of Environmental Impacts and Bioremediation Systems - PMC [https://pmc.ncbi.nlm.nih.gov/articles/PMC9087044/]
- 92. Becoming Major Cause of Pharmaceutical ... Pollutants Environmental [https://link.springer.com/chapter/10.1007/978-3-031-93444-5_106]
- 93. An insight into the impacts of pharmaceutical on the... pollutants [https://pubmed.ncbi.nlm.nih.gov/40451592/]
- 94. Potential ecological footprints of active pharmaceutical ingredients: an examination of risk factors in low-, middle- and high-income countries - PMC [https://www.ncbi.nlm.nih.gov/pmc/articles/PMC4213596/]
- 95. Determination of Pharmaceutical Residues by UPLC-MS/MS Method: Validation and Application on Surface Water and Hospital Wastewater - PMC [https://pmc.ncbi.nlm.nih.gov/articles/PMC7811430/]
- 96. Method Validation Essentials, Limit of Blank, Limit of Detection, and Limit of Quantitation | BioPharm International [https://www.biopharminternational.com/view/method-validation-essentials-limit-blank-limit-detection-and-limit-quantitation]
- 97. Establishing Acceptance Criteria for Analytical Methods | BioPharm International [https://www.biopharminternational.com/view/establishing-acceptance-criteria-analytical-methods]
- 98. Frontiers | Testing the Stochastic Convergence of Ecological ... [https://www.frontiersin.org/journals/public-health/articles/10.3389/fpubh.2022.897459/full]
- 99. sciencedirect.com/topics/computer-science/ ecological -validity [https://www.sciencedirect.com/topics/computer-science/ecological-validity]
- 100. Validity as a Key Feature of External Validity in Research... Ecological [https://pmc.ncbi.nlm.nih.gov/articles/PMC10978015/]
- 101. EconPapers: On the Validity of Environmental Performance Metrics [https://econpapers.repec.org/article/kapjbuset/v_3a132_3ay_3a2015_3ai_3a2_3ap_3a249-258.htm]